Adventures In Artsy Organizing
As an Amazon associate, I may earn a small commission if you navigate to Amazon from my site and buy something. This will not result in an extra cost to you.
Recently, I did something I’ve never done before. I stopped by Goodwill and just browsed. I was vaguely looking for something I could use for an art project, but since I did not have any project in mind, this was a just a methodical trip up one aisle and down the next, looking at everything.
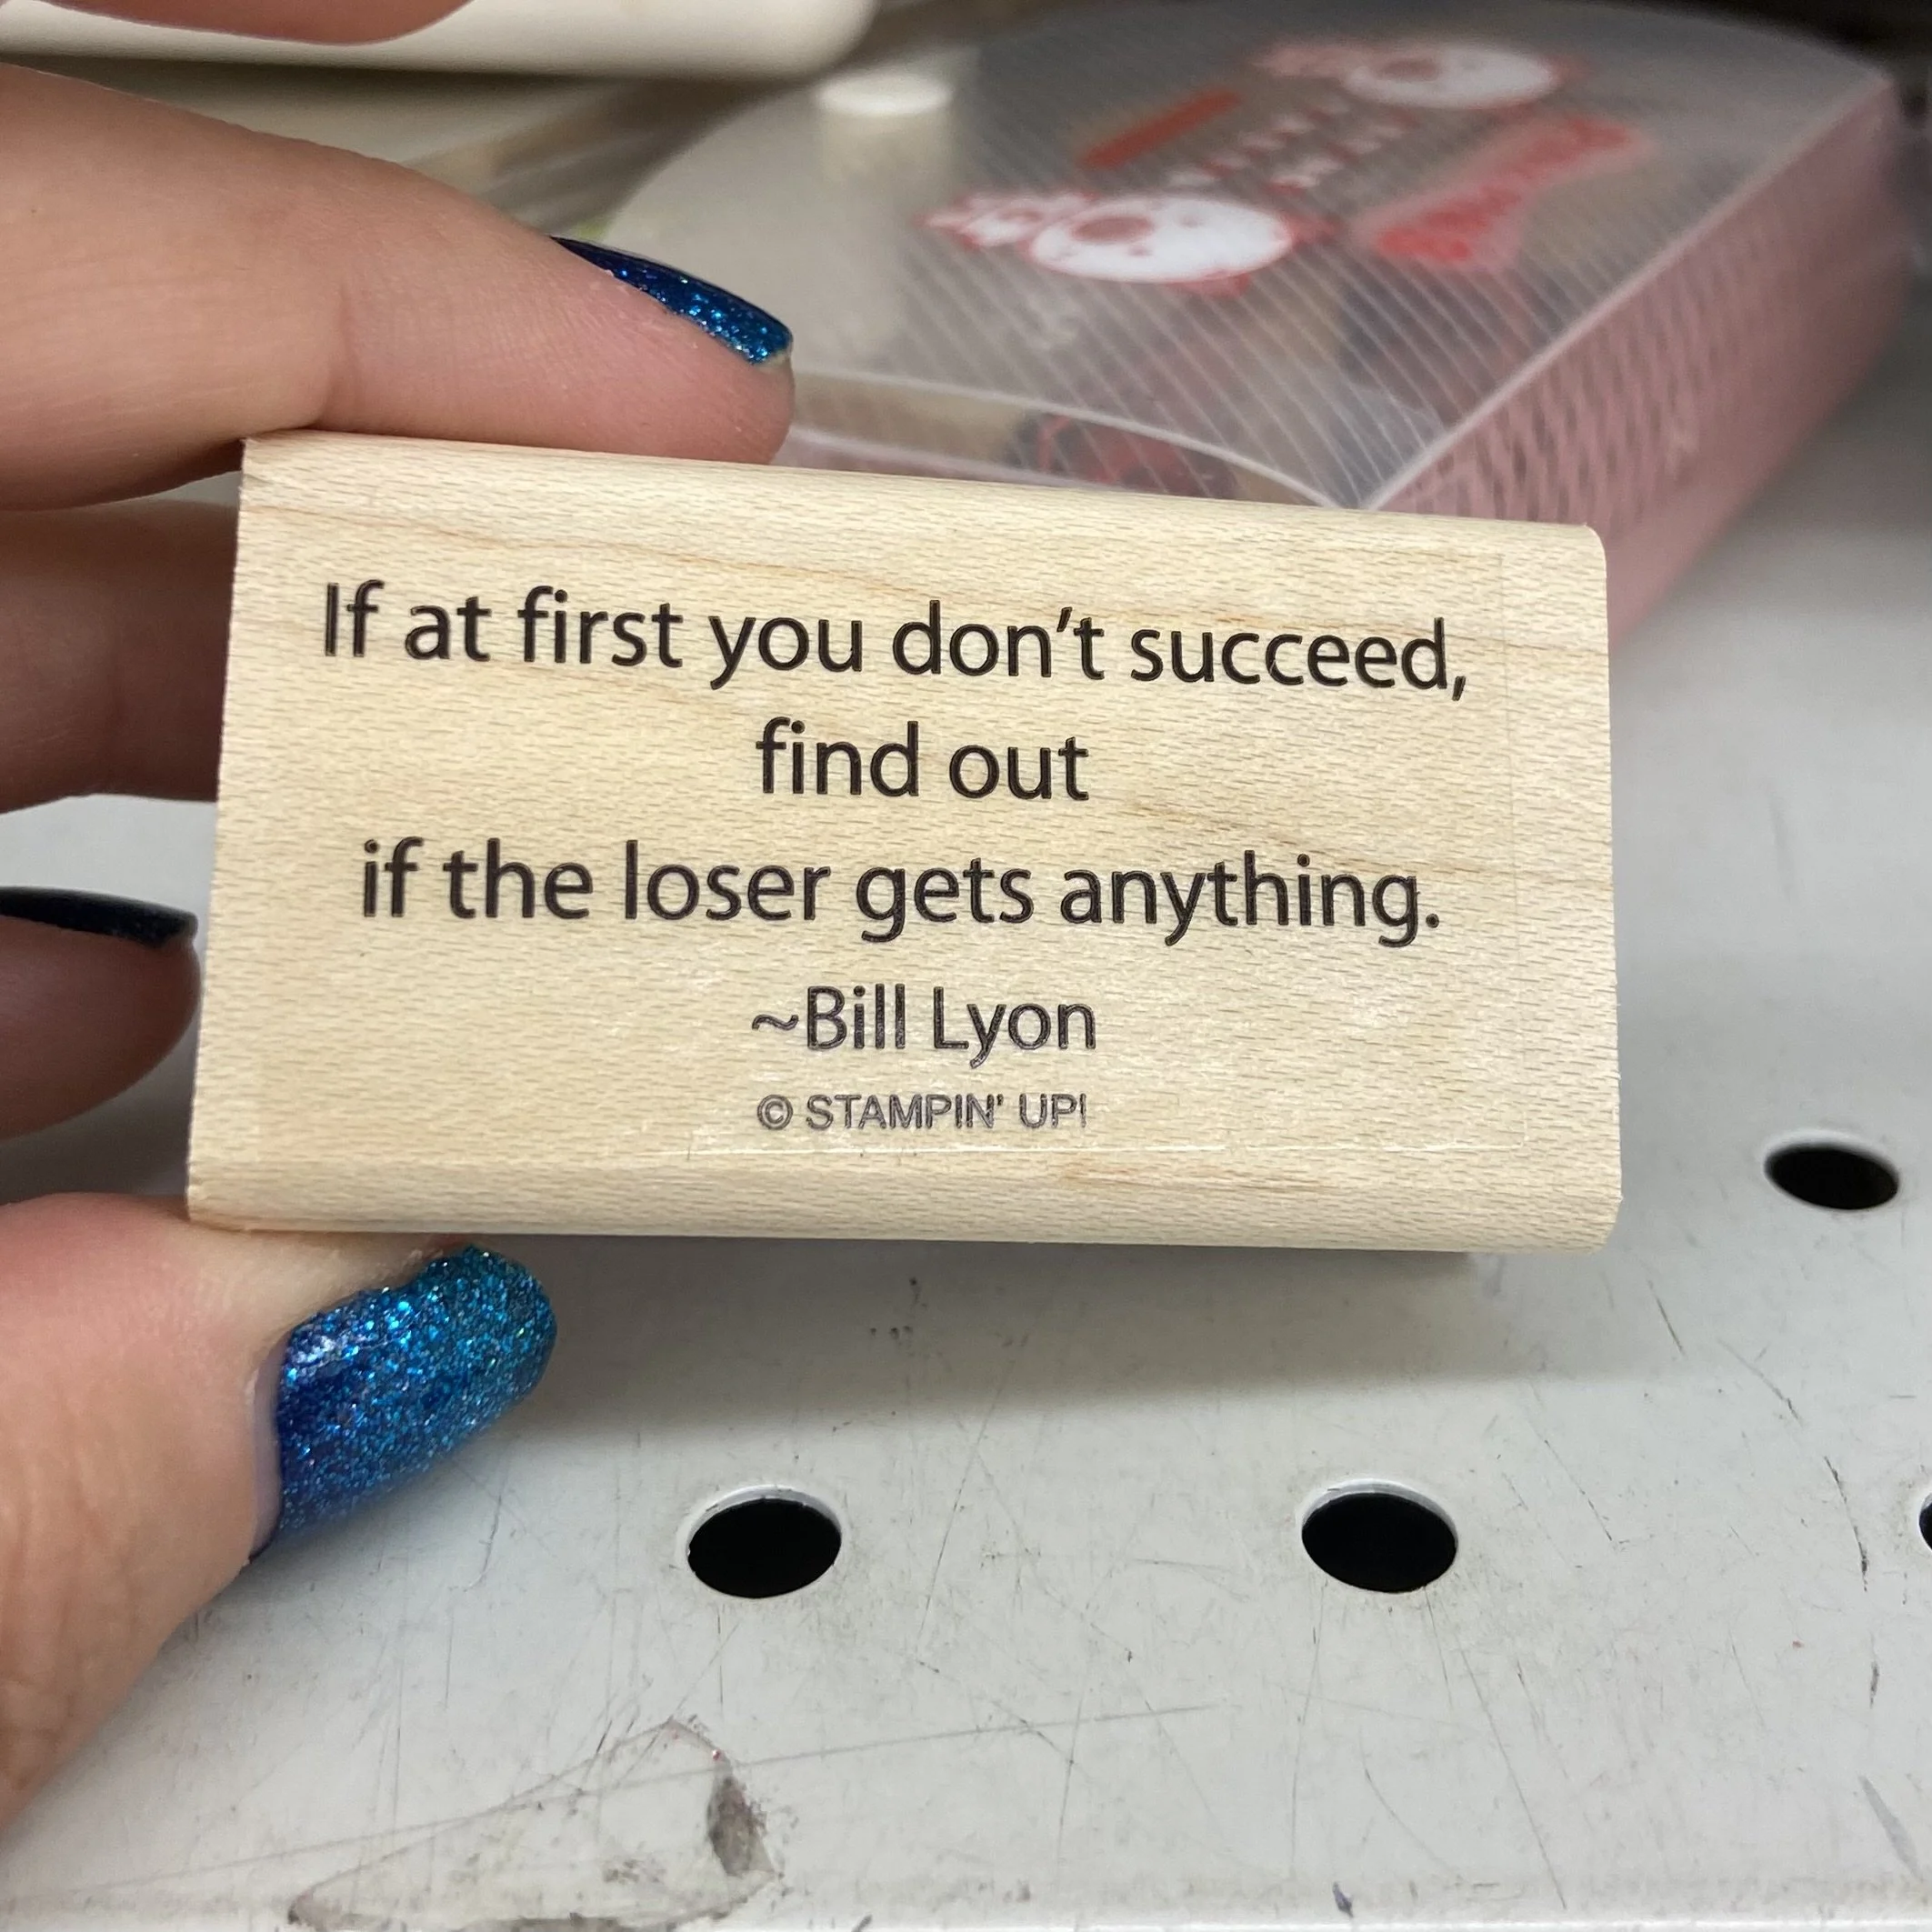
I found a section that had a bunch of rubber stamp collections, one of which really tickled me. It’s this one, and since I really had no use for it, I did not buy it. But it was funny and it was worthy of a picture.
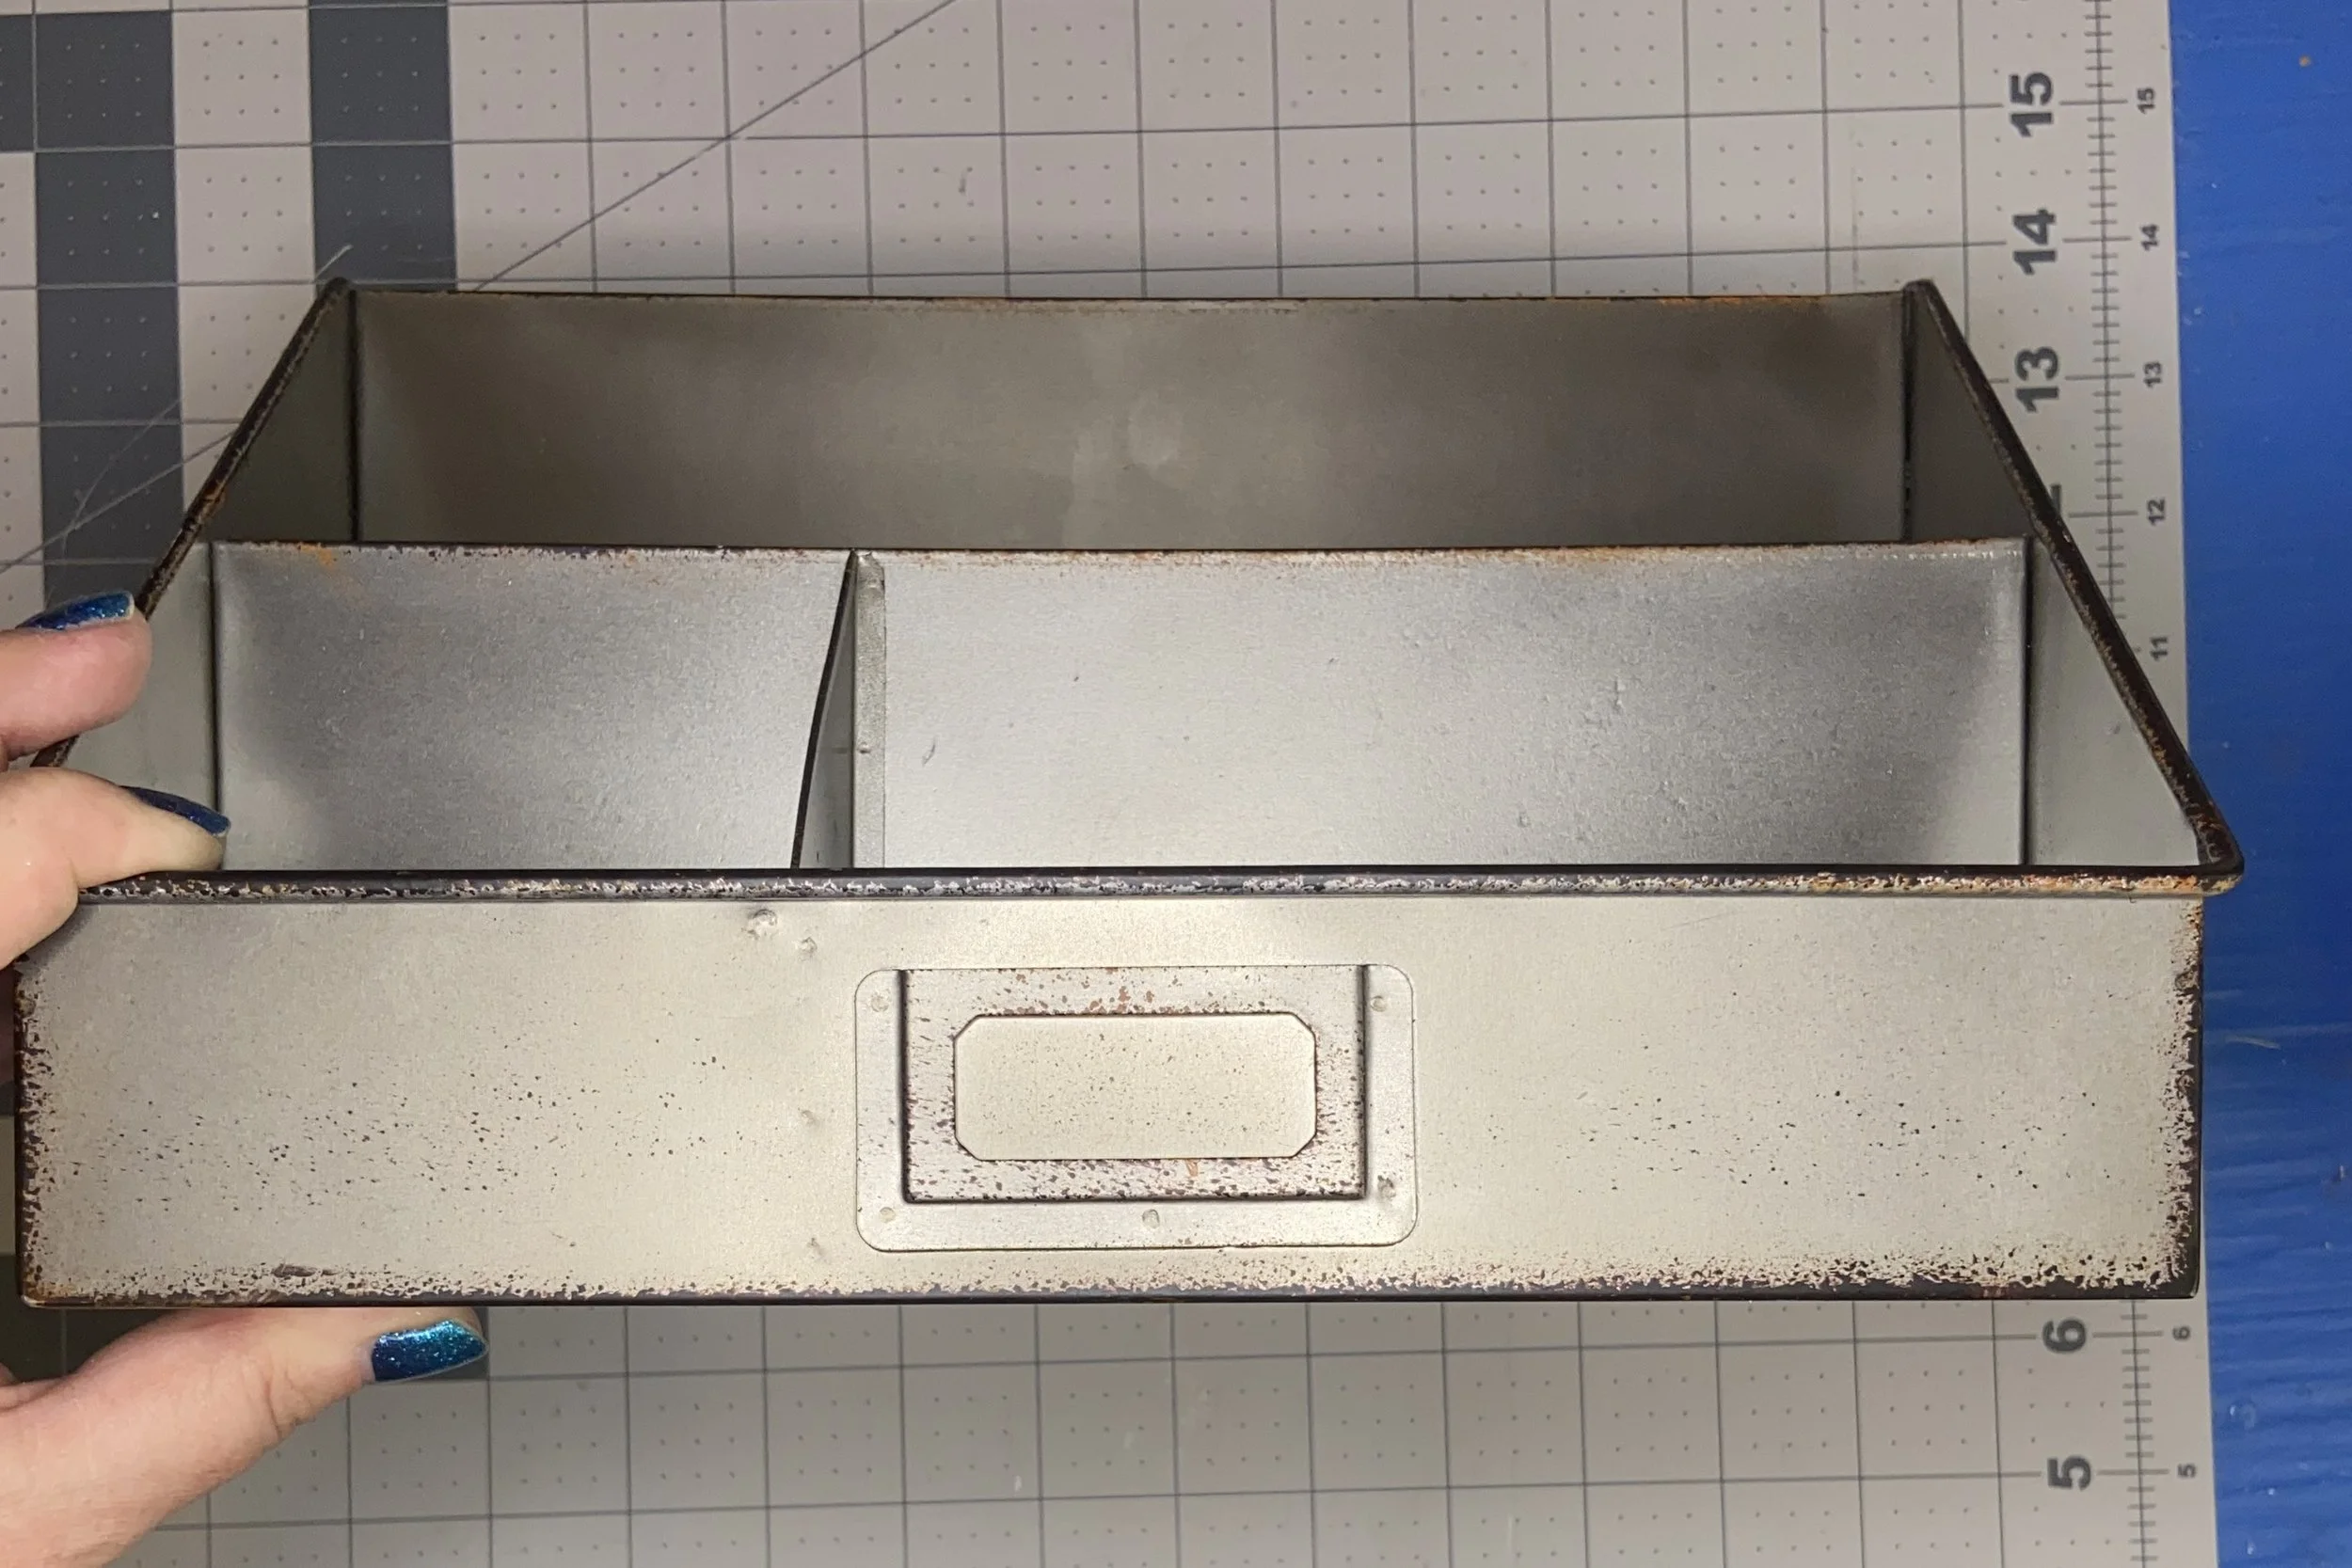
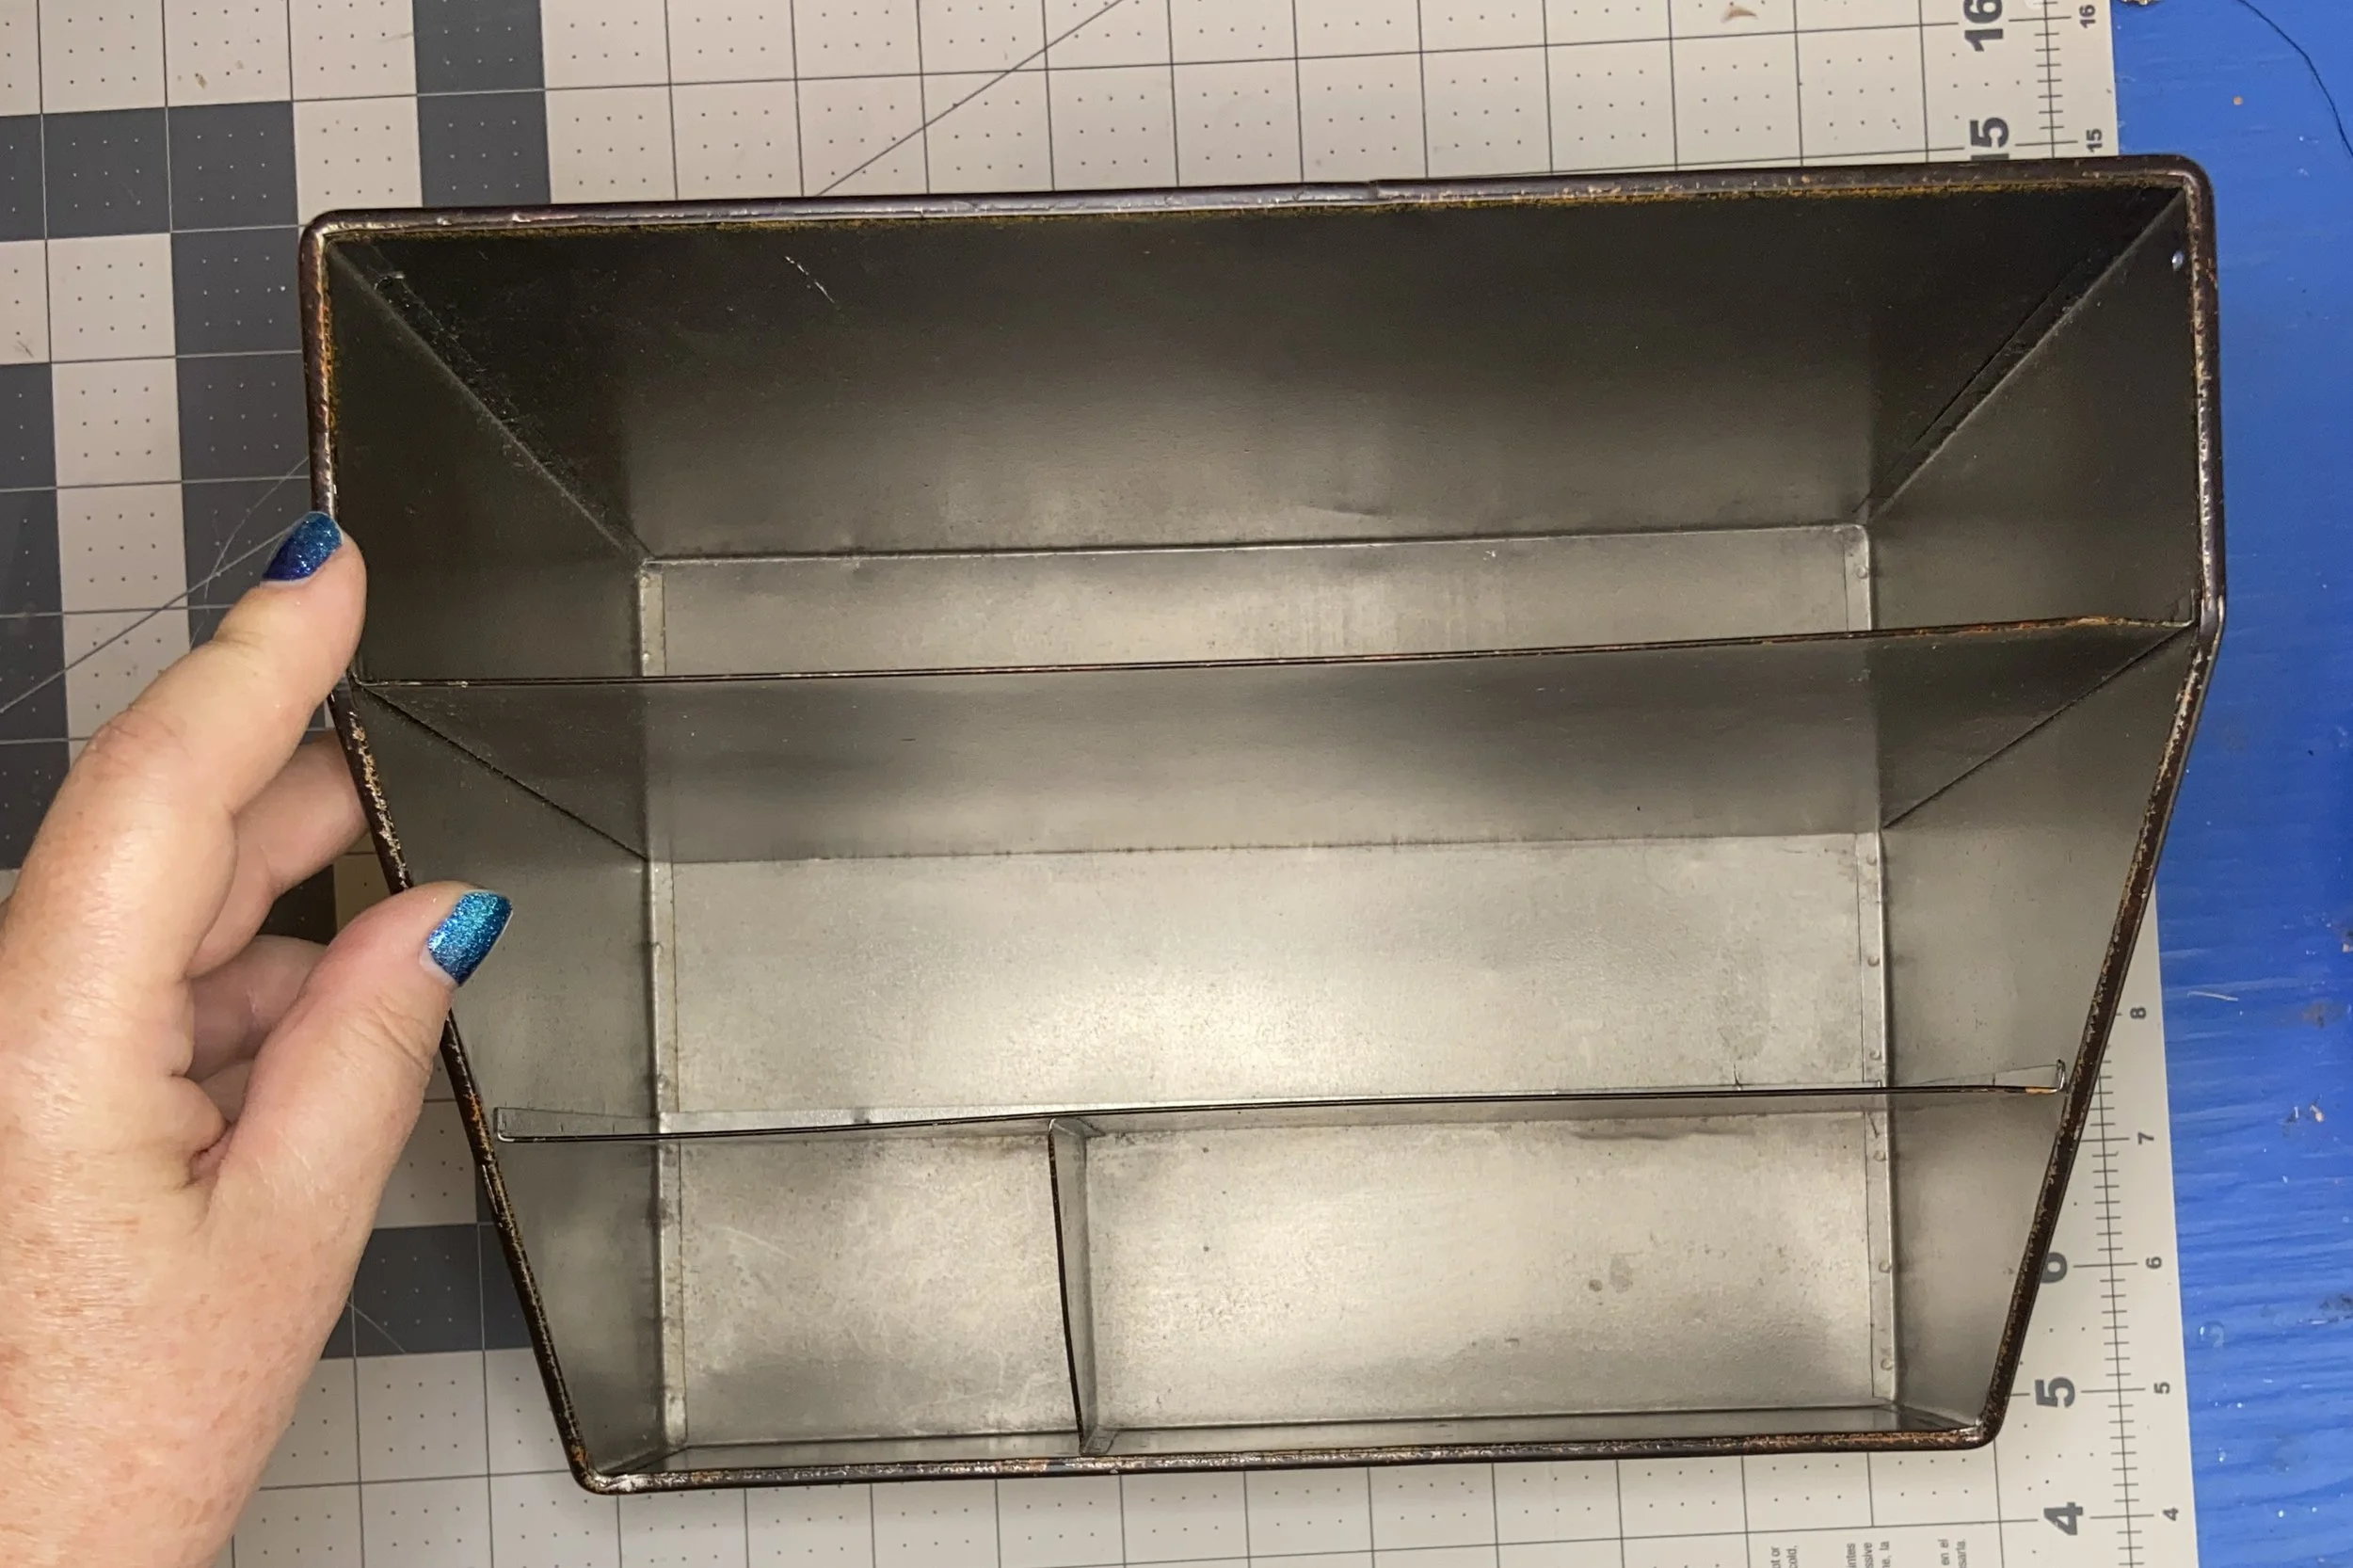
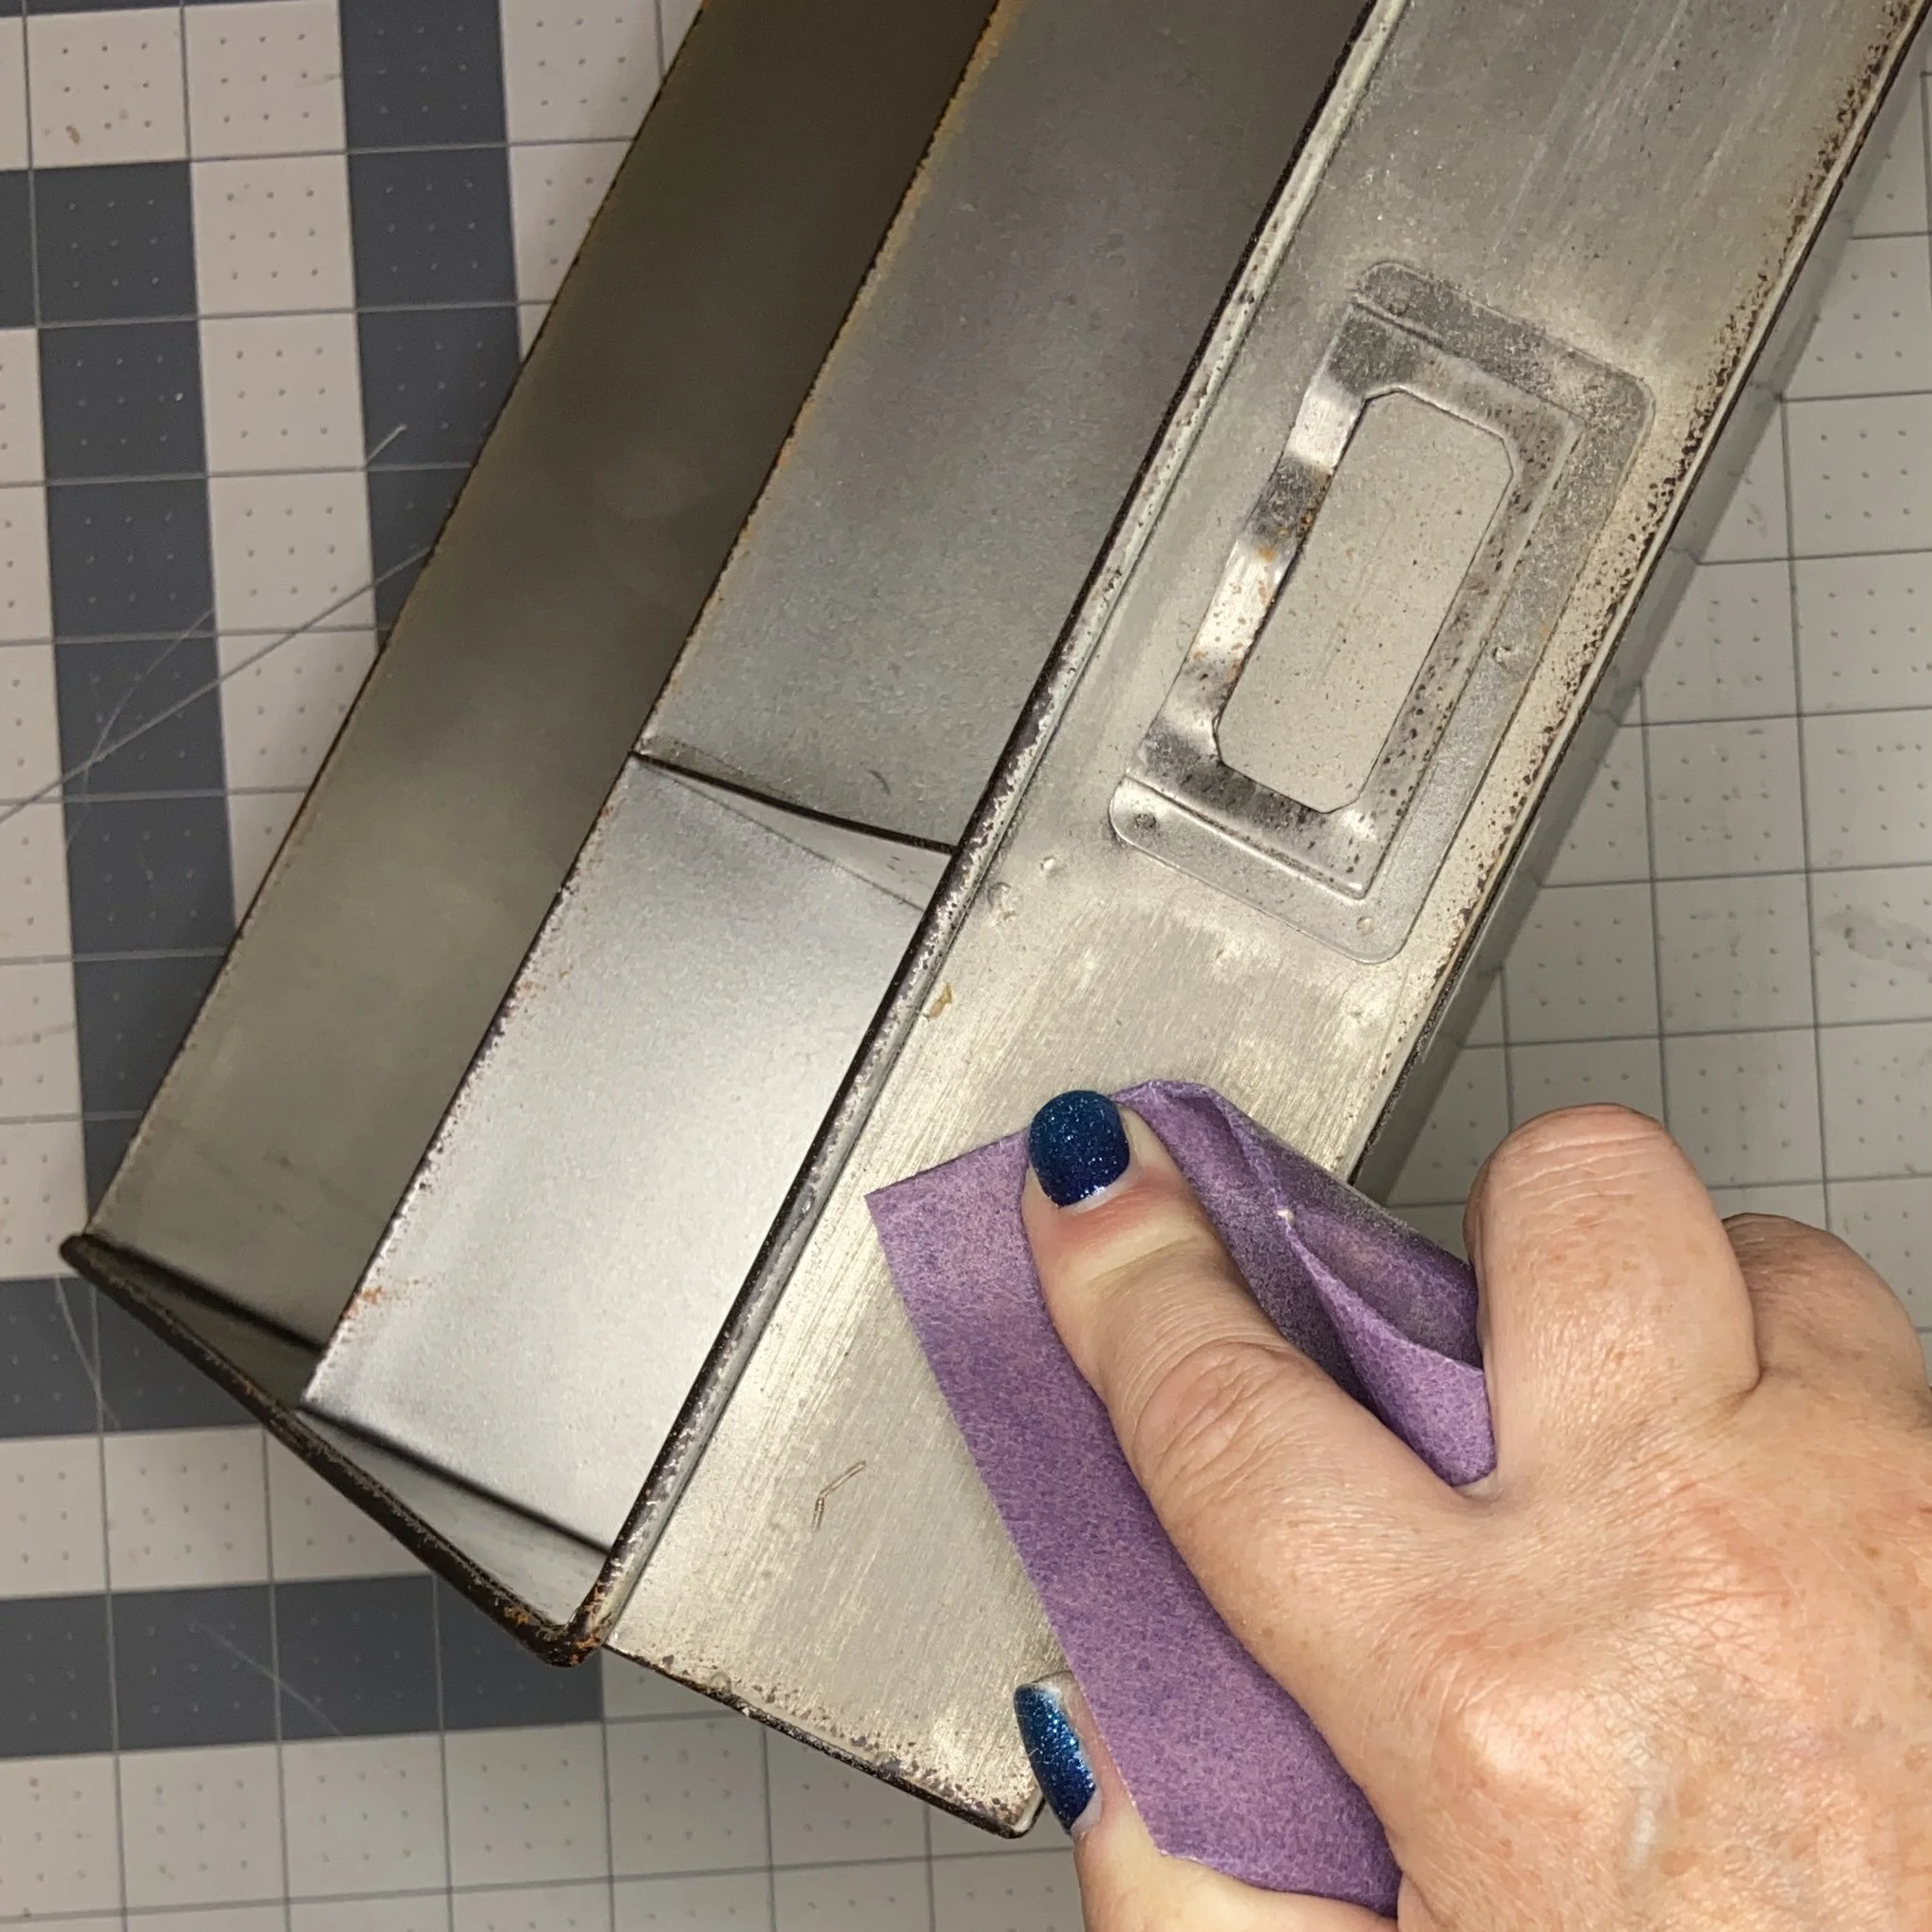
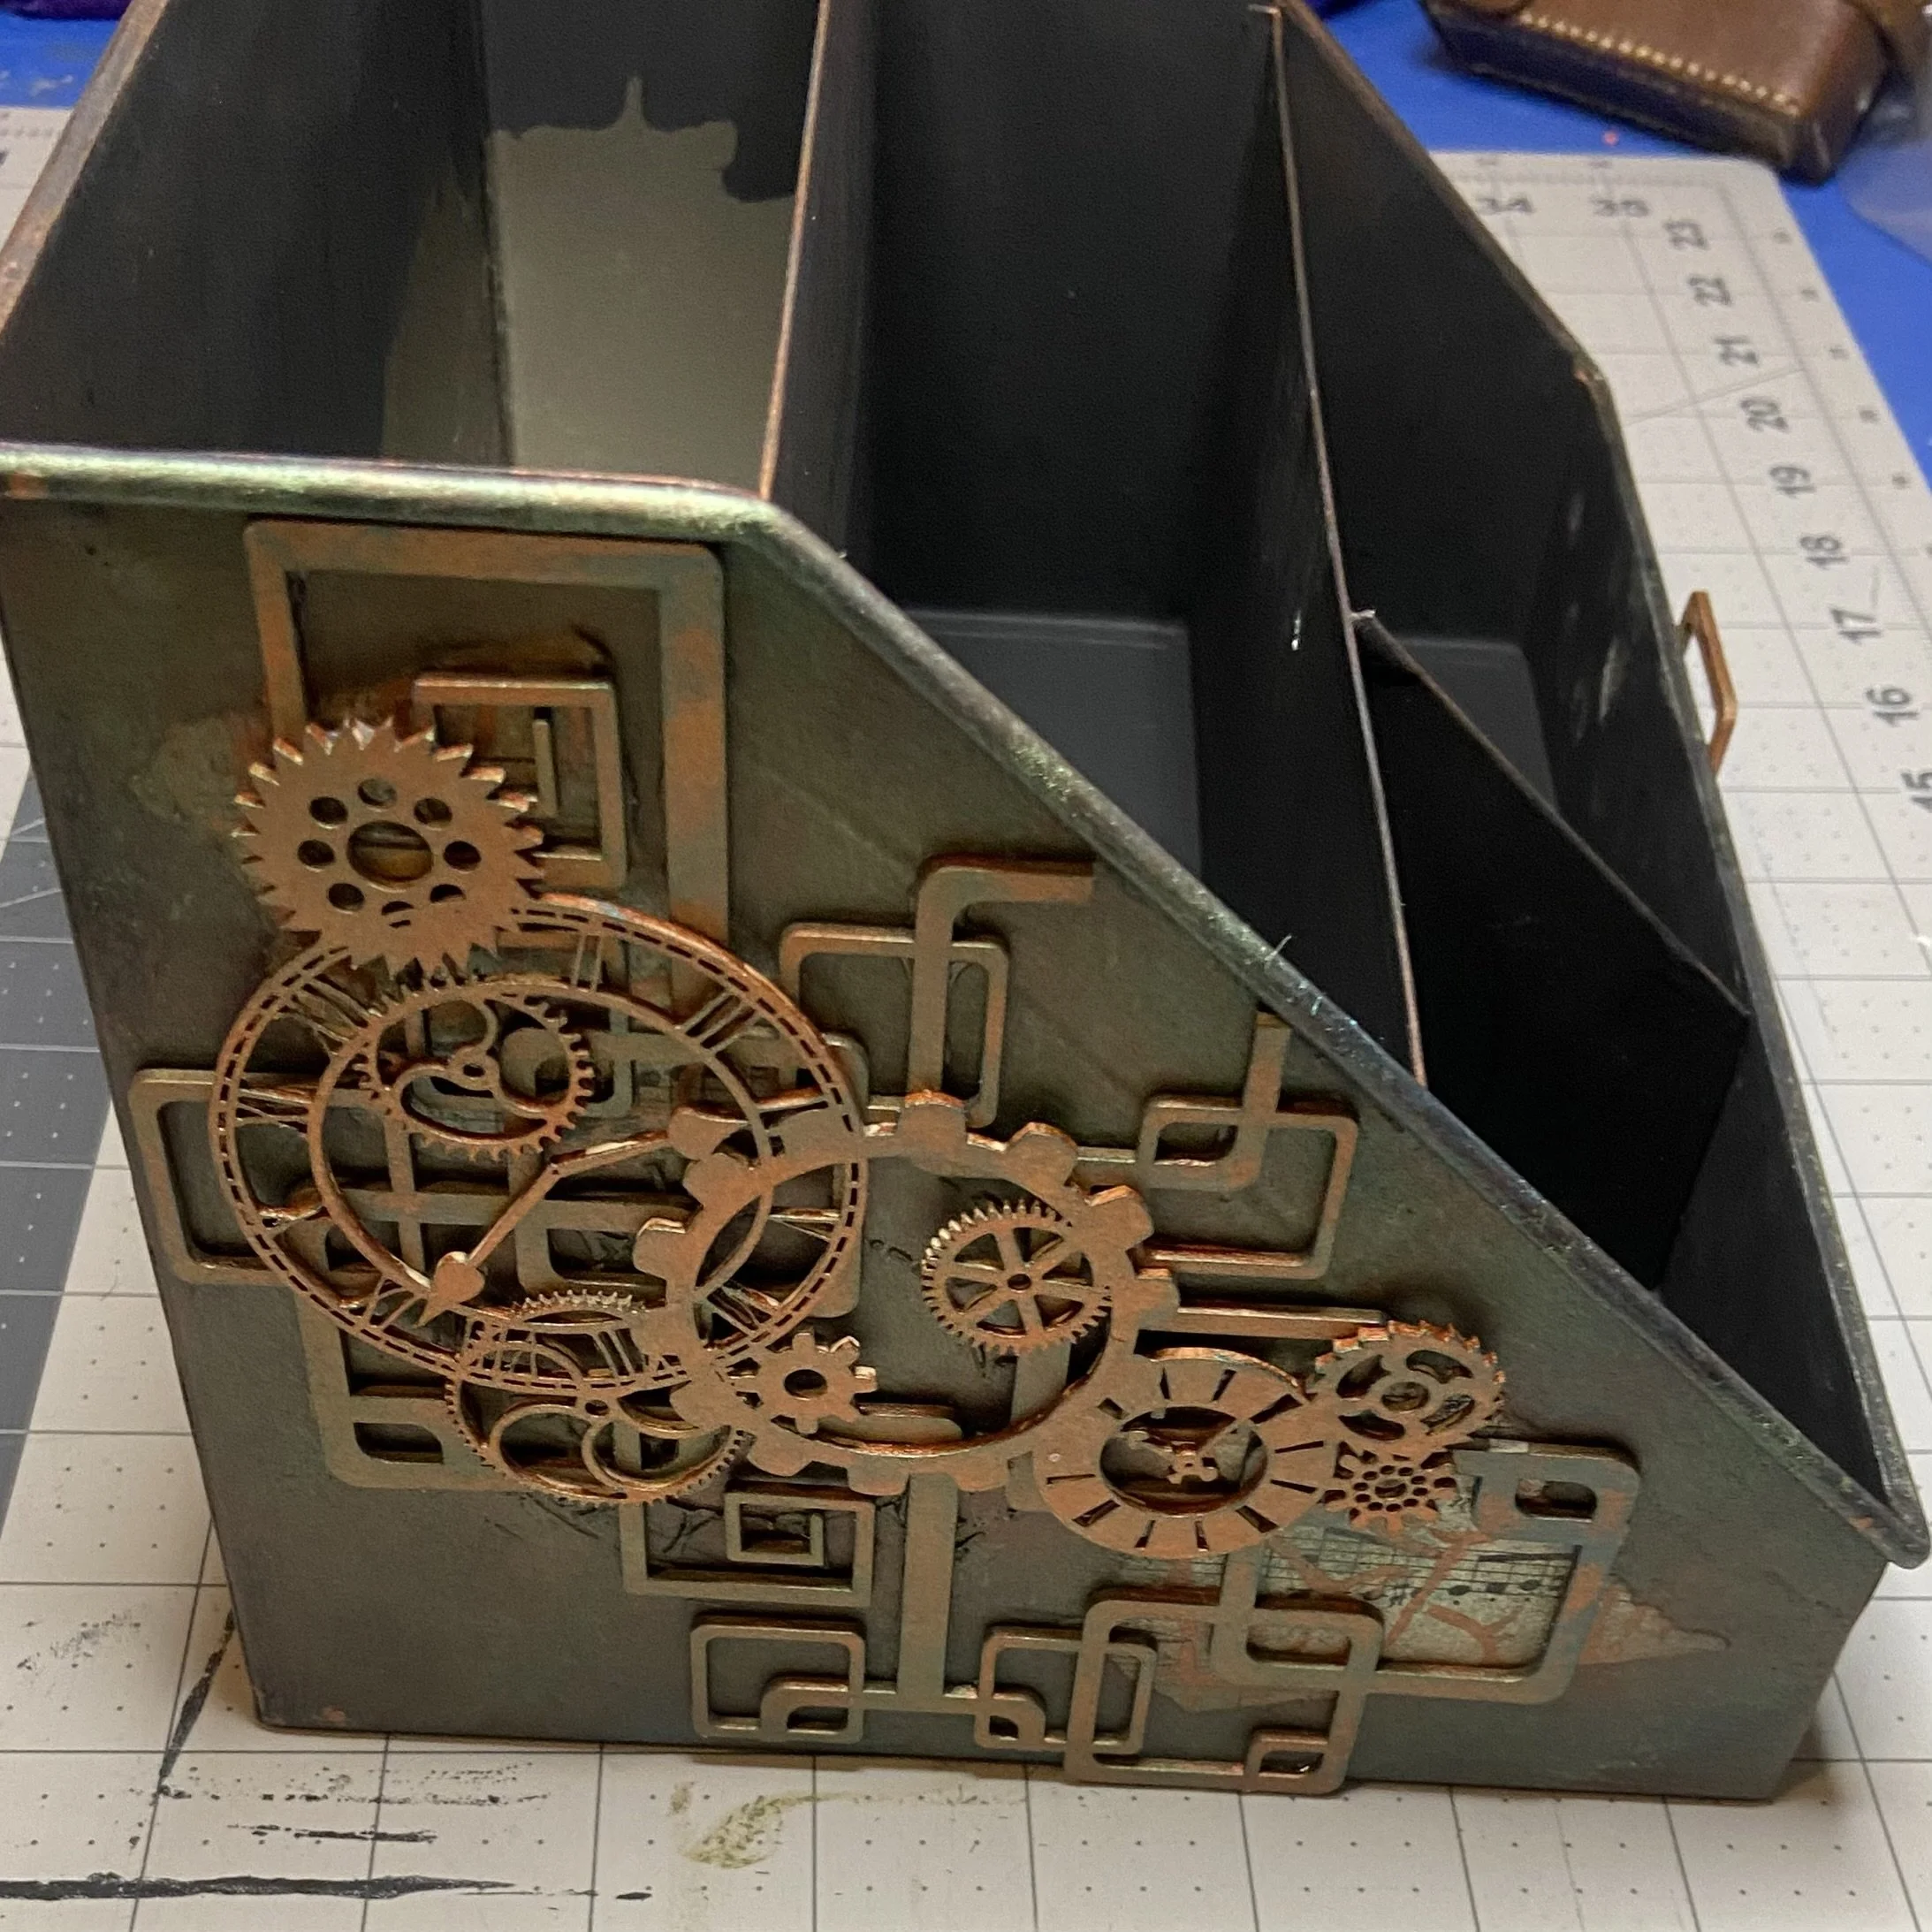
When I was poking through a miscellaneous mishmash of stuff, I found it. IT. “IT” is a metal office desk organizer, clearly meant to hold things like envelopes and full size sheets of paper and paper pads. I have no idea how old it is but it looked a little worn, the metal looked a little aged, and yet…it was still in perfect condition. No dents, no scratches, no rust. Even the little slot on the front meant to hold a card was perfectly intact.
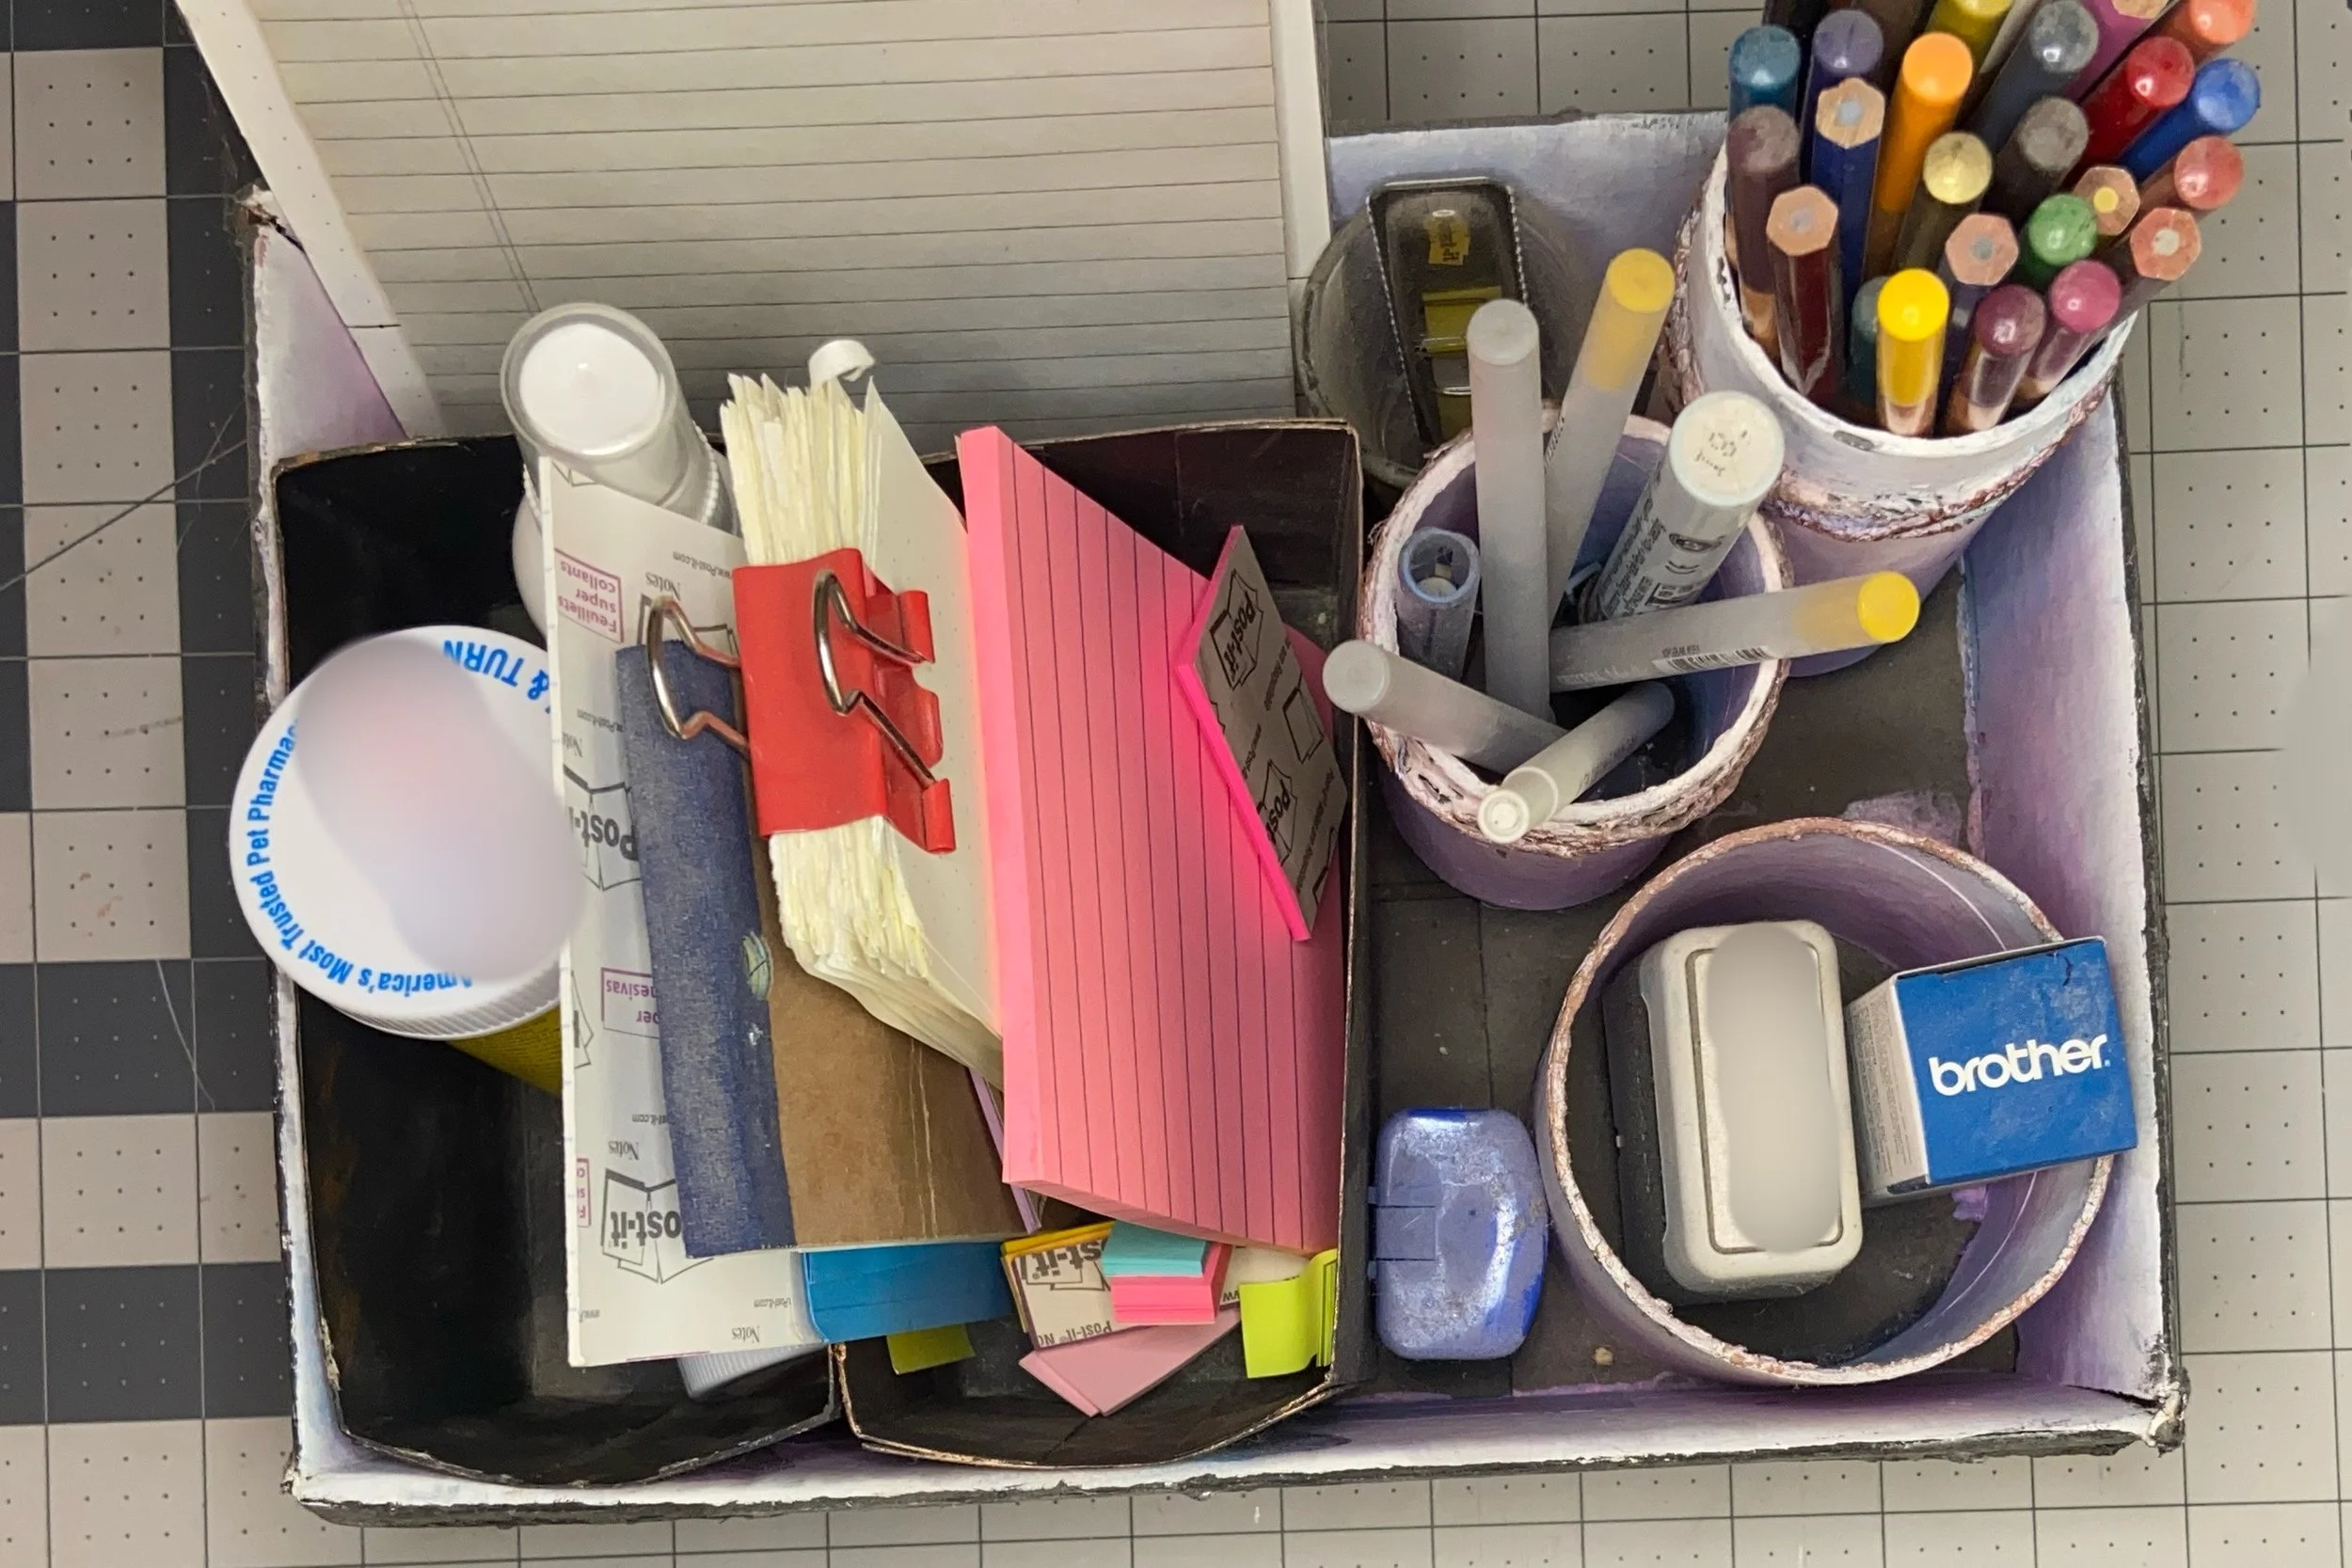
A million years ago, when I was first starting to play with mixed media art, I made an organizer that sat beside the landline phone I still had at the time. The paints have long since faded, since I didn’t do a proper job of priming things, and the cardboard structure was a bit worn. Also, the “art” I did on the outside is so painfully awful that I can’t even bear to show you. You’ll have to settle for the view from above.
My Goodwill find would be decorated and would replace the ratty old cardboard box system. I admit, I didn’t have a strong idea on the aesthetic I wanted for the metal organizer, but I did know that I wanted to color it completely. To that end, I started by doing an extremely haphazard job of sanding the metal to roughen it up a bit. I also tried to remove the little card slot on the front, but only succeeded in bending it and starting to bend the structure of the whole thing. So I pushed the slot frame back into place (now looking much the worse for the wear) and painted the whole thing with black gesso. Well, not actually the whole thing…I couldn’t easily get inside the deepest part of the organizer, so I just painted partway down that deep back slot.


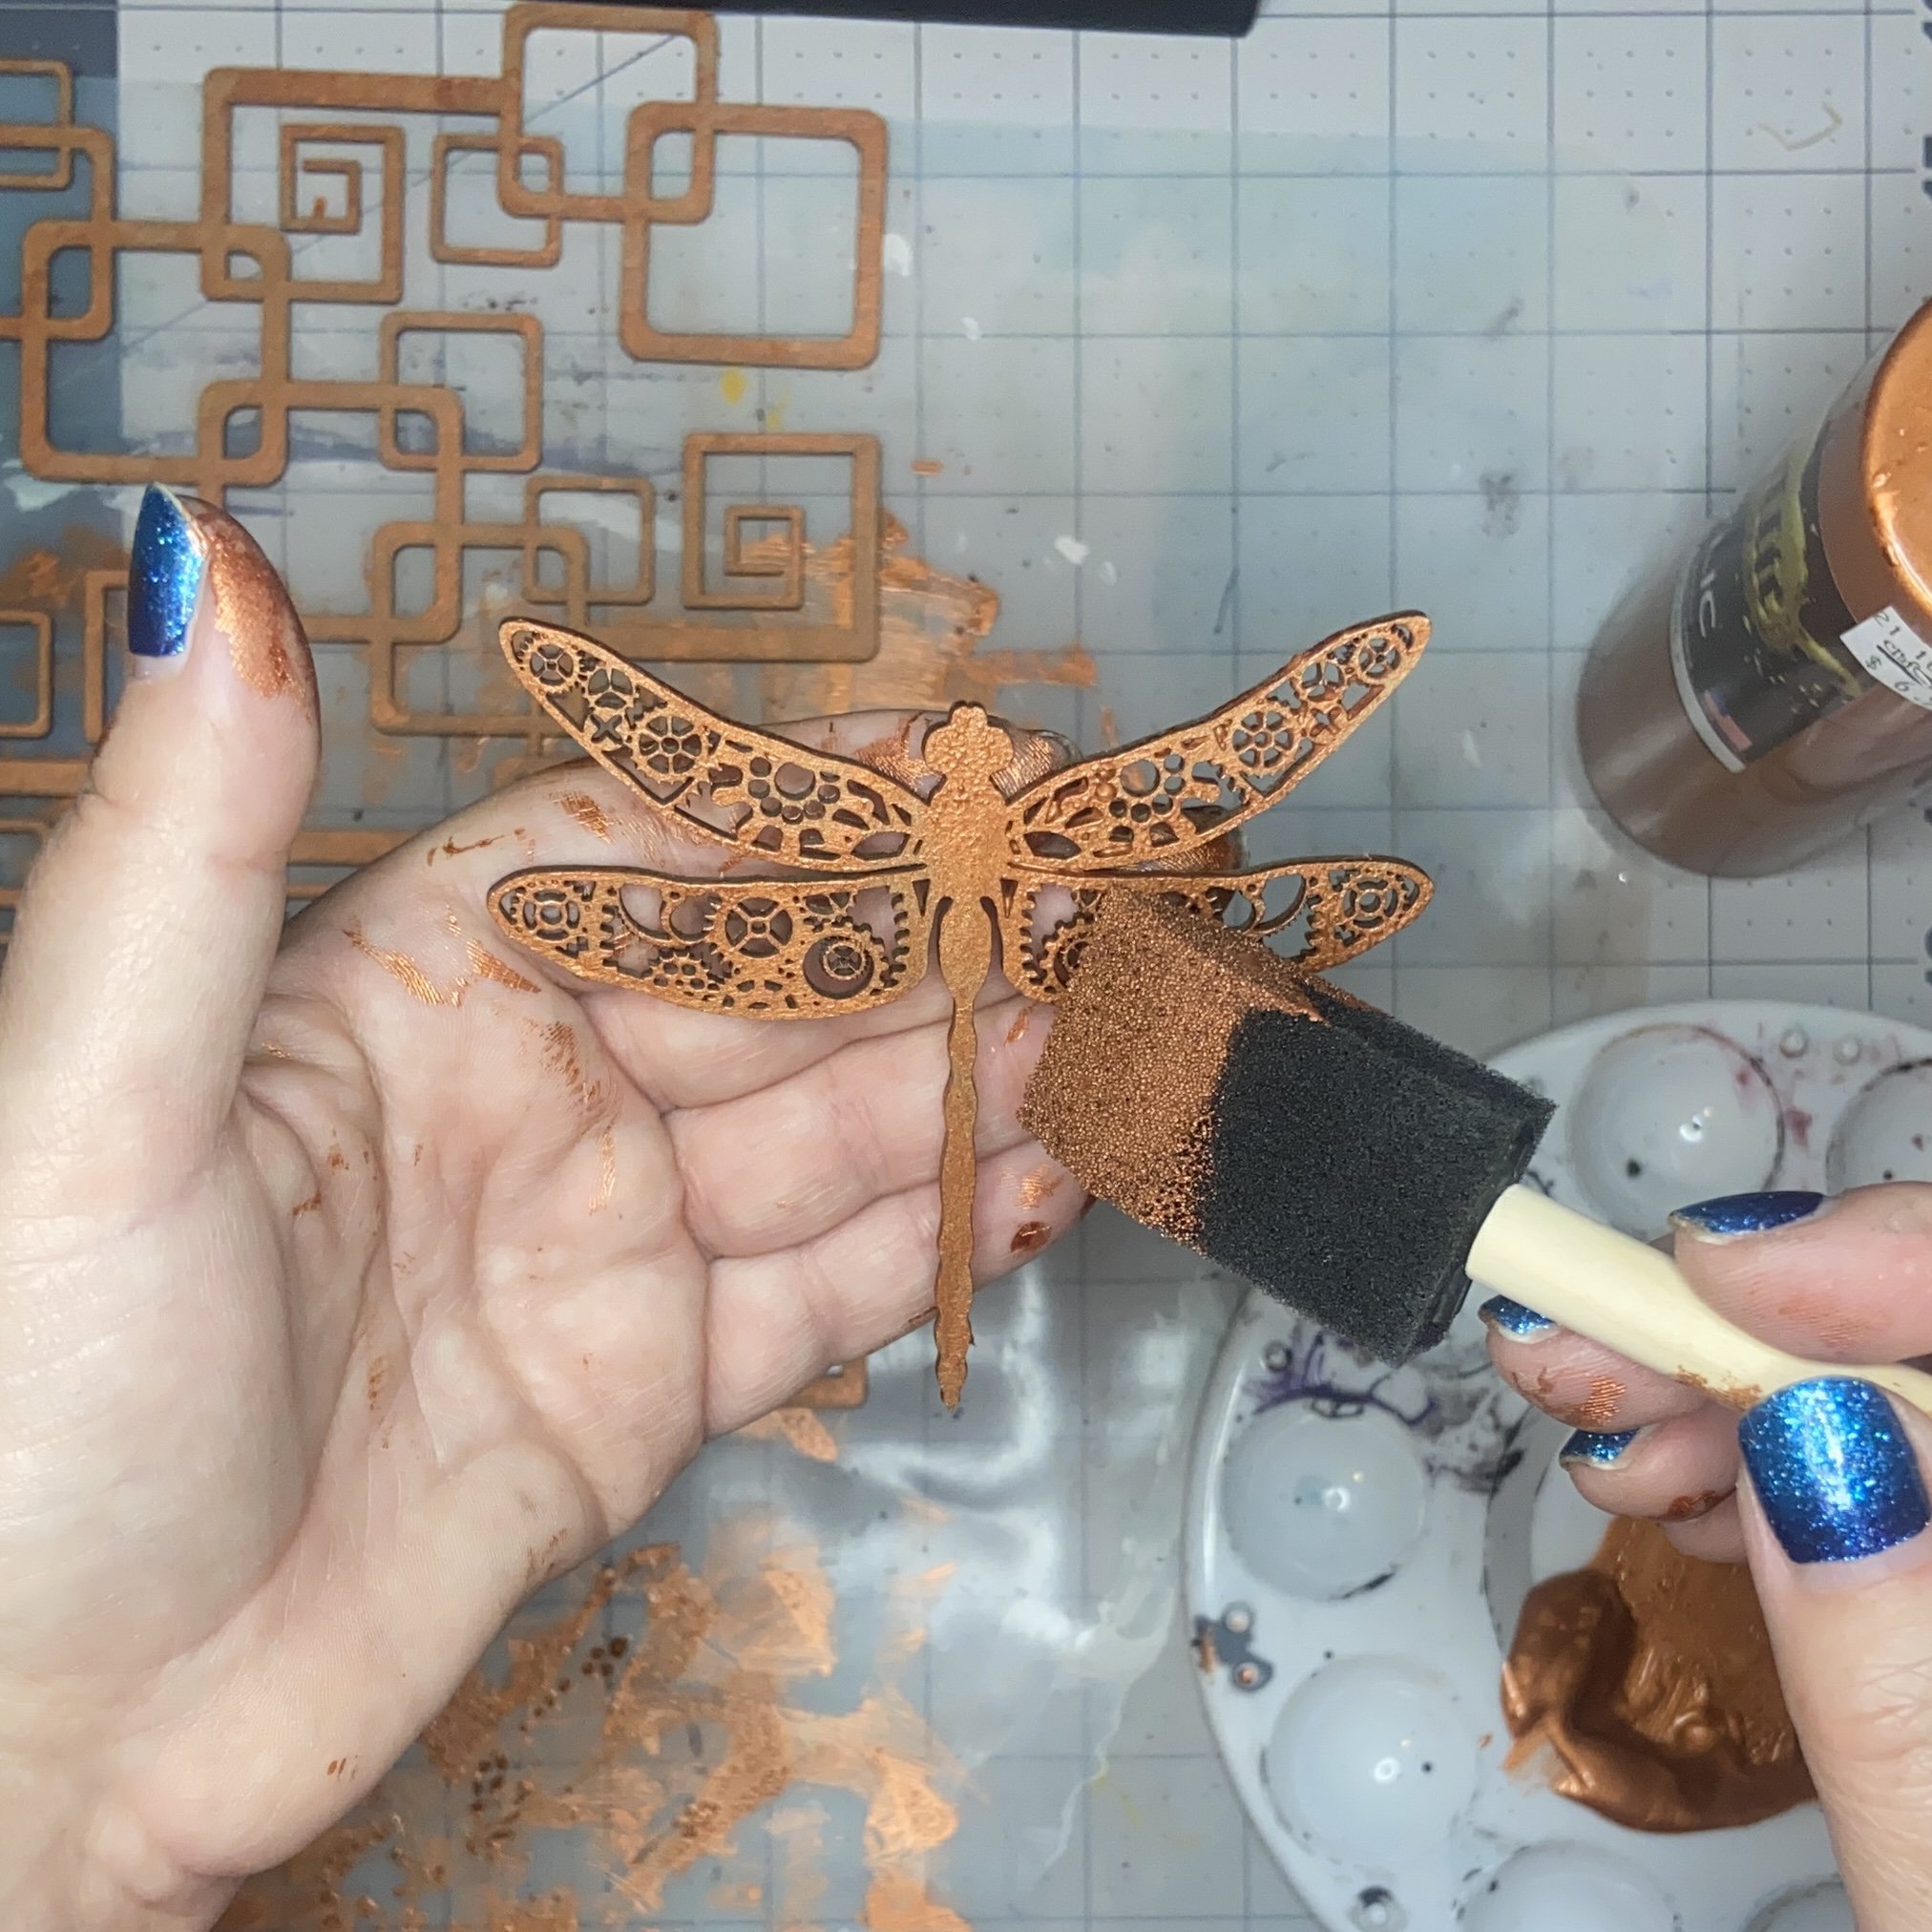
While the gesso was drying, I pulled out a bunch of chipboard embellishments from my stash and also looked through my collection of stencils. I ended up choosing the rest of my geometric chipboard piece (left over from the Trailblazer project), a steampunk dragonfly, and a gear-and-clock piece, all three of which came from Dusty Attic. Side note: this is an Australian company which has an astonishing and unusual collection of chipboard pieces, many of which they make in-house. They are definitely worth a visit, but beware…it’s hard not to bust the budget on their site. I’ve had all these chipboard pieces for quite awhile and so I can’t find them in their store anymore to link them here.
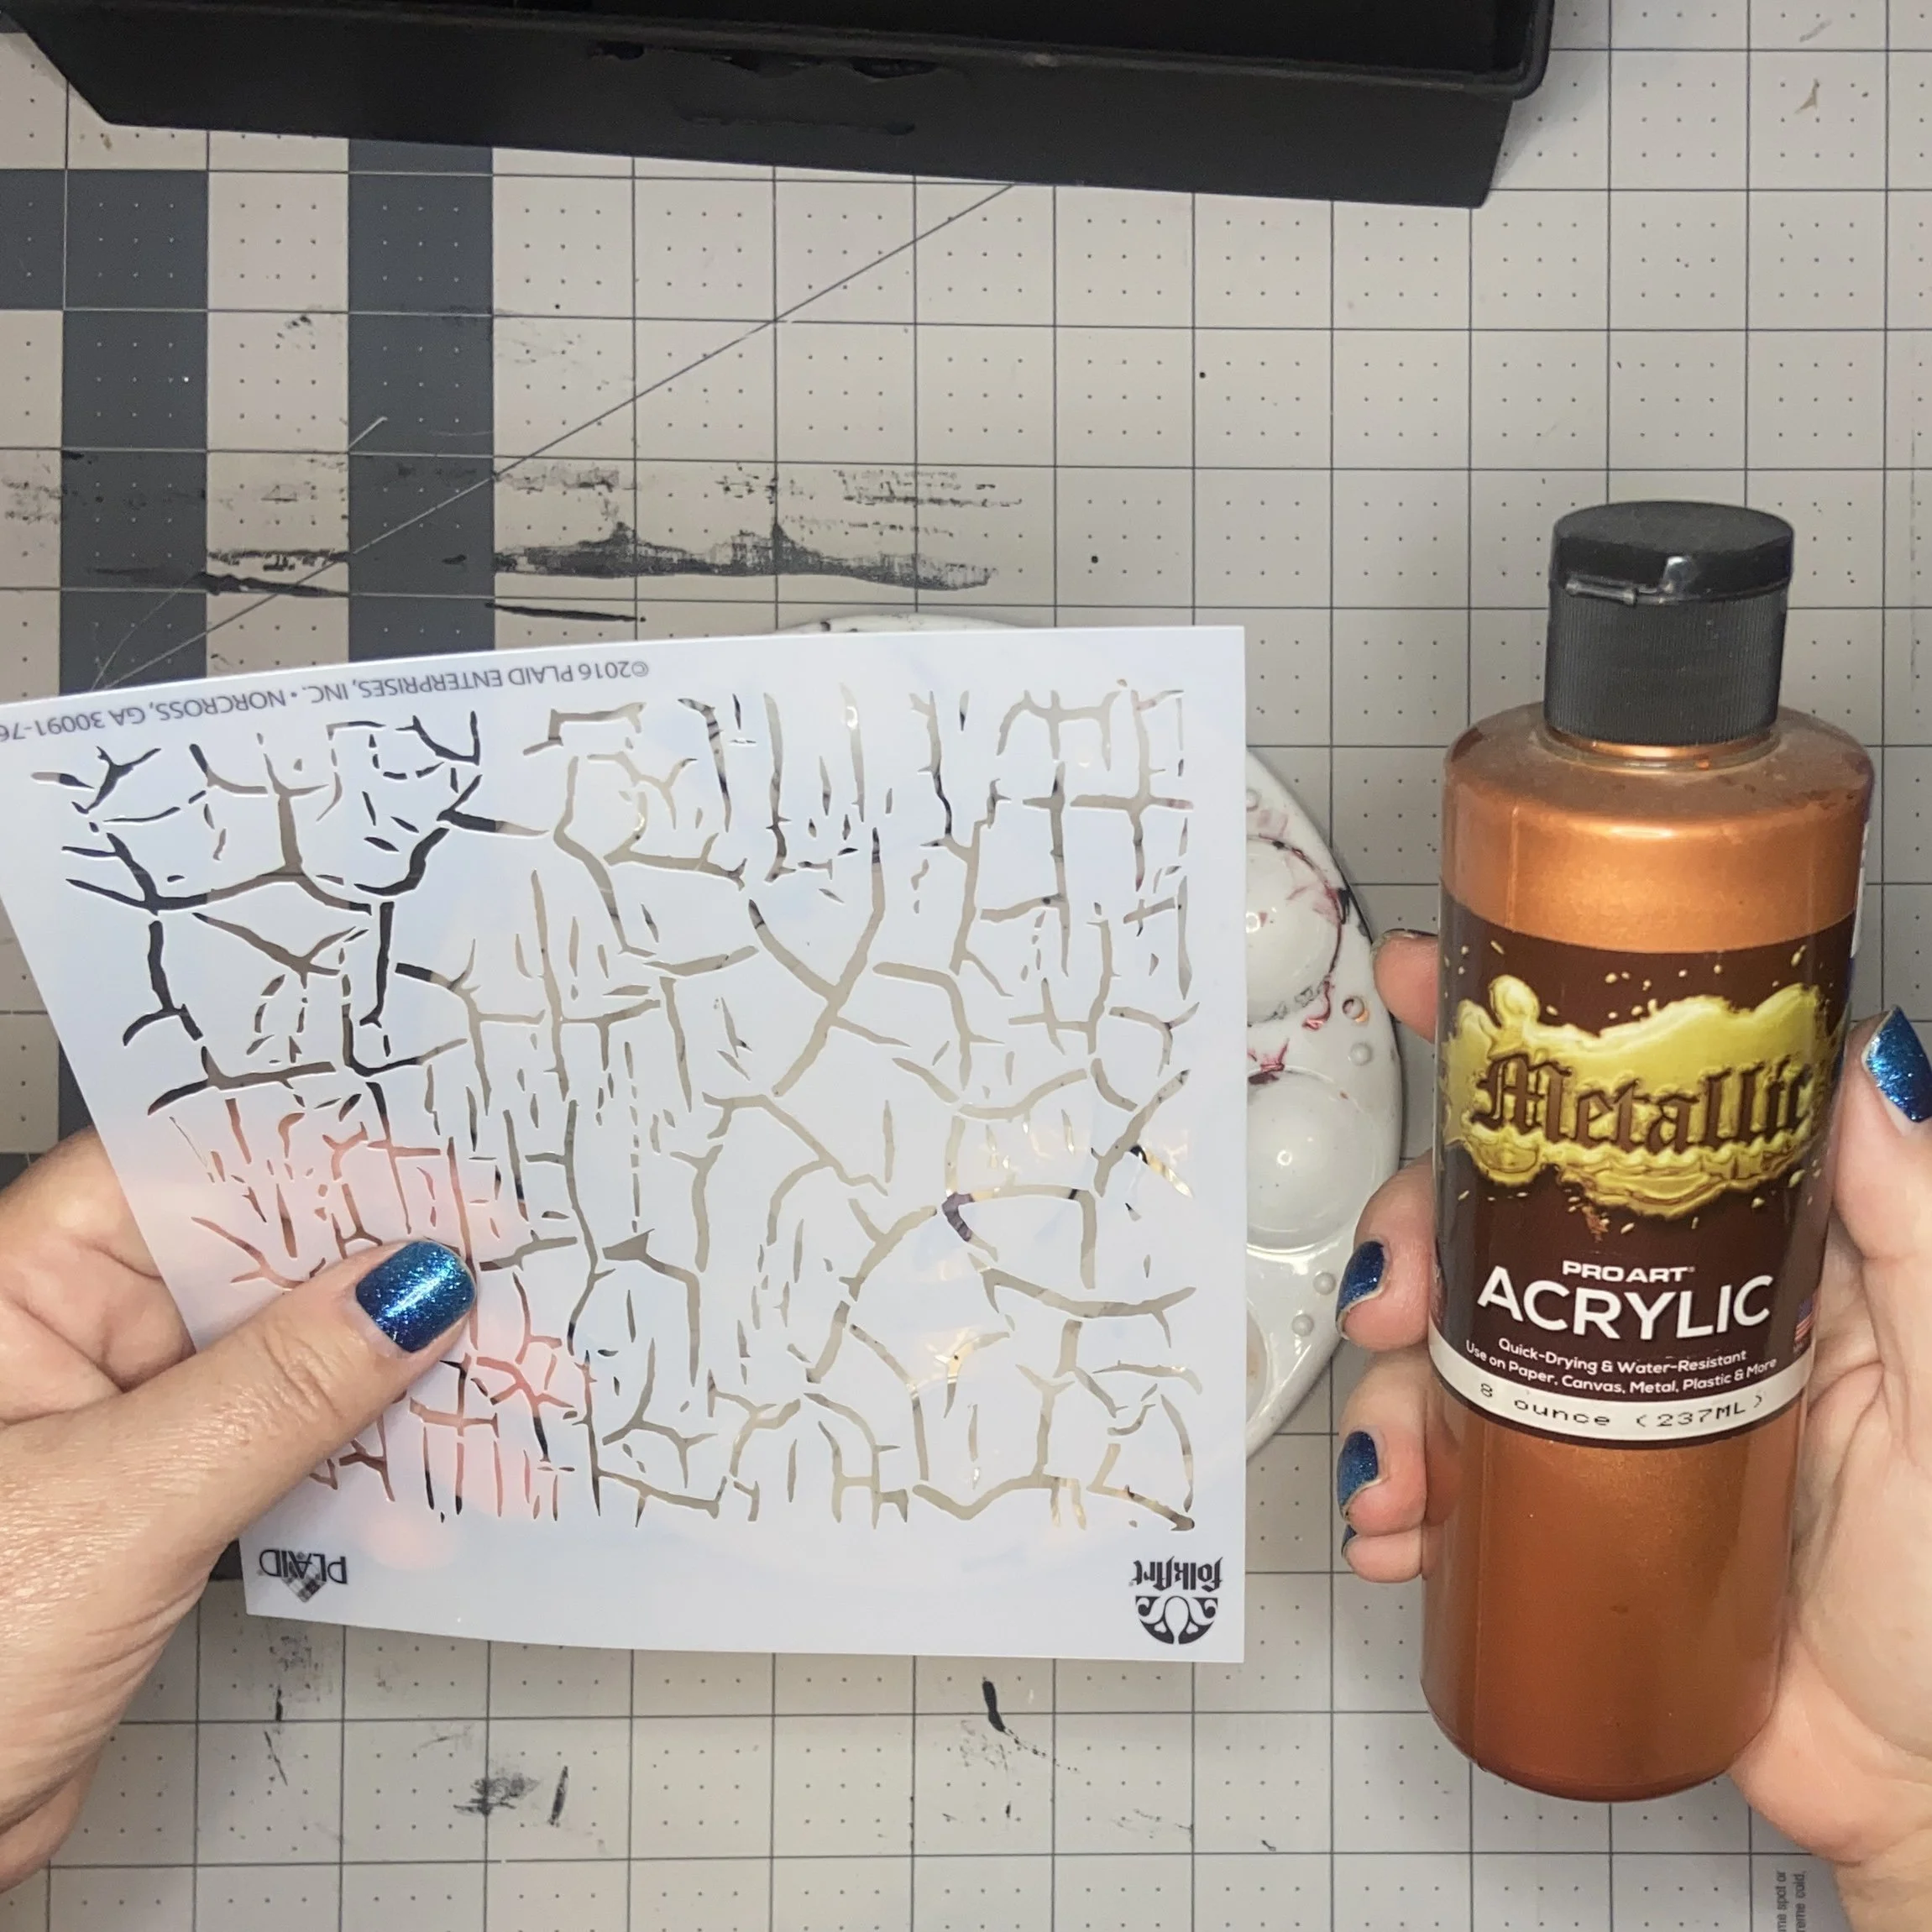
The stencils I chose were this one and this one from the Tim Holtz collection; a “crackle line” stencil that I can’t find anymore, although this is a reasonable substitute; and one labeled “Mini time travel” but I’ve lost the label that lists the company and I couldn’t find it anywhere. As you might imagine, I’ve had these stencils for many years too.
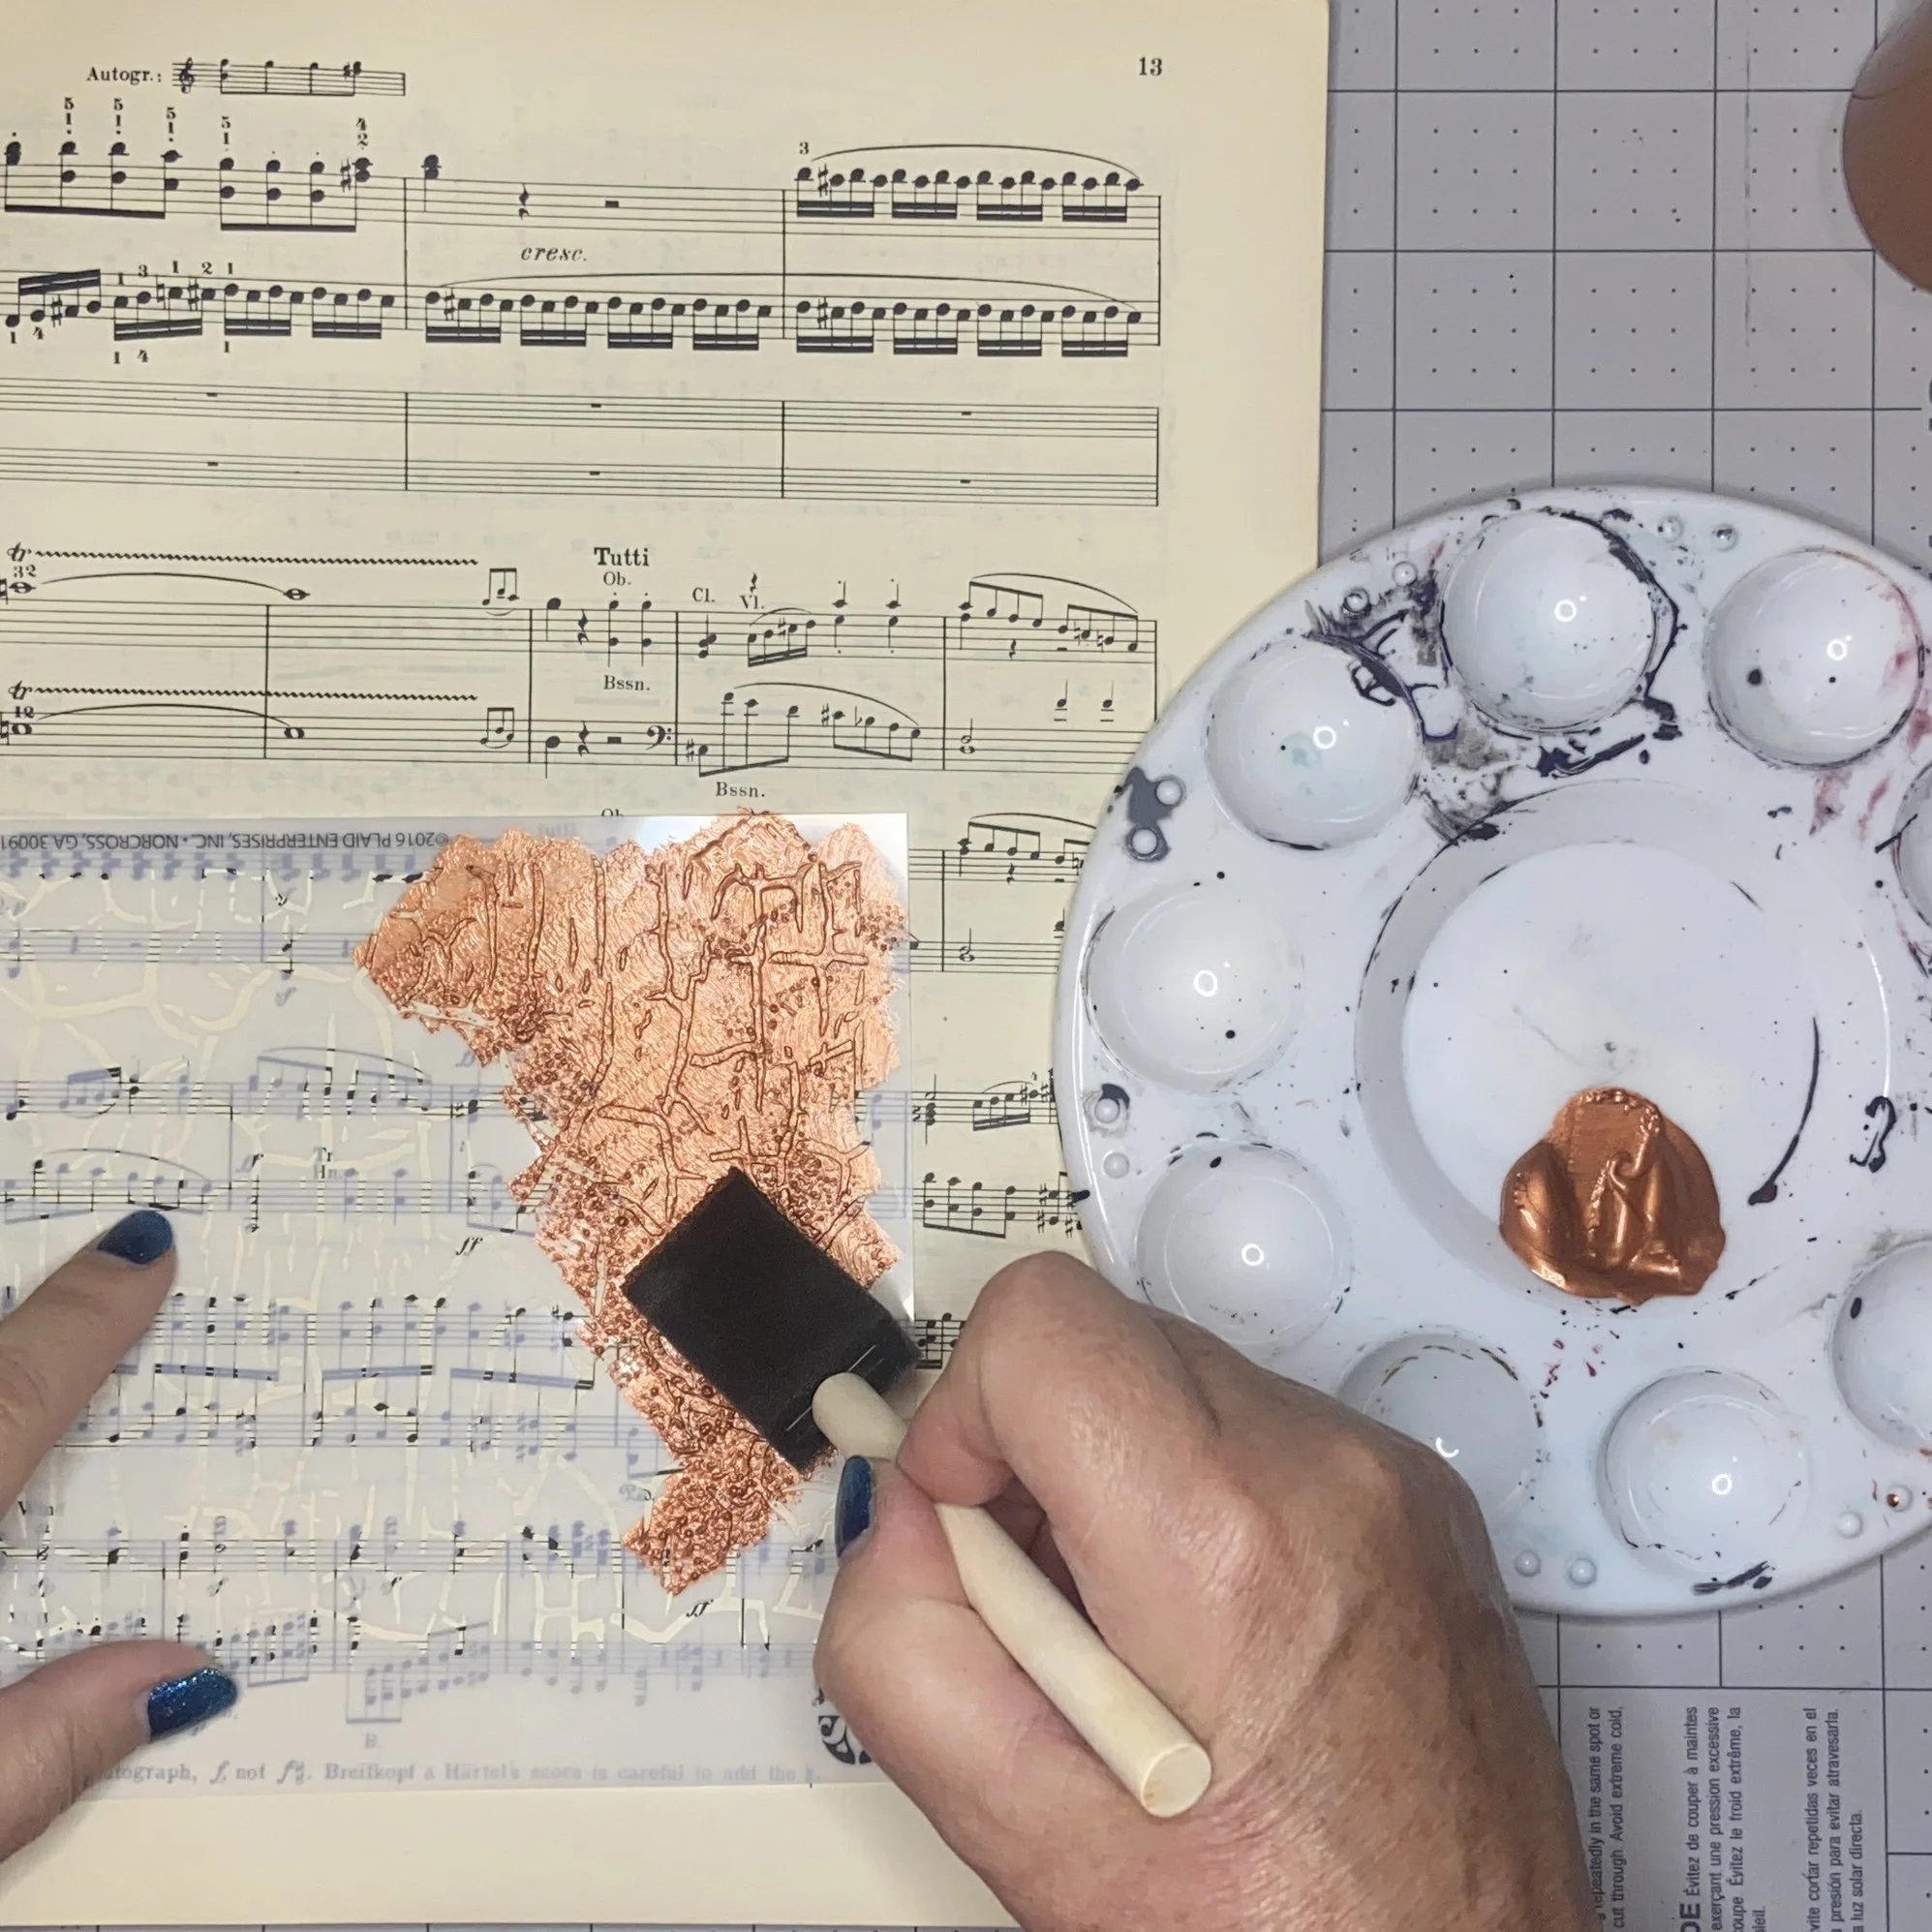
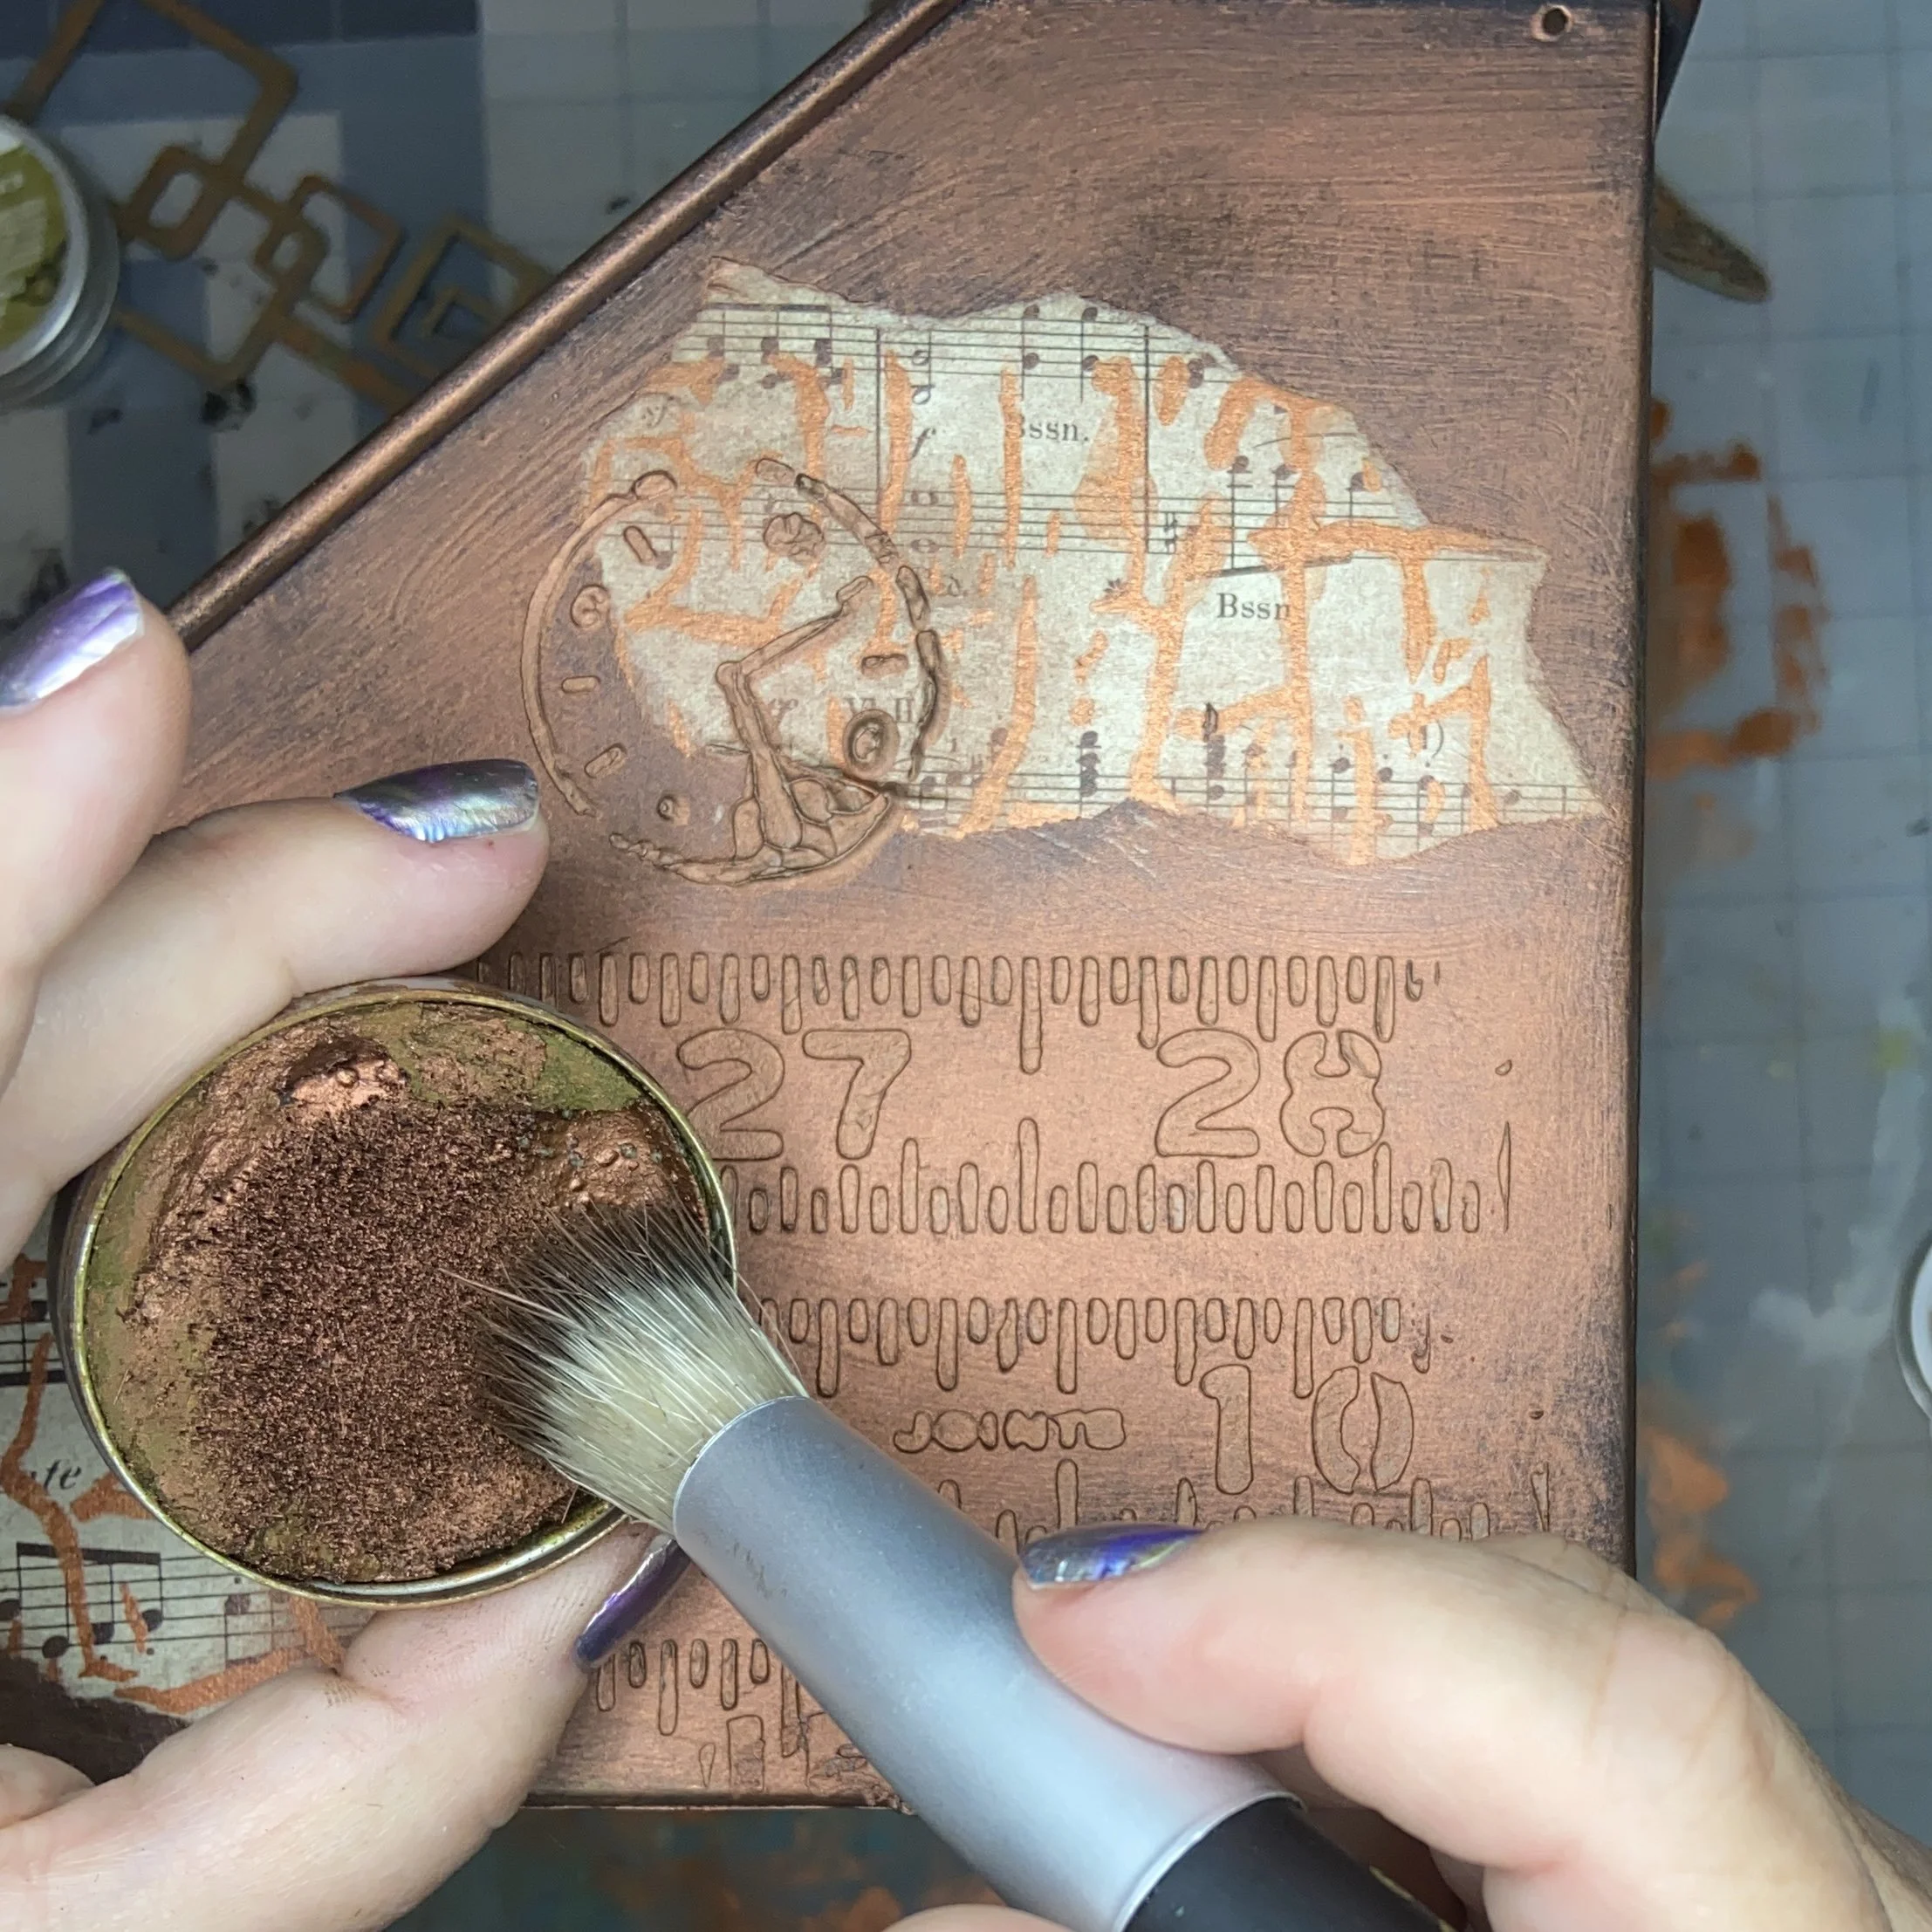
A few months ago, my local library had a book sale. Every single item was $1. My own local Dollar Store. Amongst my purchases were a couple very old music books, one Beethoven and the other Brahms. The pages were already yellowing with age, so they were already perfect for craft use. I ended up pushing some metallic copper paint through my crackle stencil on a couple pages, and then letting it dry. I did end up using a few pieces of this painted paper, but I don’t think it adds much to the final result, so now I rather wish I hadn’t. Alas, some kinds of mixed media glue are forever.

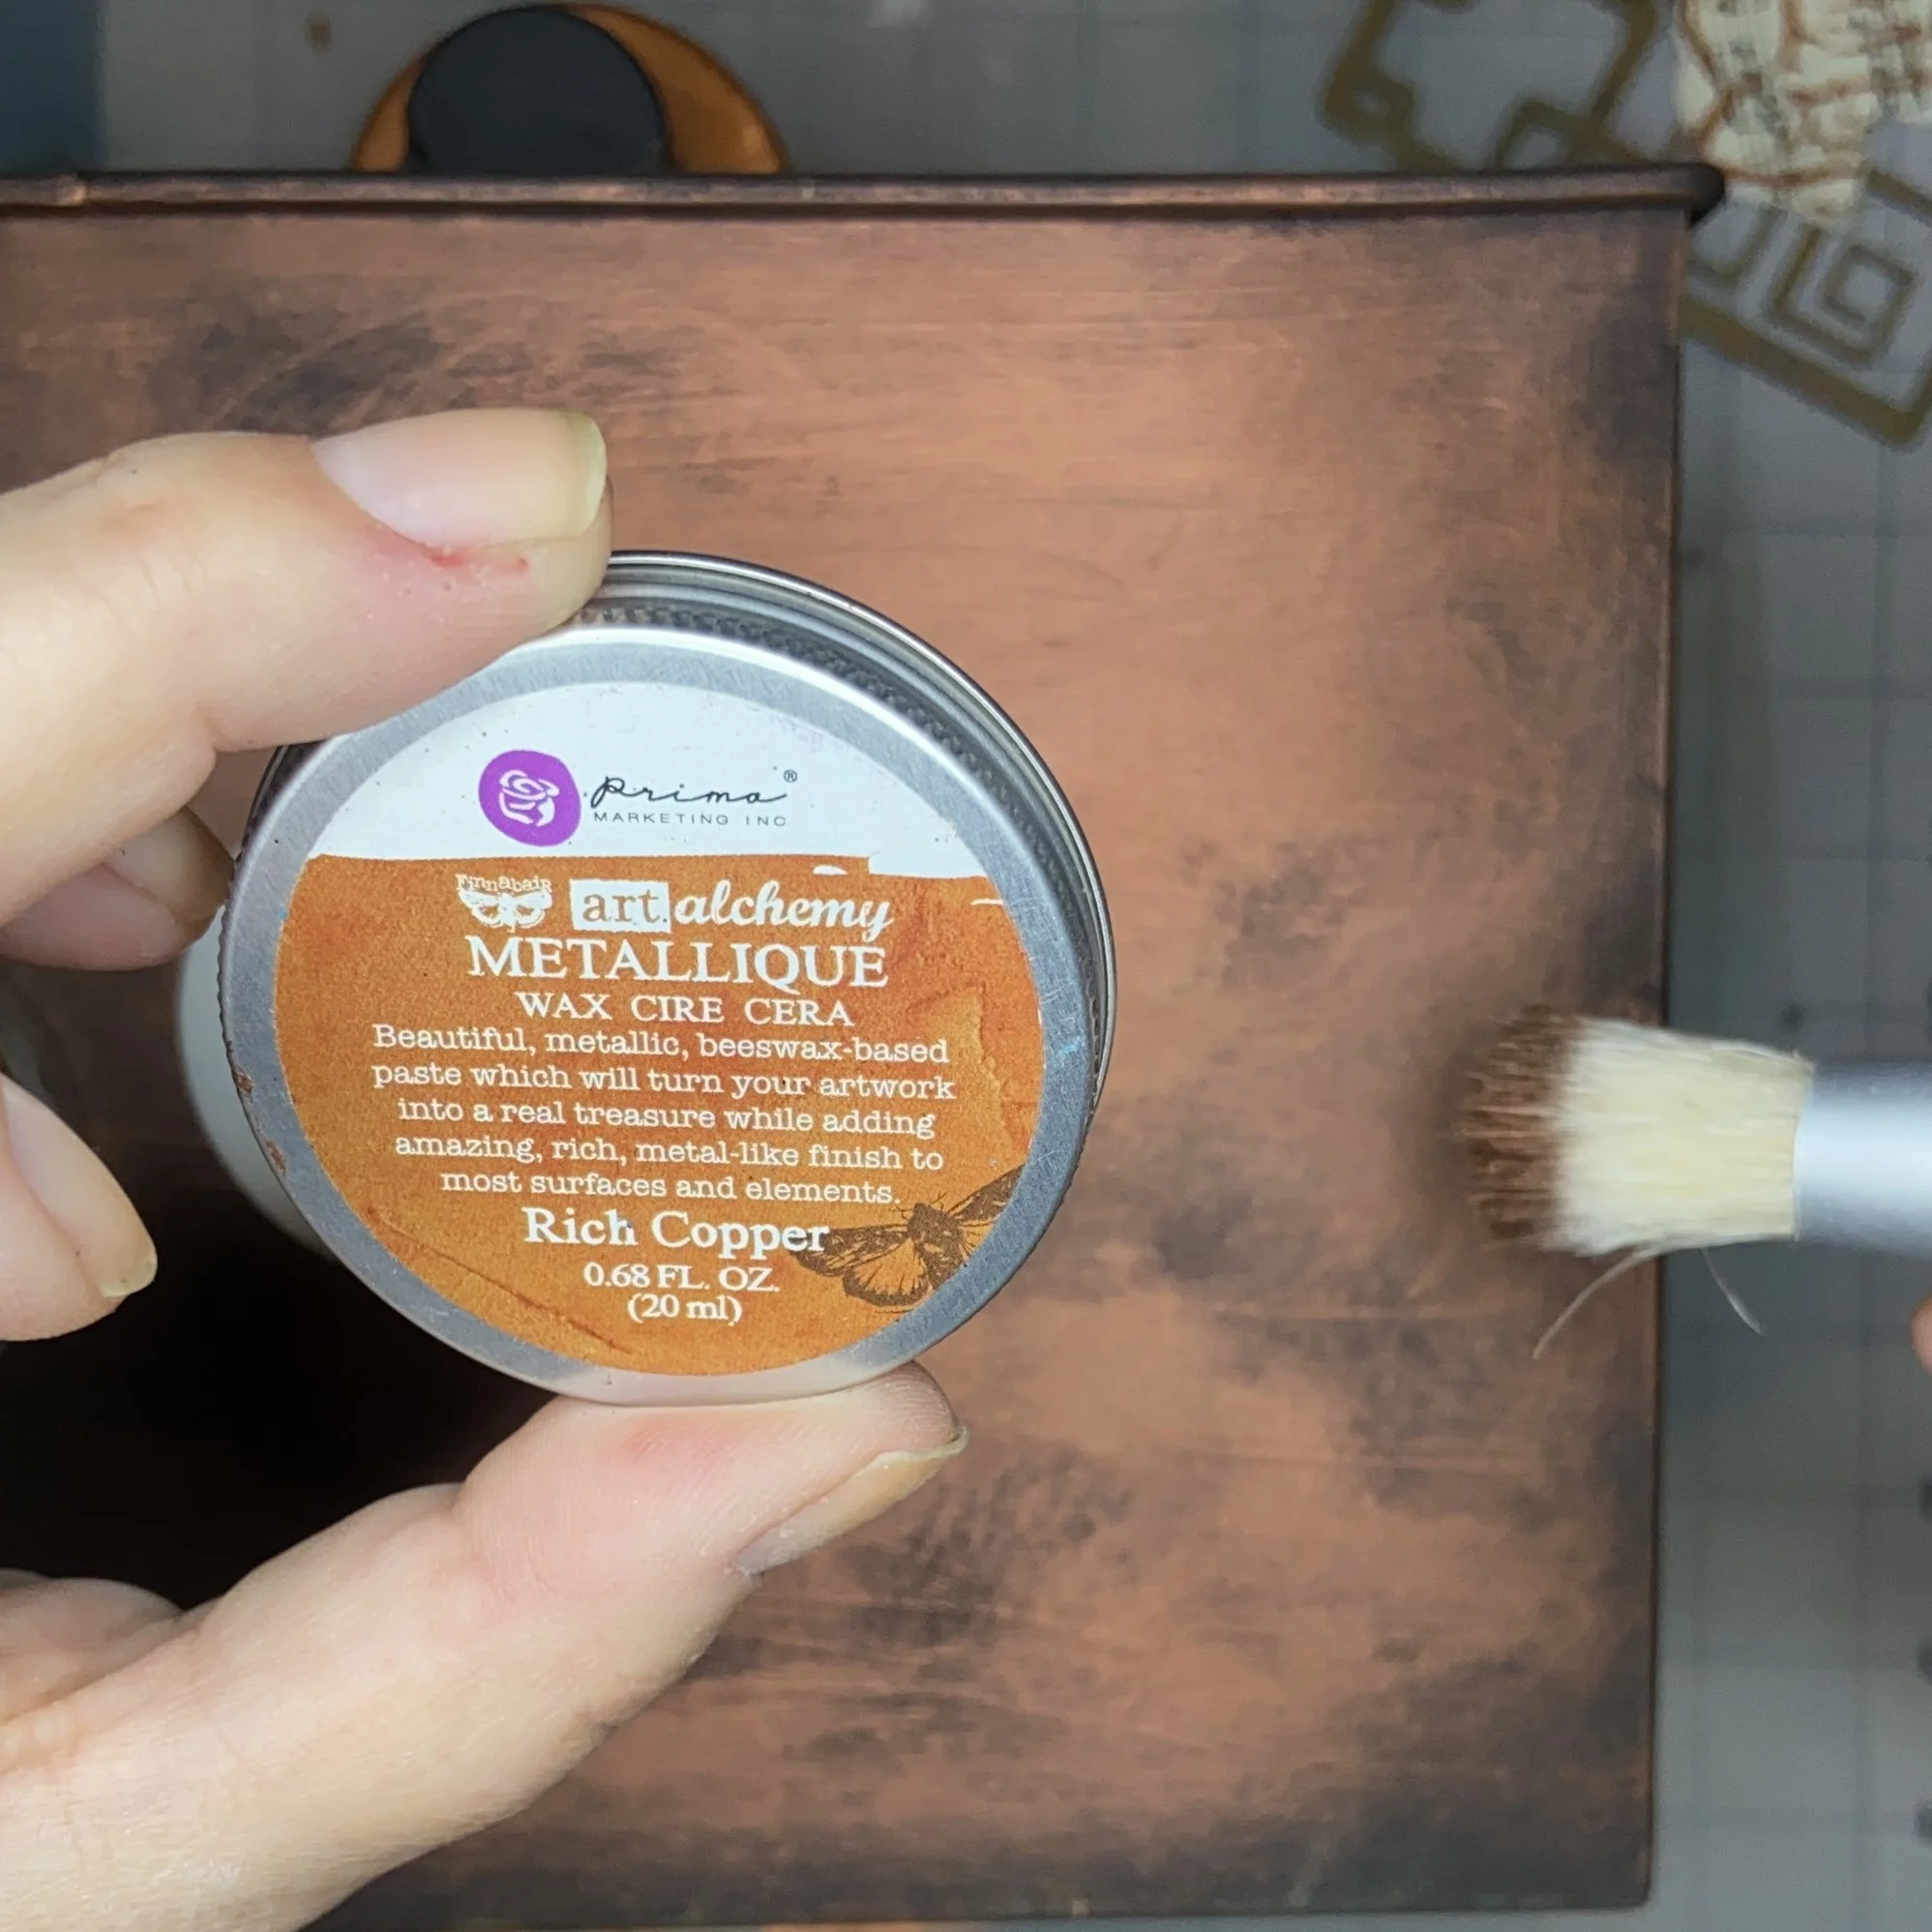
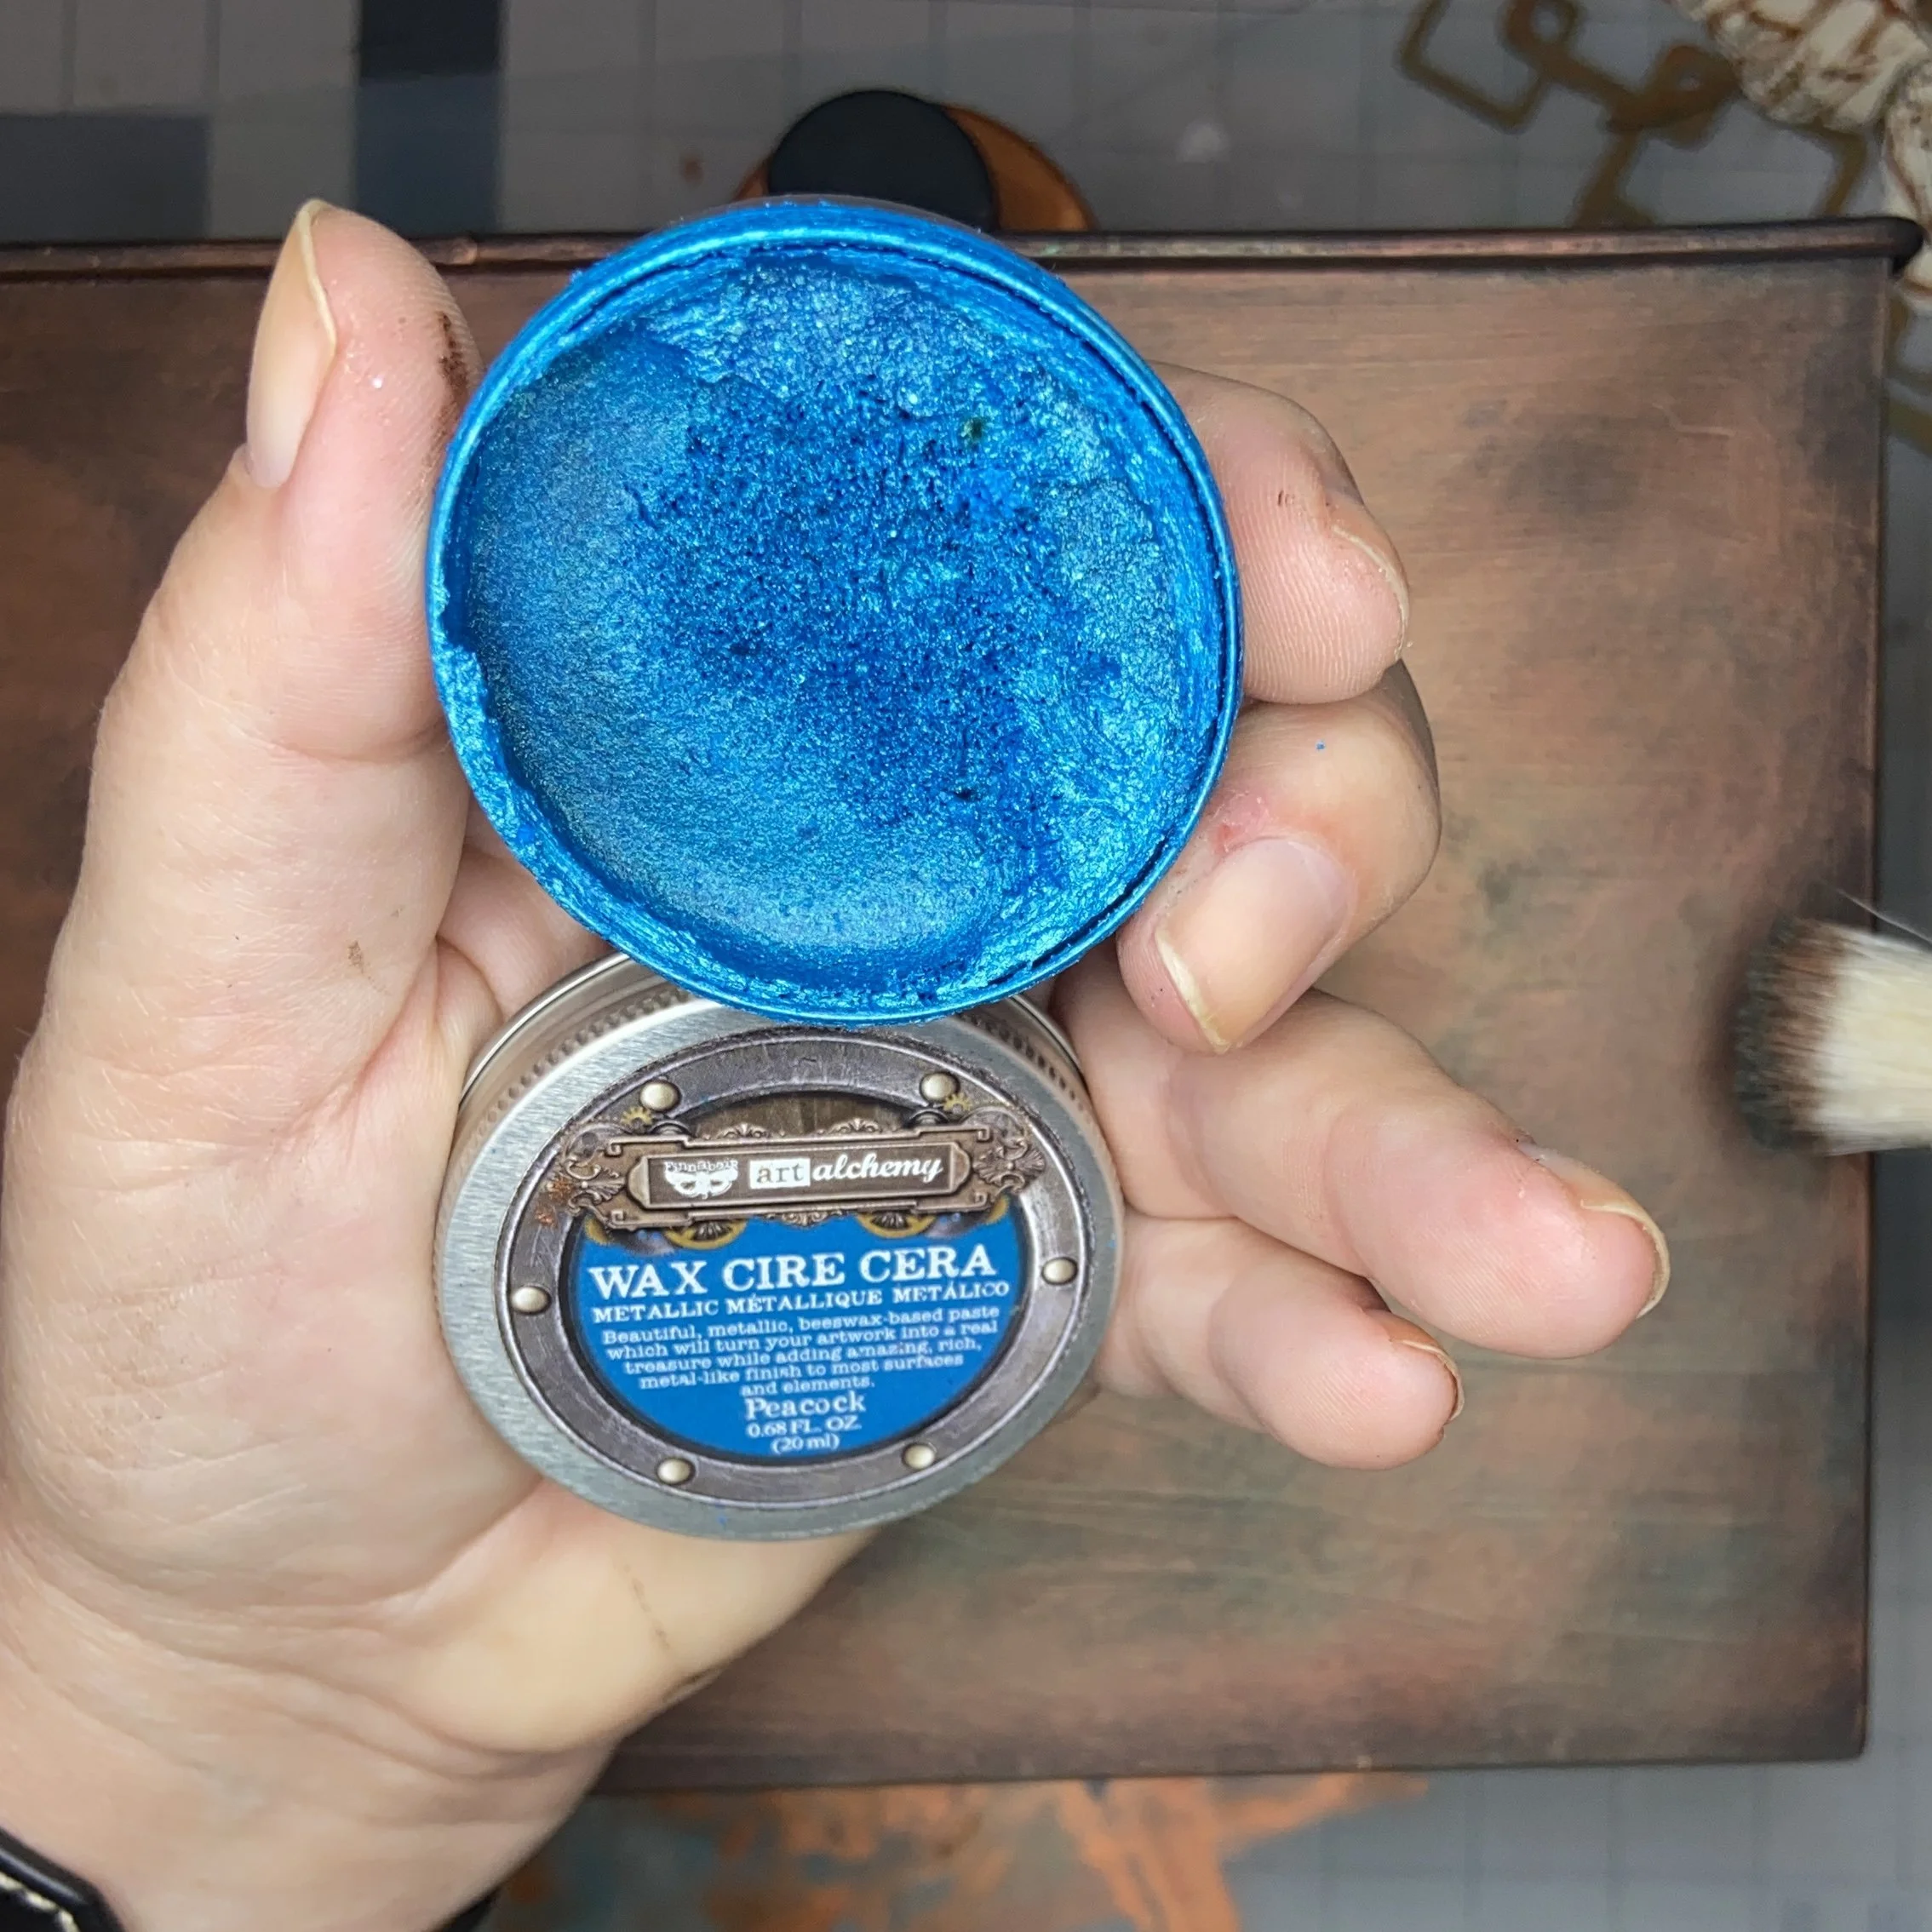
I ended up painting all my chosen pieces of chipboard with the metallic copper paint, and then using some of my Finnabair waxes over the top after the paint was dry. My desired end result was to have the copper look like it was splotched with patina and verdigris, but to still have the whole thing look a little shimmery. This is why I decided to use the waxes, rather than a patina effect paste. Well, that and I just plain love using the waxes. In addition to looking absolutely beautiful, they smell sooooo good! Even days later, my studio smelled faintly of the waxes. Yummy. I chose Peacock and Lucky Emerald (sadly, no longer available, but this is a reasonable substitute) and dry-brushed it onto the chipboard pieces. I’m rather happy with how they came out.


Finally, I needed to do something to the metal organizer so that it wasn’t just matte black. I decided to use the back (which wouldn’t be visible when it was in use) as a sort of swatching space. Using my Finnabair dauber brush, I first applied a Finnabair wax in copper. Then I used Peacock and Lucky Emerald again to dab on the patina effect. I liked how it turned out and decided to do that on the front and sides.

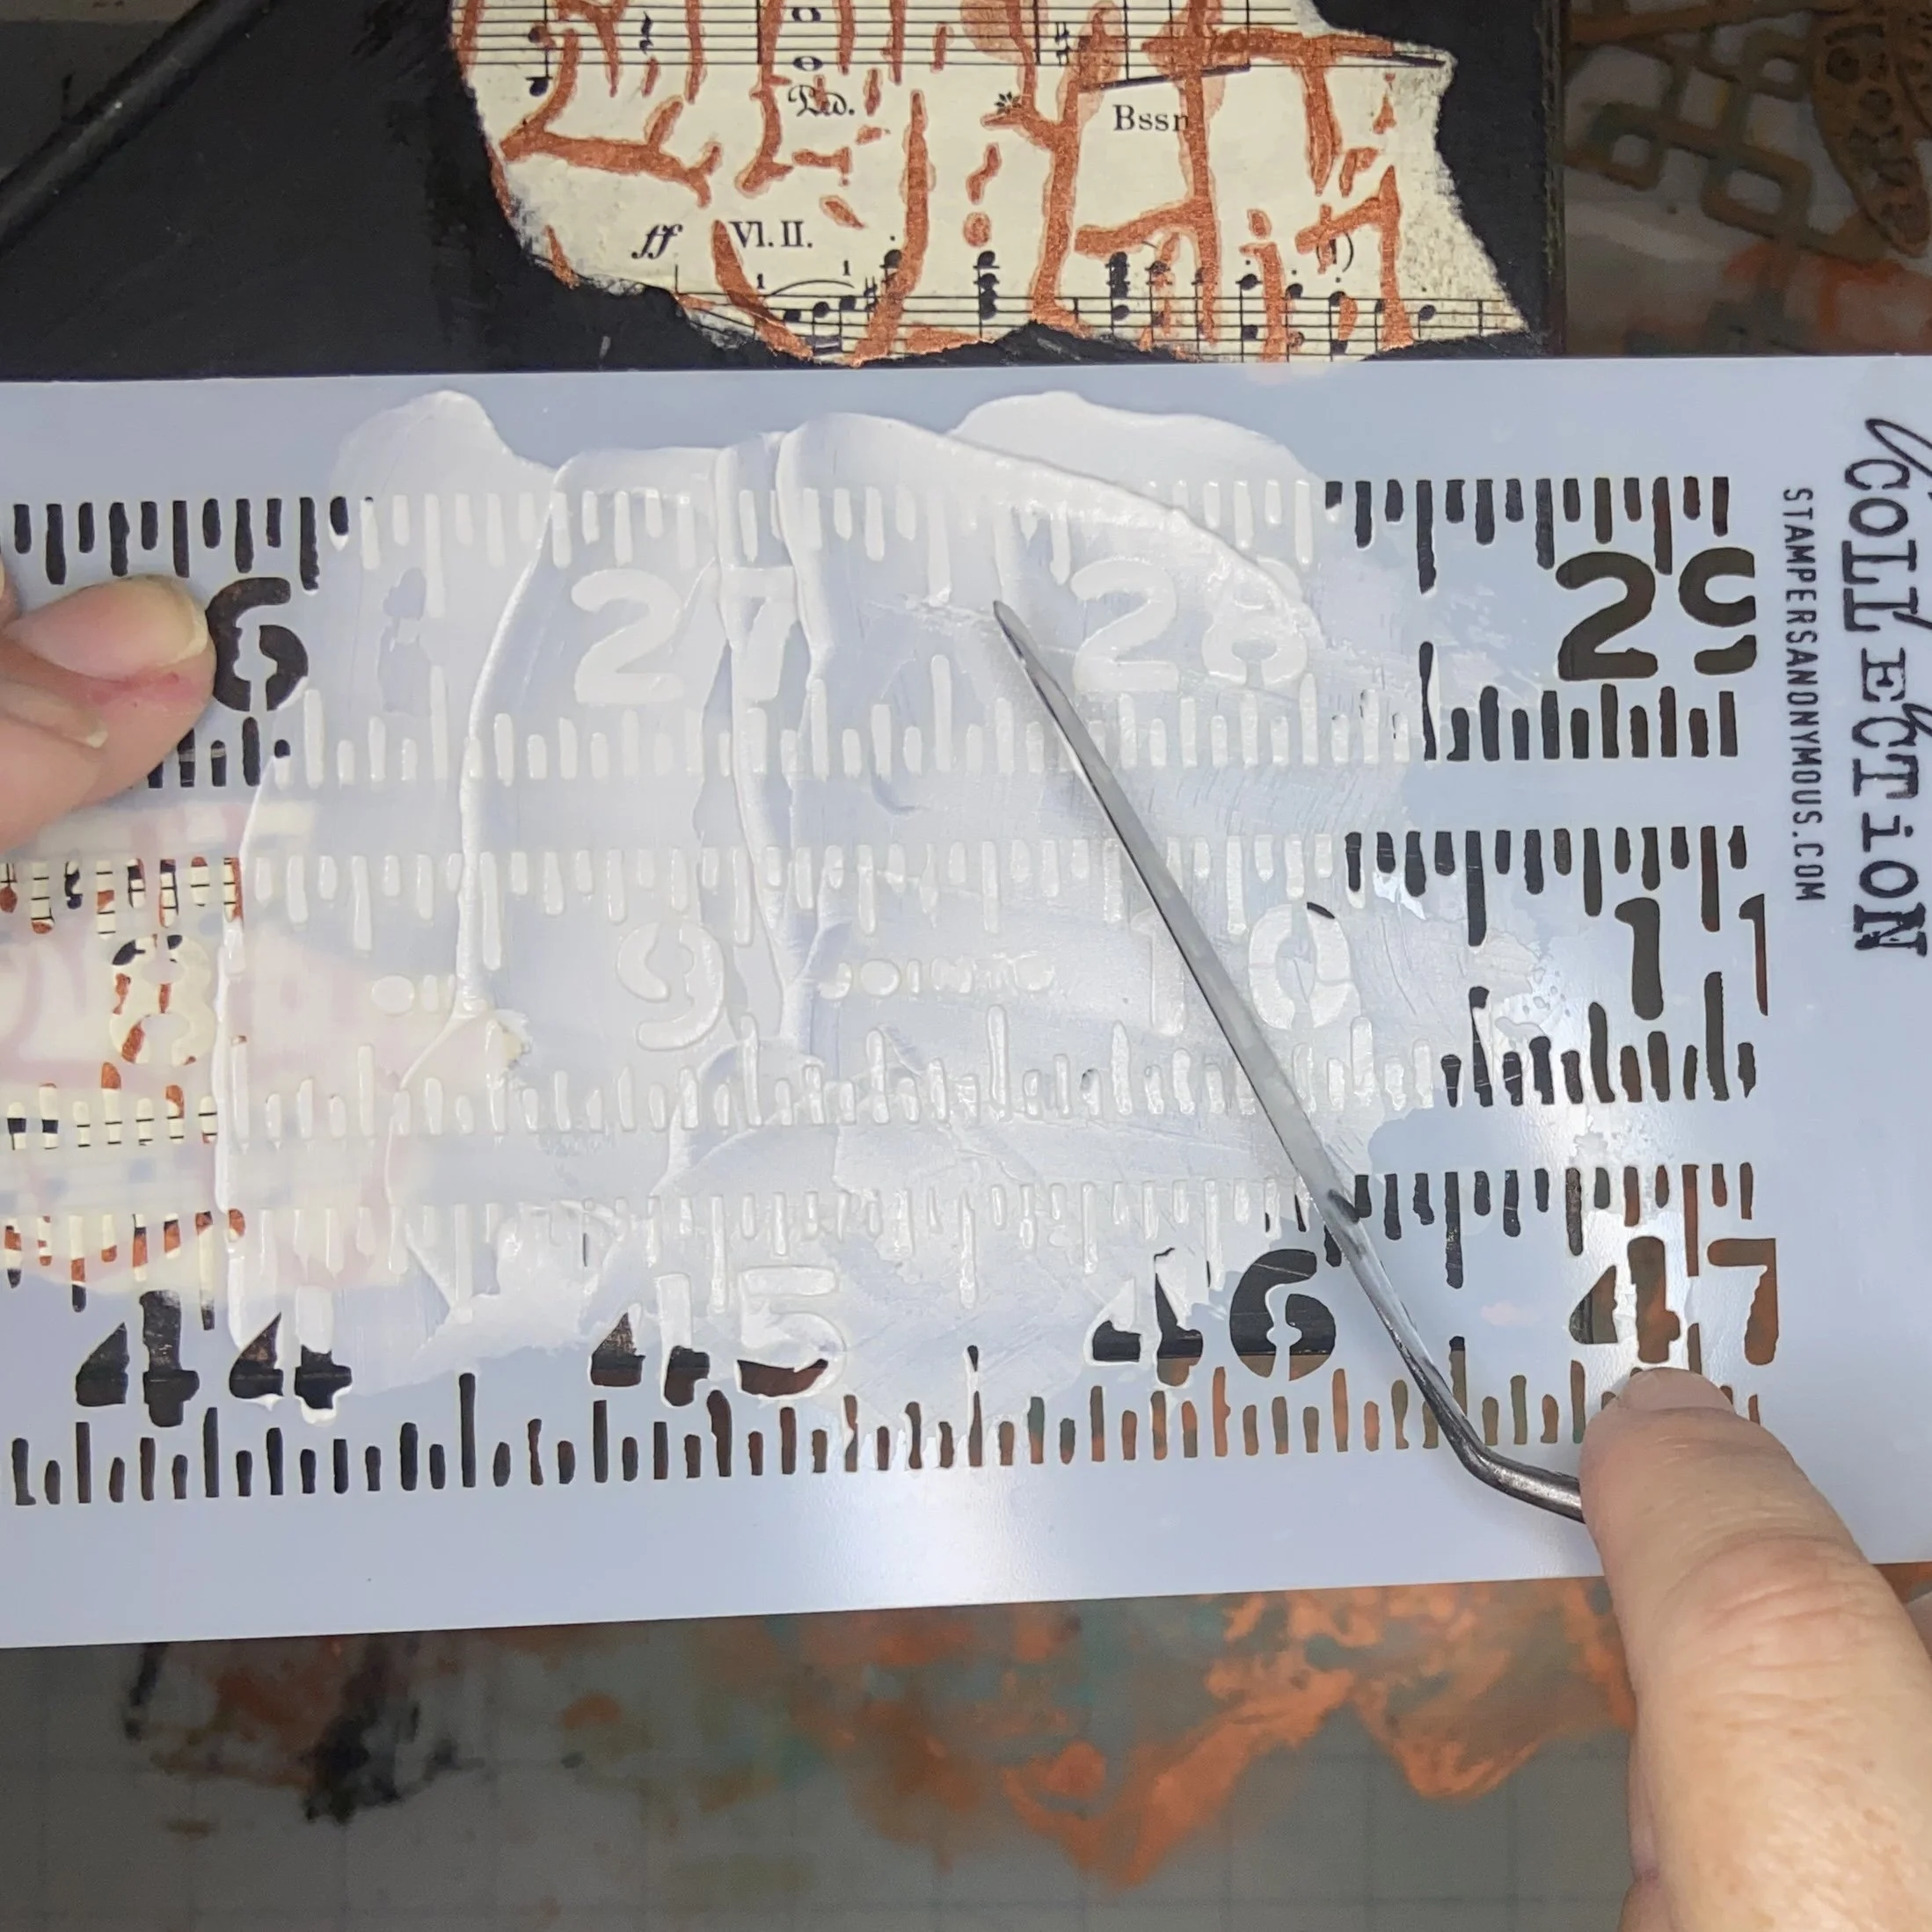
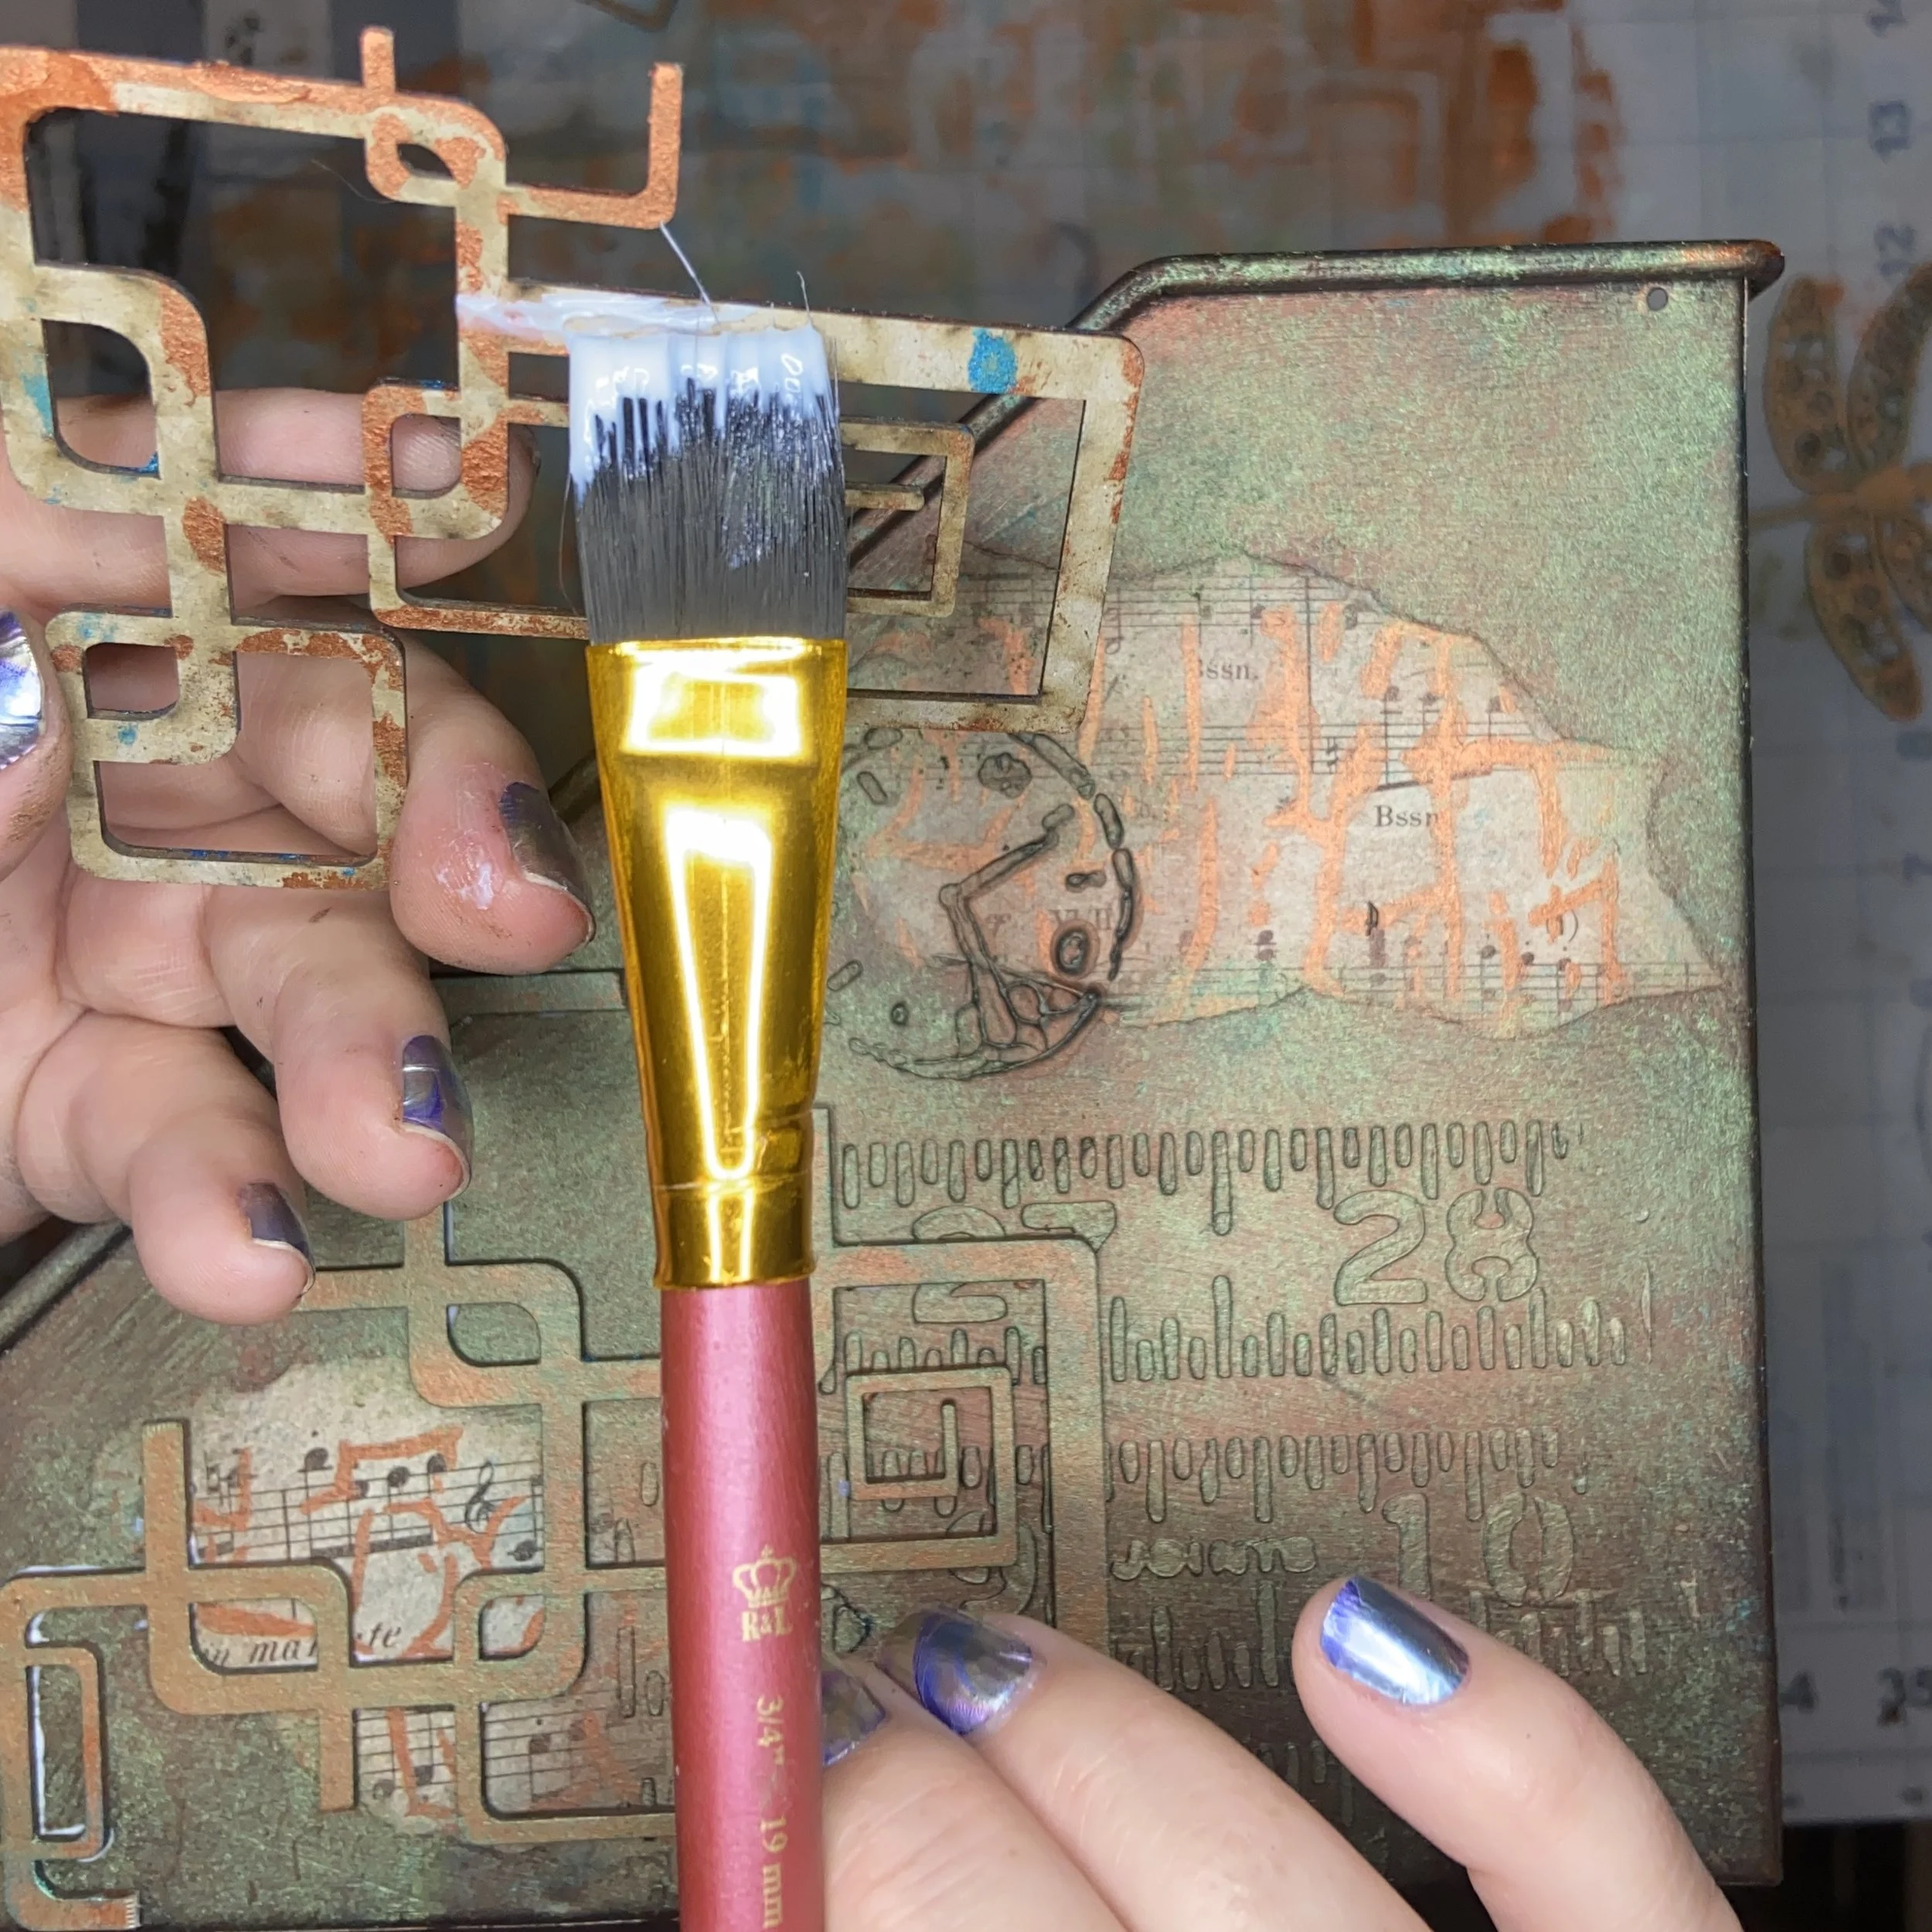
But before I did that, I needed to apply my bits of paper (glued them down with heavy body gel). Then I pushed some modeling paste through my chosen stencils in various spots on the front and sides. I left that to dry for a day.

After everything was dry, I added the waxes. First the copper over everything, then the Peacock, then the Lucky Emerald. Because I hadn’t applied black gesso over the modeling paste, it took a little while to get the waxes to cover it. I won’t make that mistake again. In fact, now that I think about it, if I’d taken this moment to gesso the modeling paste, I could have also gessoed (English is a living language, mom!) over the paper which by this time I didn’t care for. Alas for missed opportunities. Then I glued down the painted chipboard pieces with heavy body gel, and I was done.

It doesn’t really look like something. Or anything. But it is pretty and I do like it.


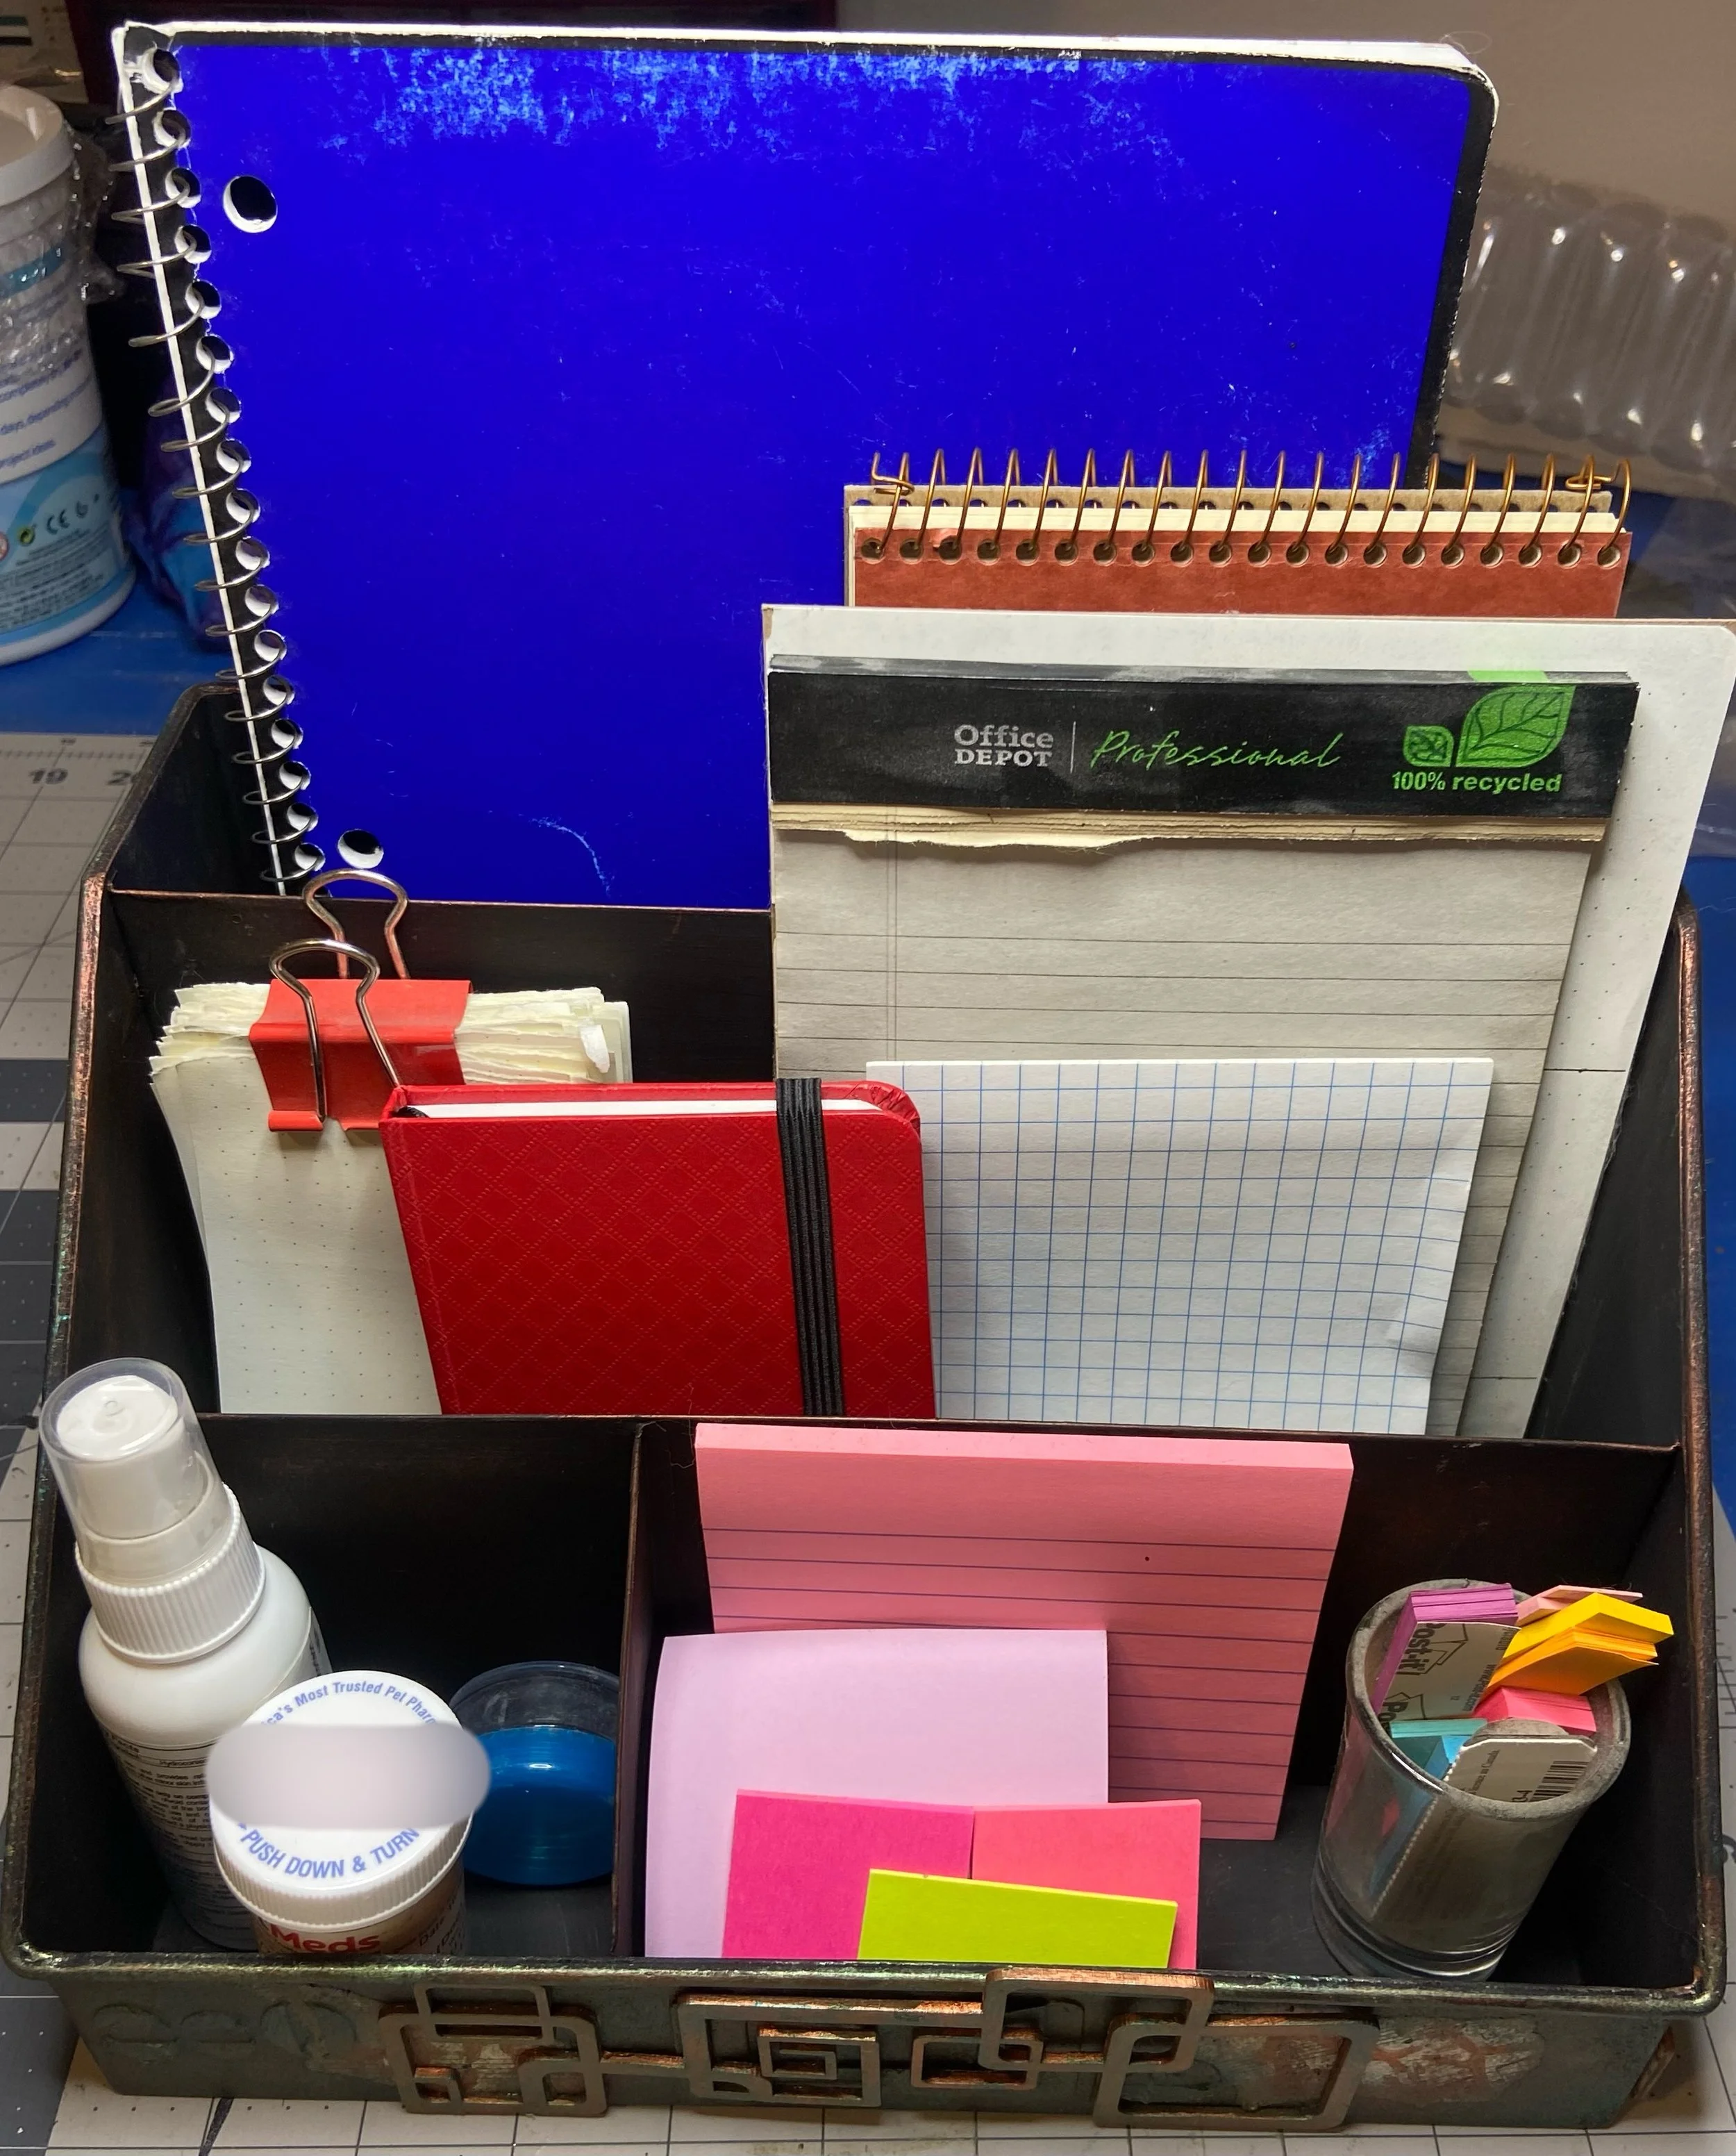
I took this opportunity to purge the old organizer of things I didn’t need, and also removed the writing implements. I didn’t use the ones in the organizer, instead using a leather cup a friend made me years ago to hold the writing implements that I use regularly. So my finished and loaded organizer looks a lot tidier than the old one and is also more useful, being full only of things that I use all the time. A fun little project. I shall have to browse for inspiration at Goodwill more often.