Adventures In Clockwork Nookery
As an Amazon associate, I may earn a small commission if you navigate to Amazon from my site and buy something. This will not result in an extra cost to you.
Fourth quarter of the year, and per my booknook budget, I’ve built my fourth booknook of the year. And it’s a doozy! It’s this one from Tonecheer, the same company that created my Leonardo da Vinci booknook. They really do a very nice job and any flaws in the build are of my own making, not due to a problem with the kit.
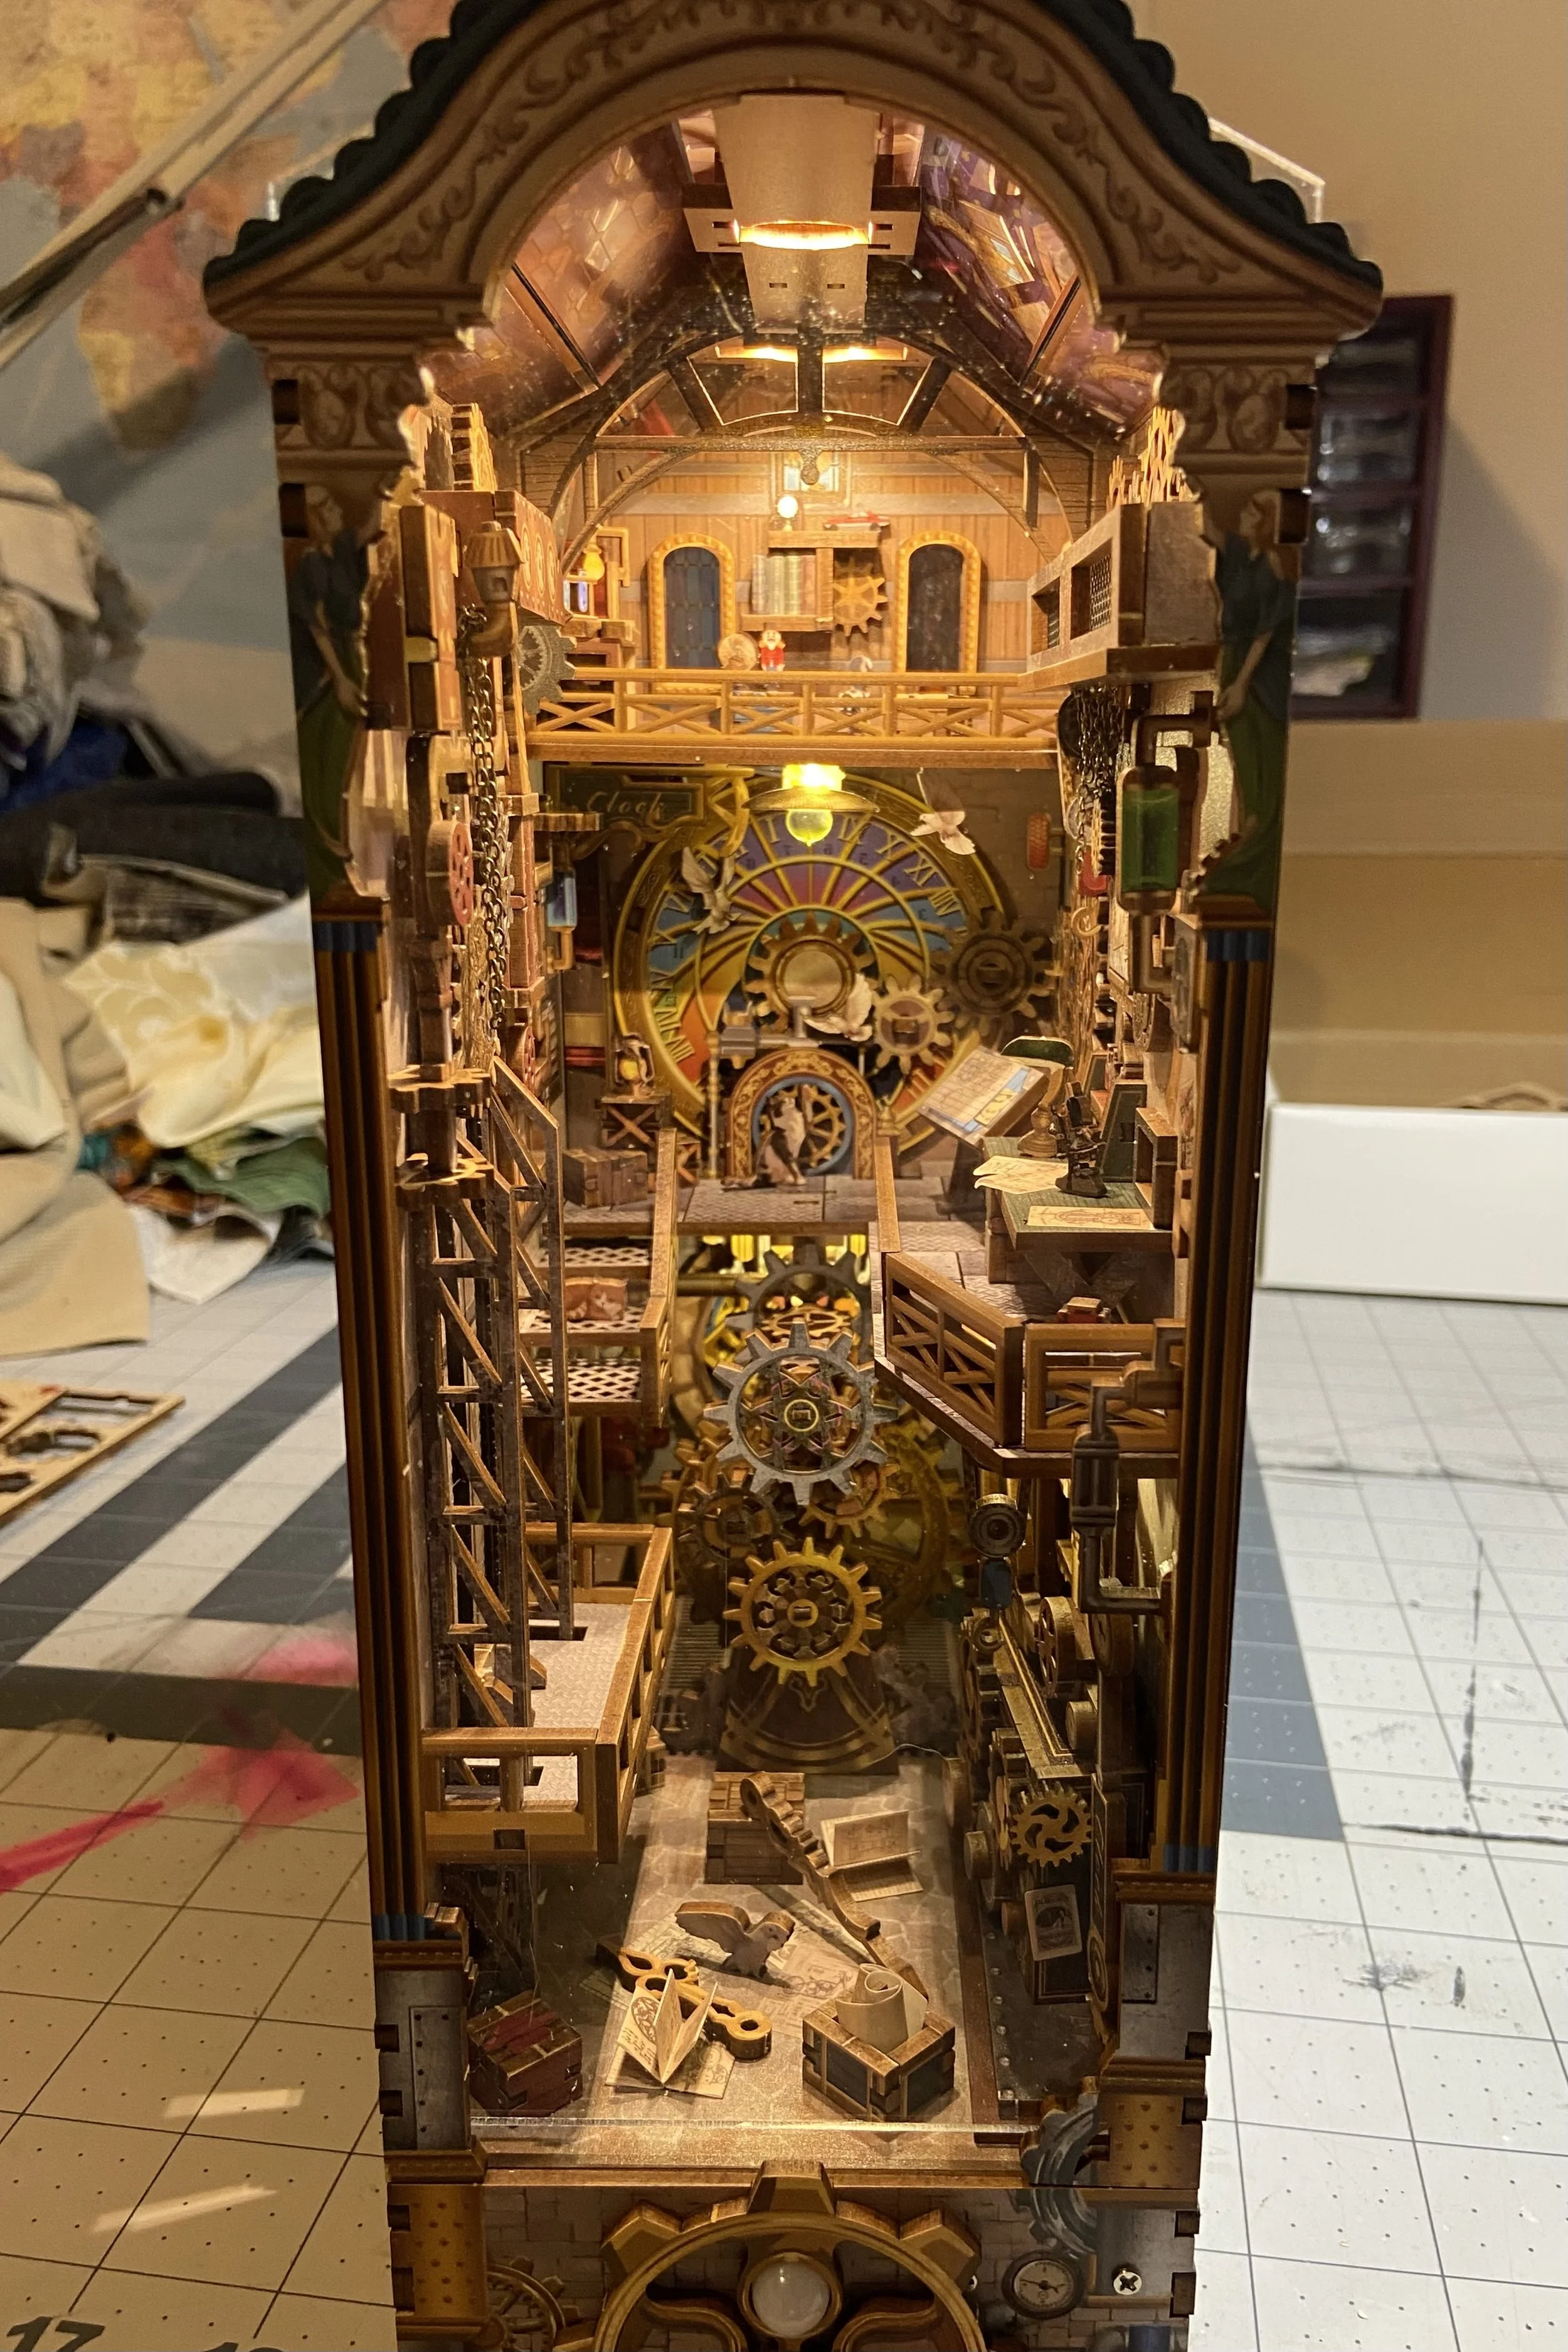
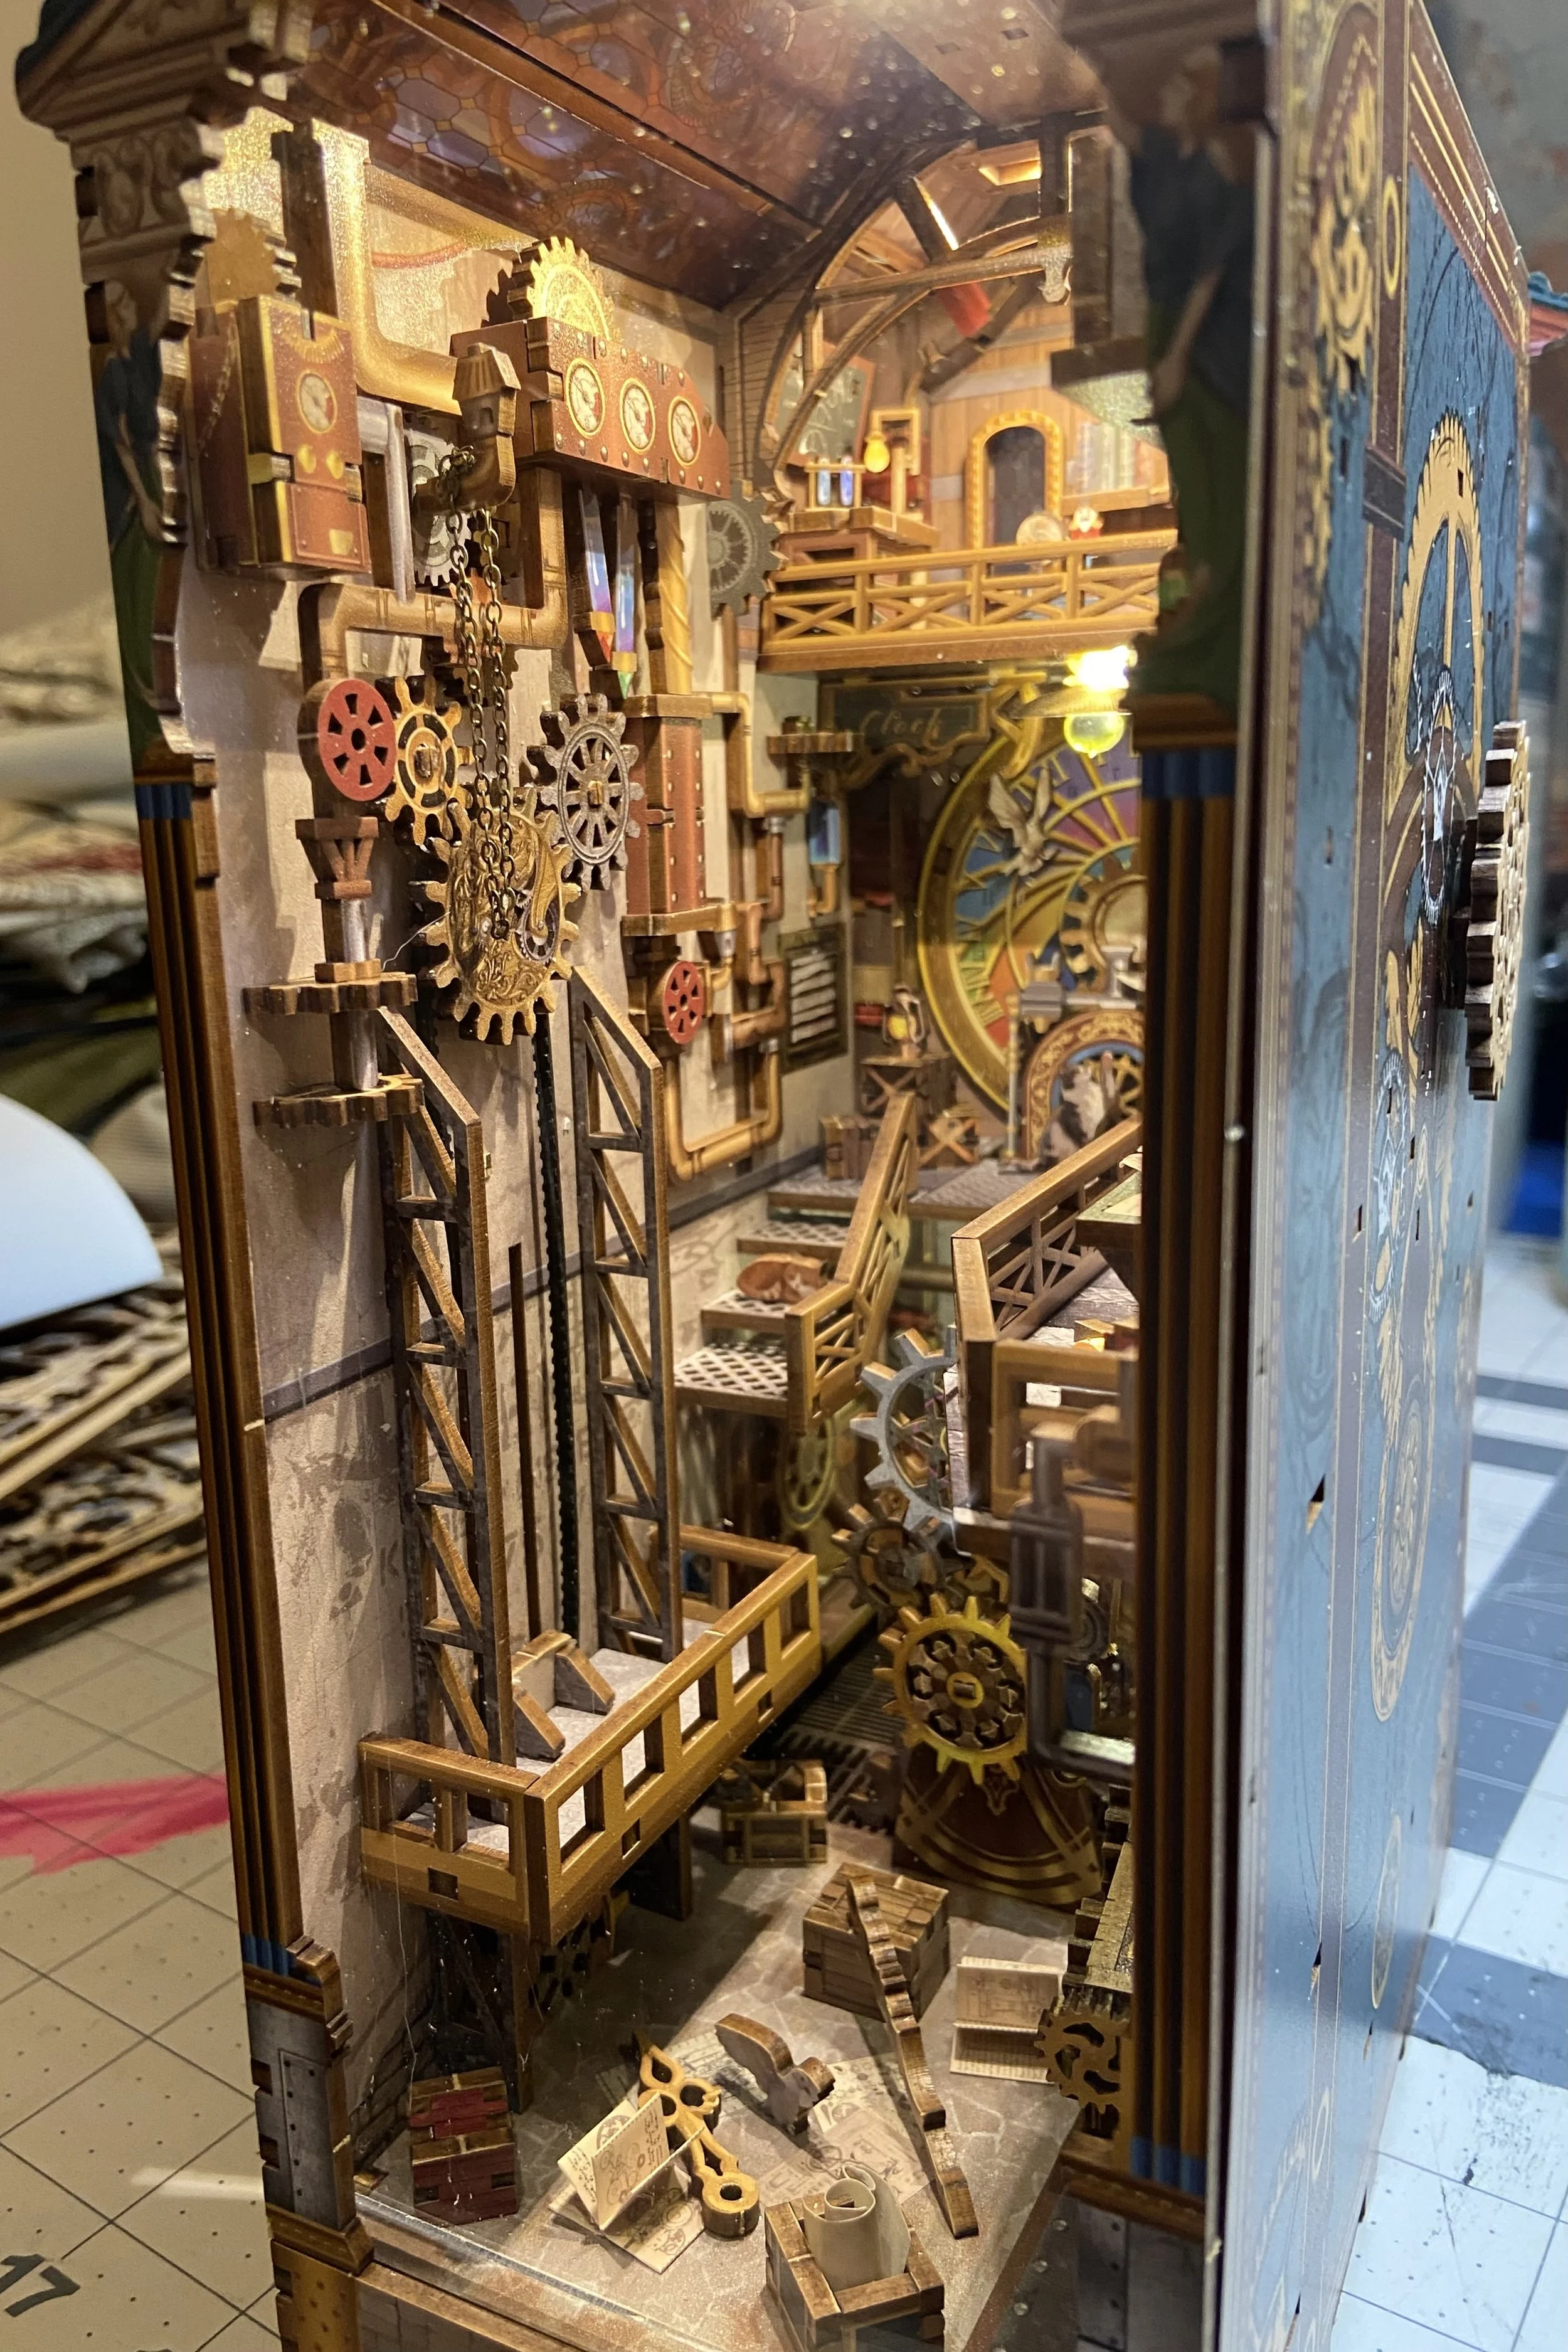
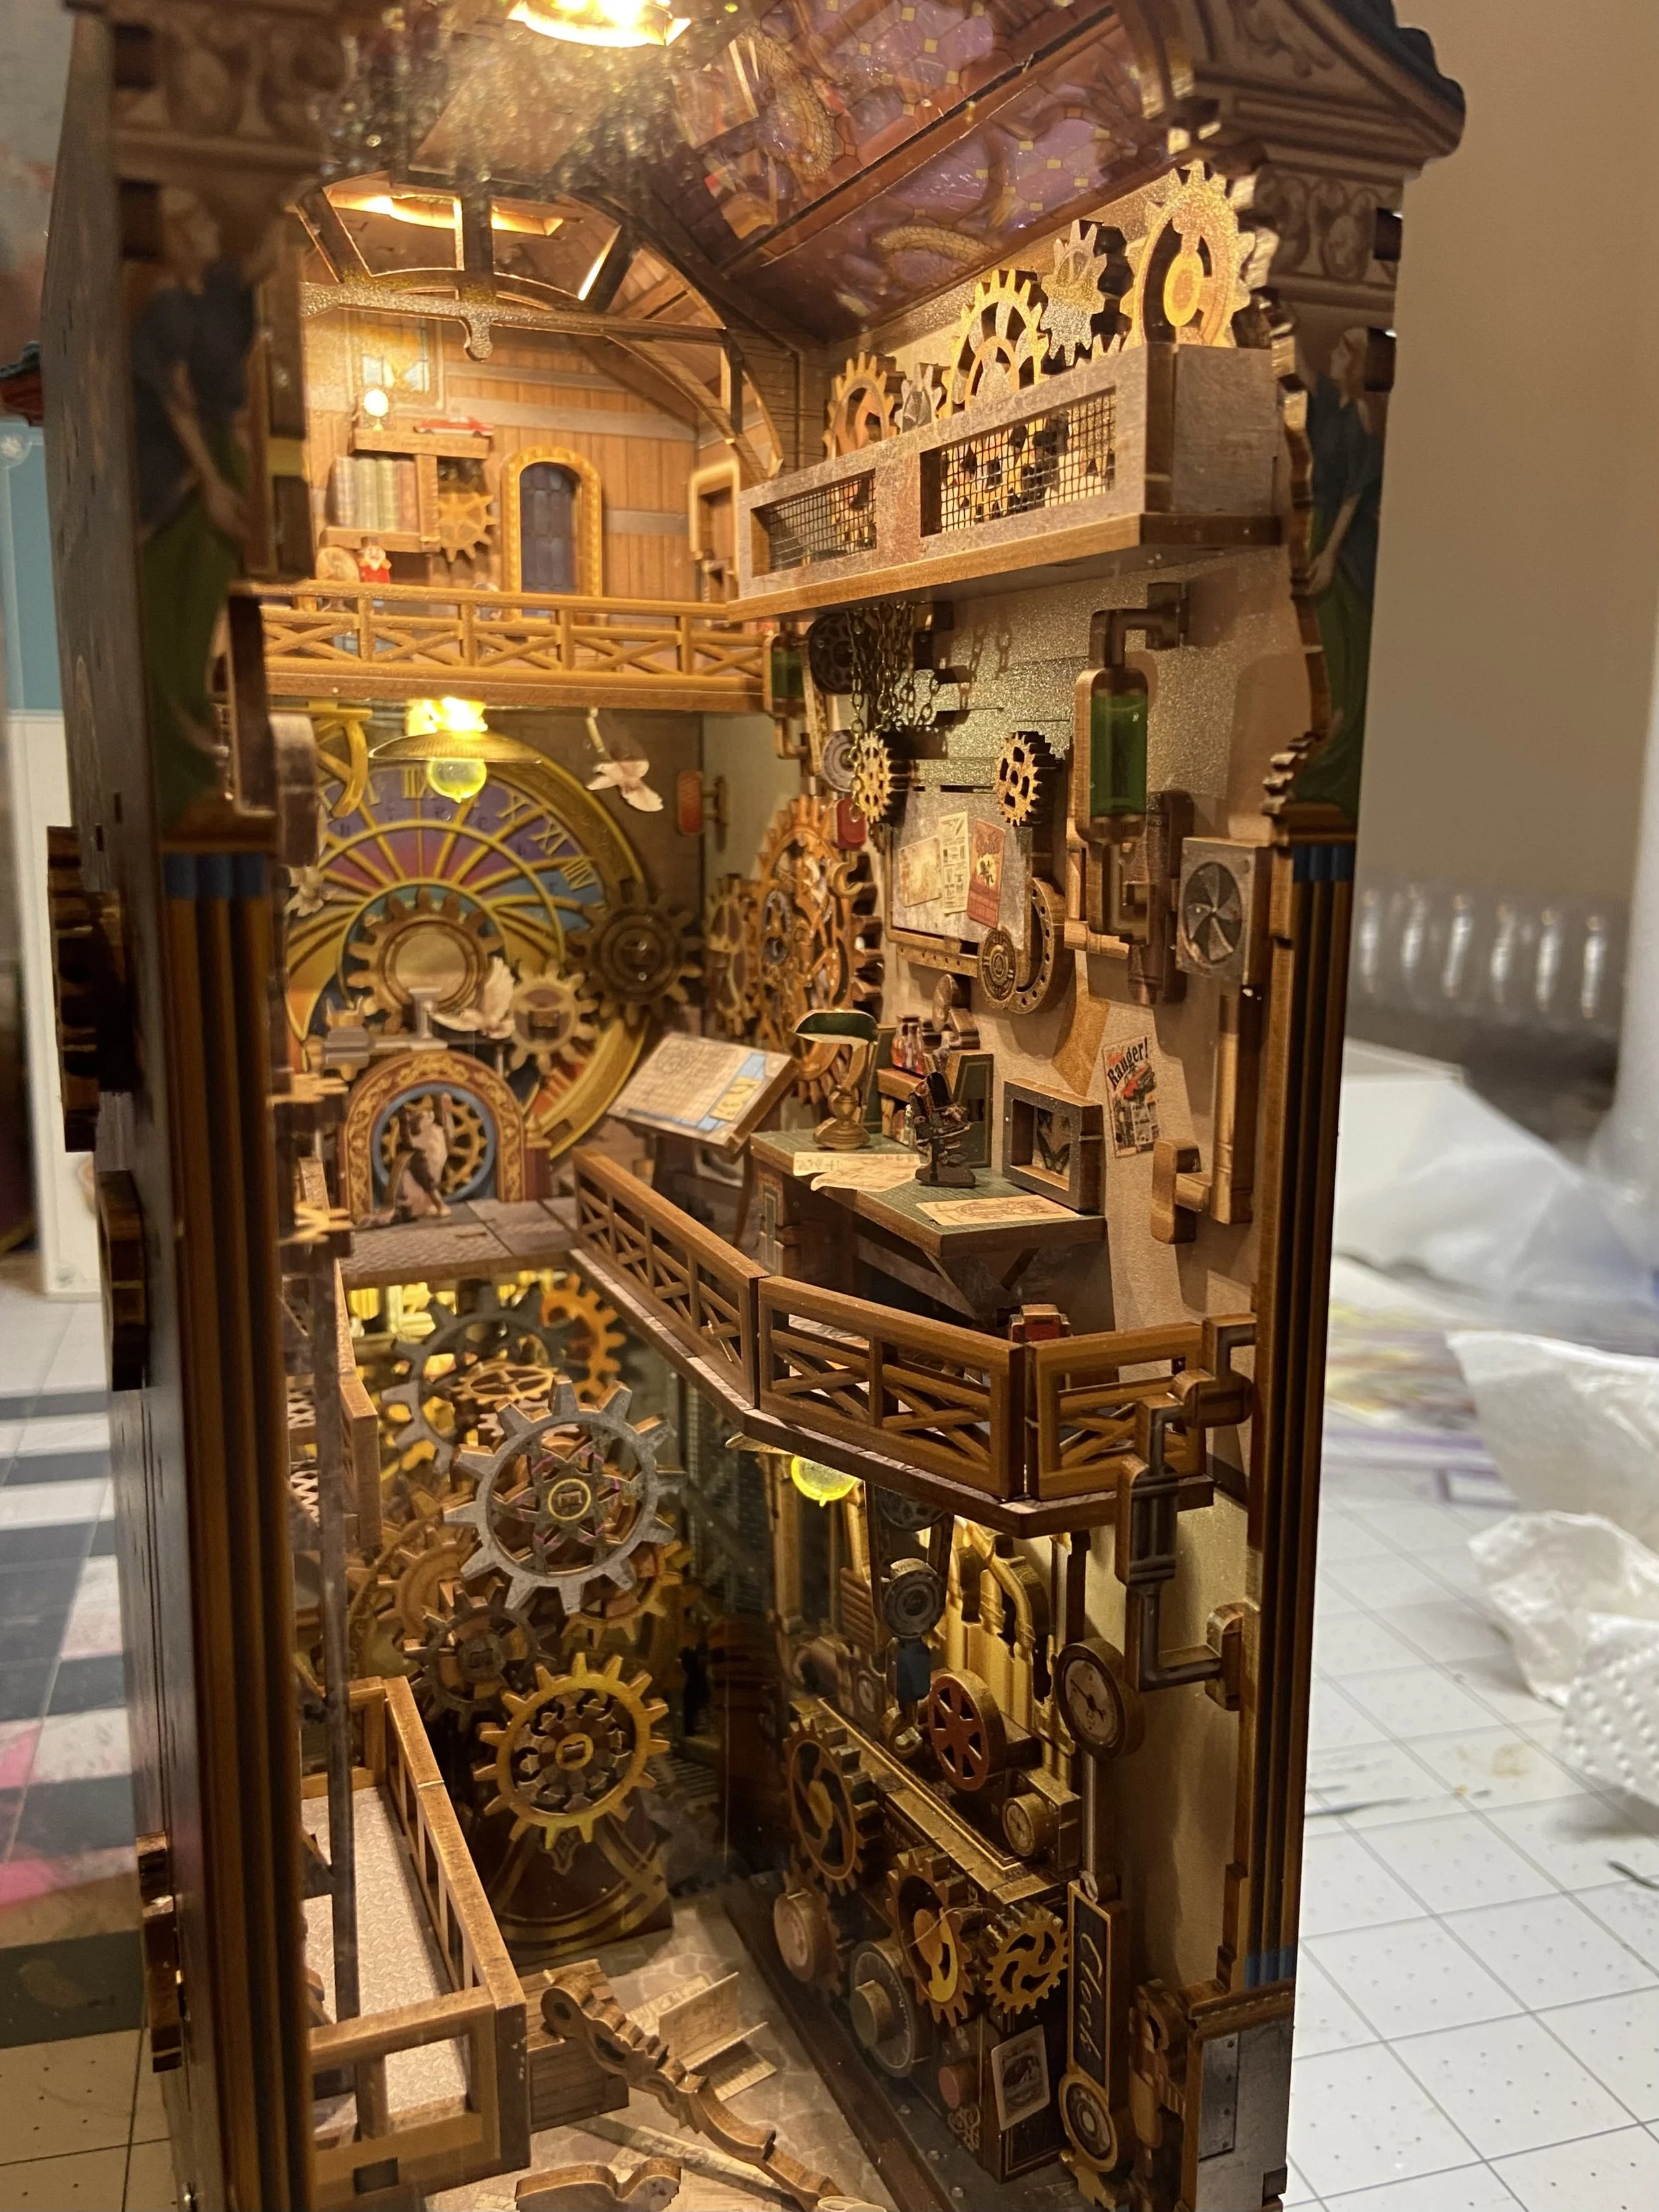
This kit was called Clockwork Tower, and it really lives up to the title! There are clockwork themes everywhere but also quite a lot of rather steampunk details, not just all the extra gears but all the steam pipes as well. It’s absolutely gorgeous.
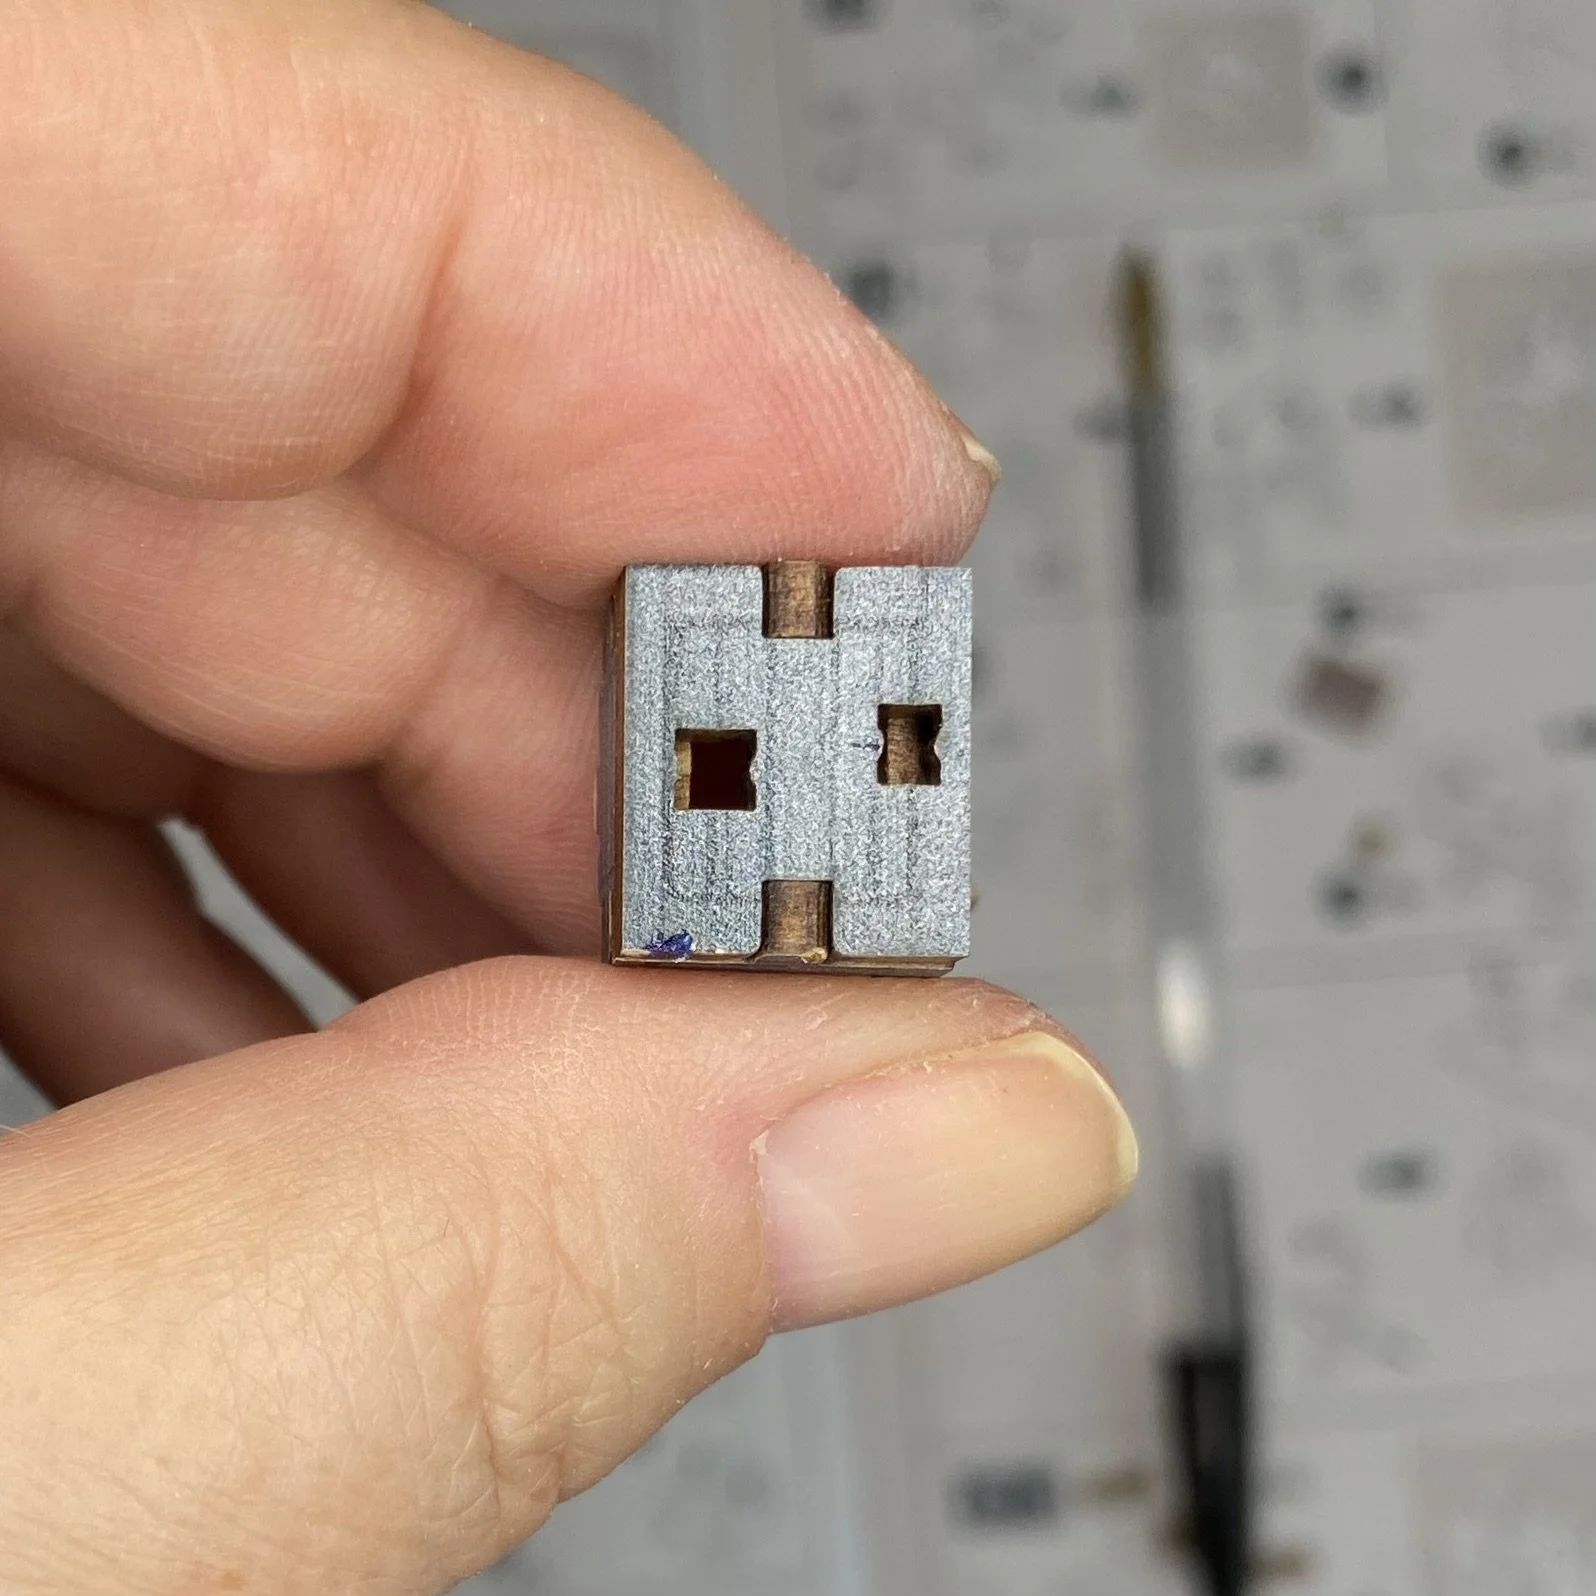
Any paper pieces that needed to be stuck onto anything were already in the form of stickers, so no need to glue them. And like the last Tonecheer kit, there are lots of ways to tell if you have a piece in the right position. Consider the top of this little box that I put together: it’s very easy to tell which decorative pieces will go in which place because the slots are slightly (but noticeably) different sizes. I cannot tell you how helpful this is! The instructions are great and detailed, but even the very best instructions can cause a little confusion about the orientation of various pieces.
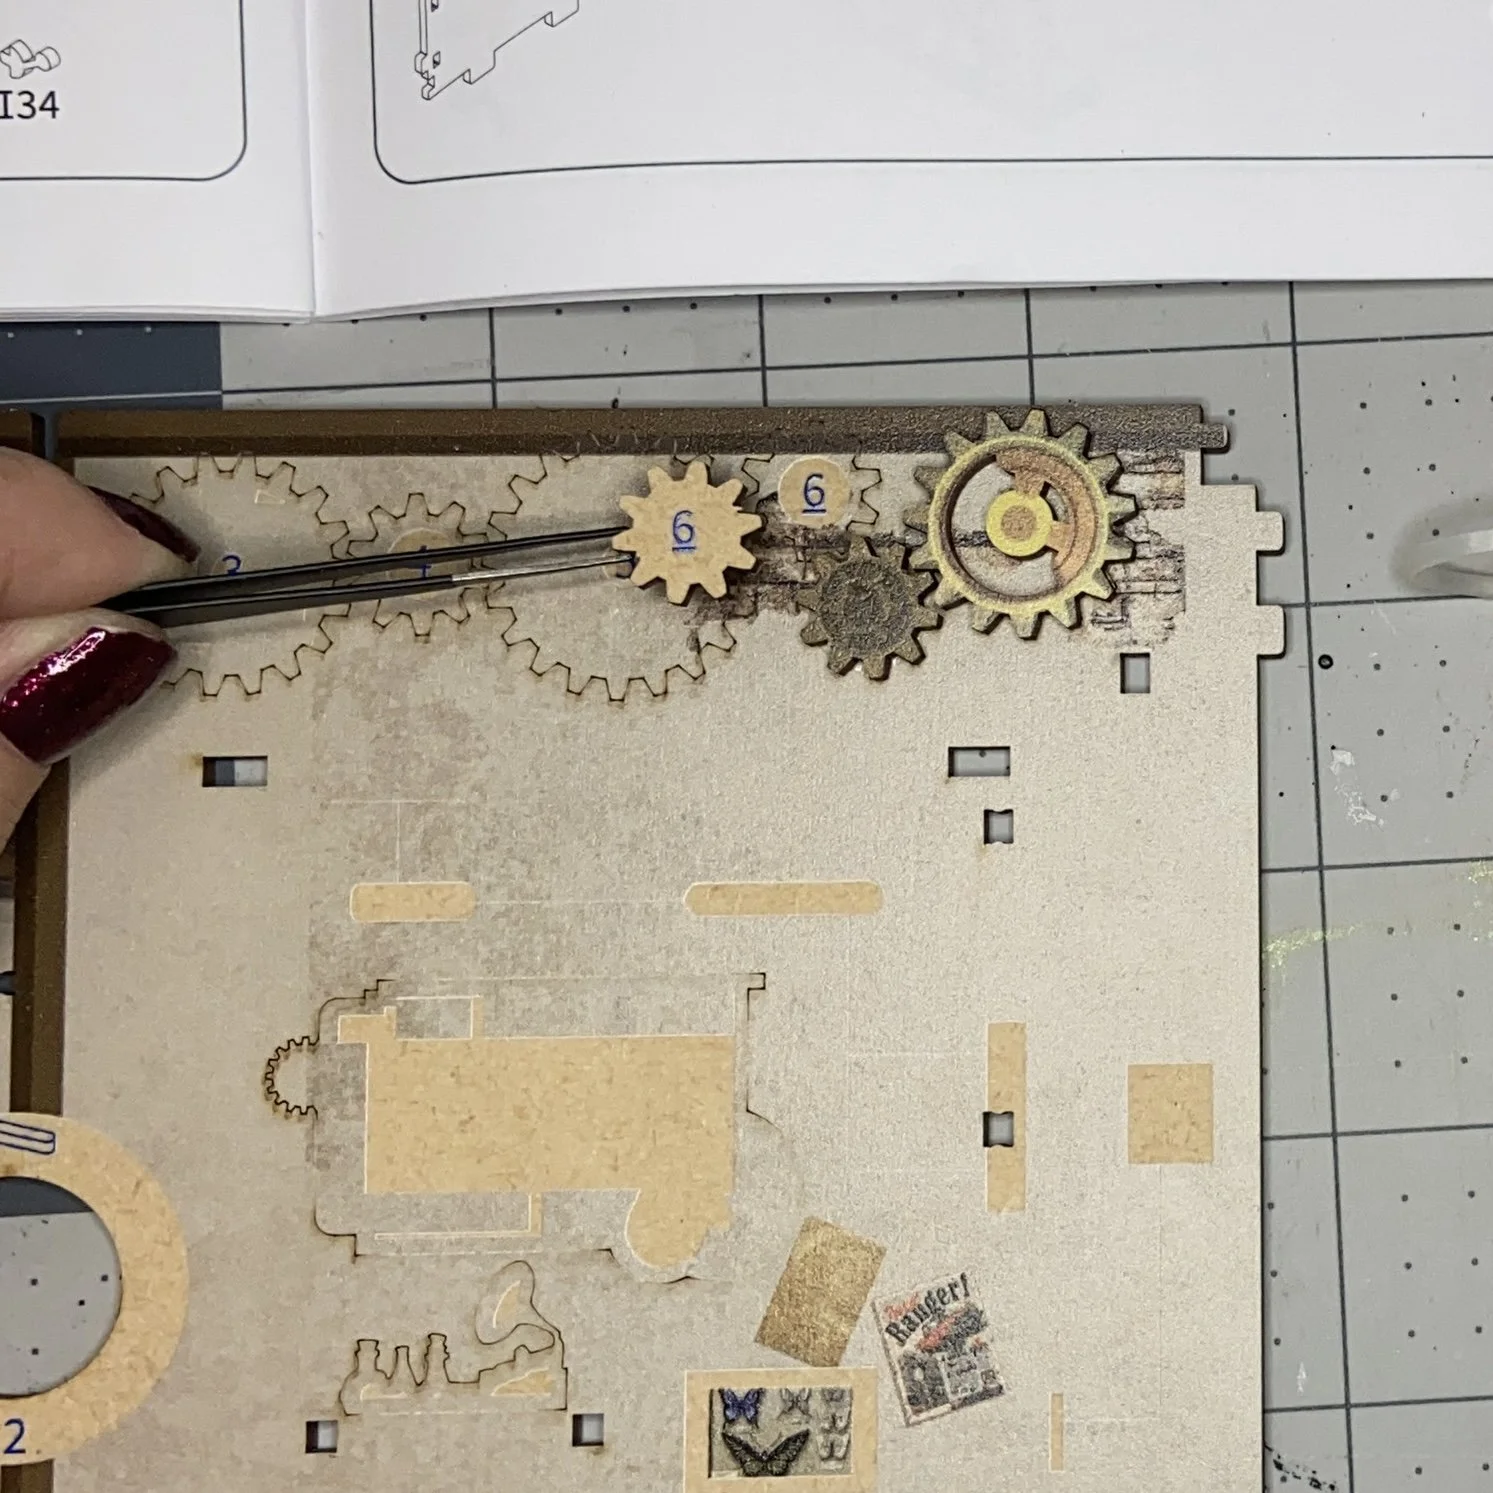
Another big help is the fact that the walls are often sort of engraved with the shapes of the pieces that are to be glued on. And in a few cases, such as when there are a series of gears to be glued in place, there’s even a number on the wall that corresponds to a number on the listed gear. So helpful!
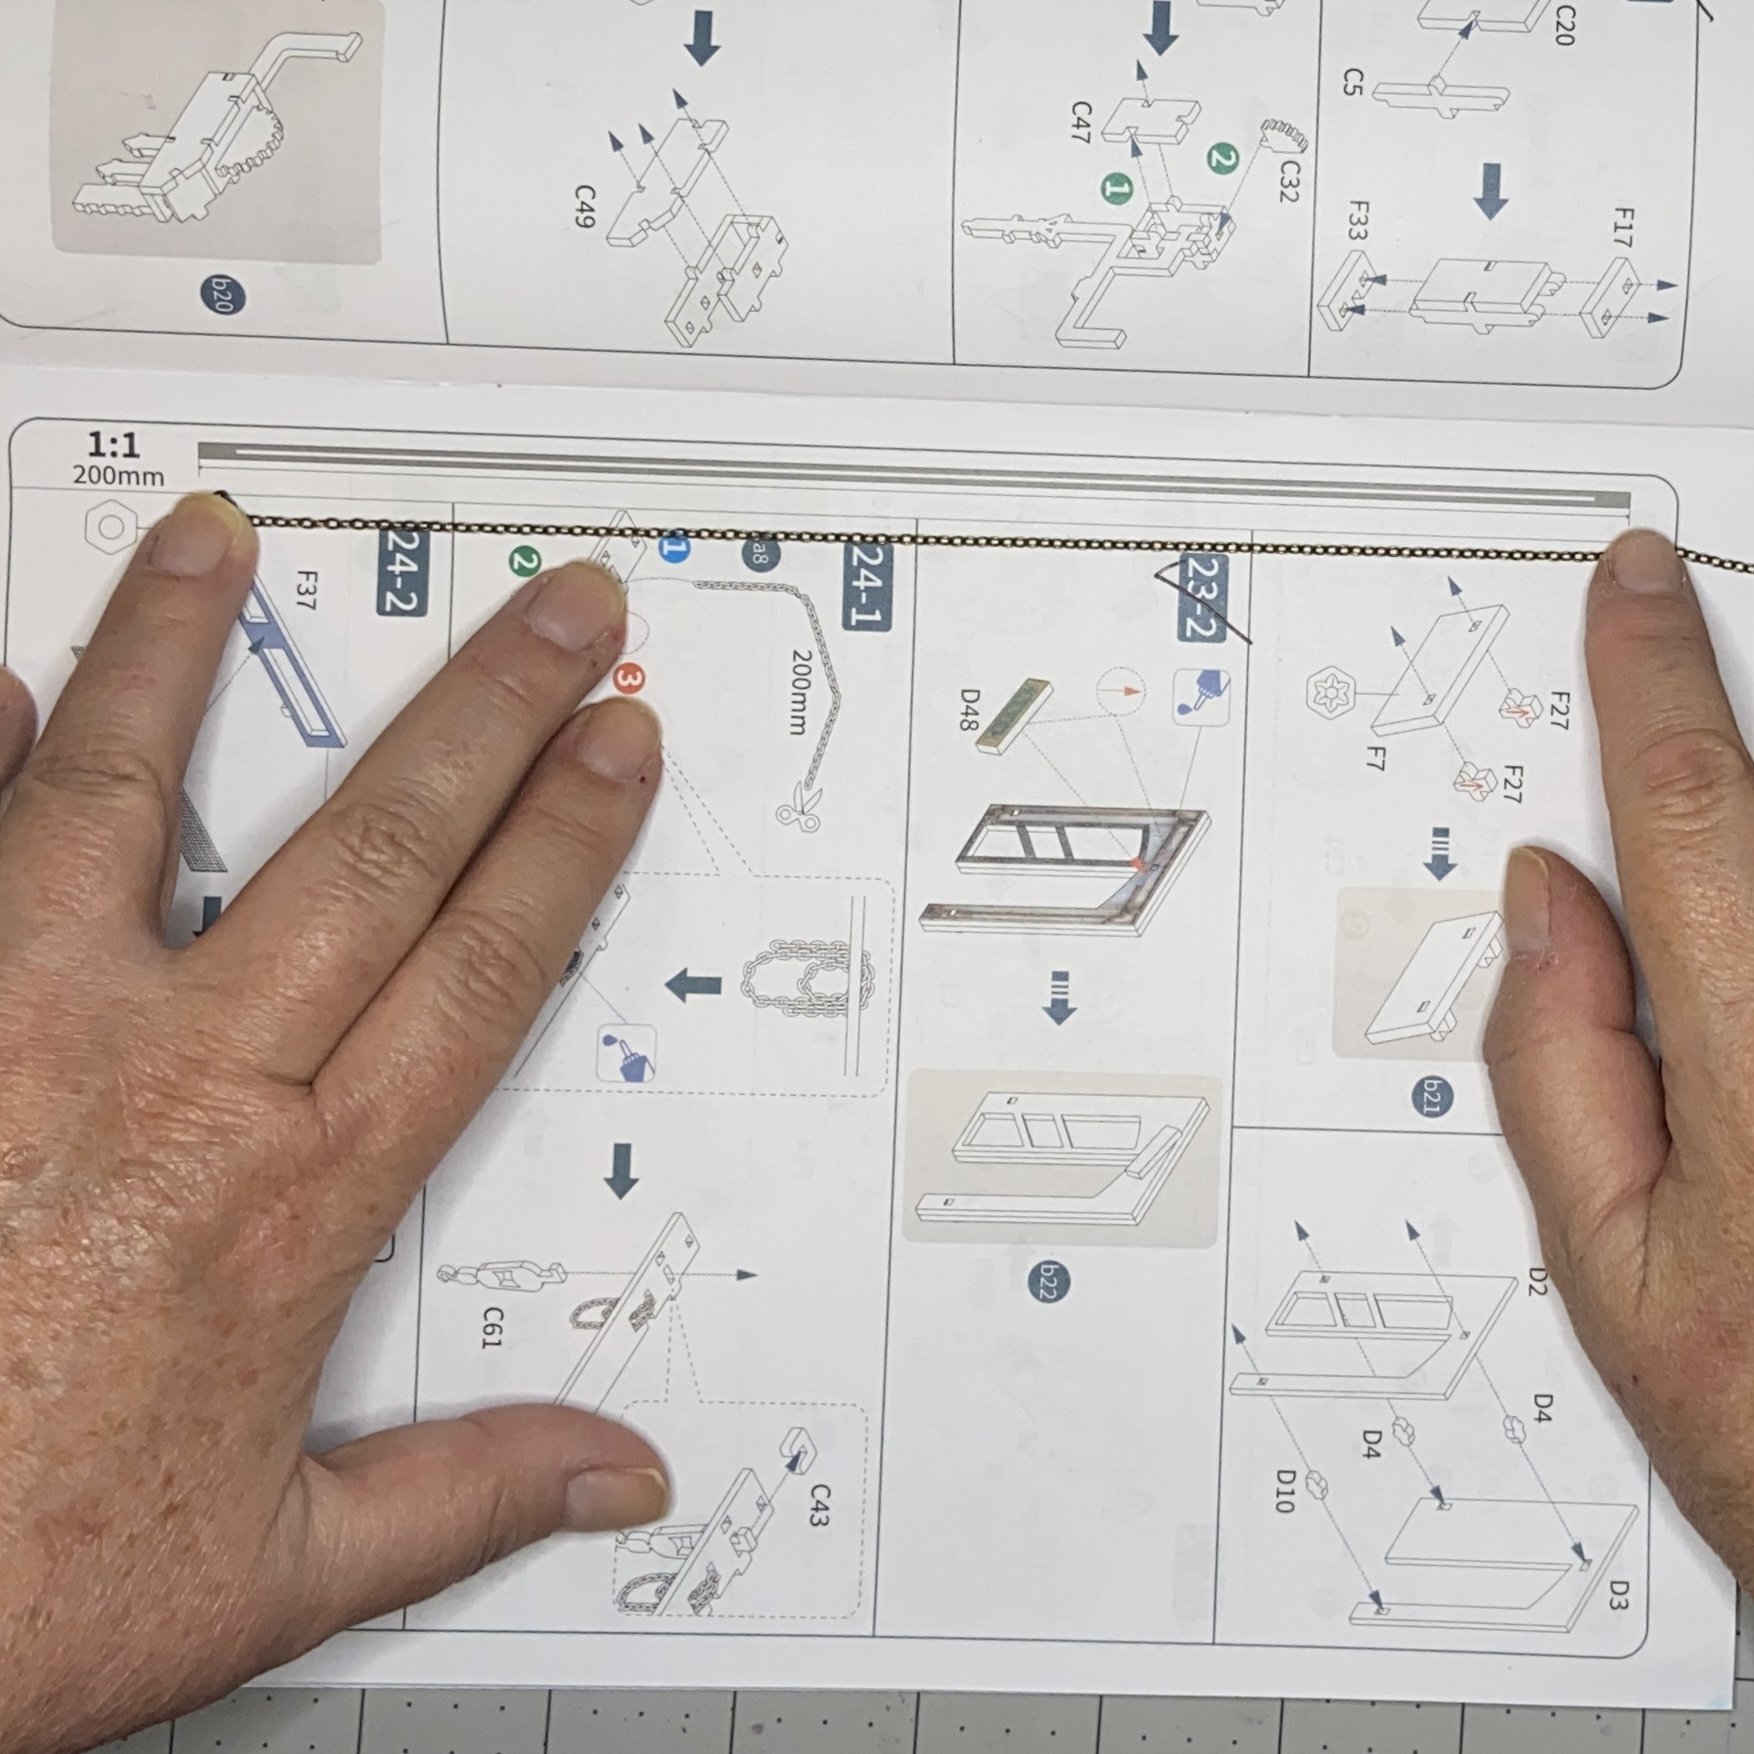
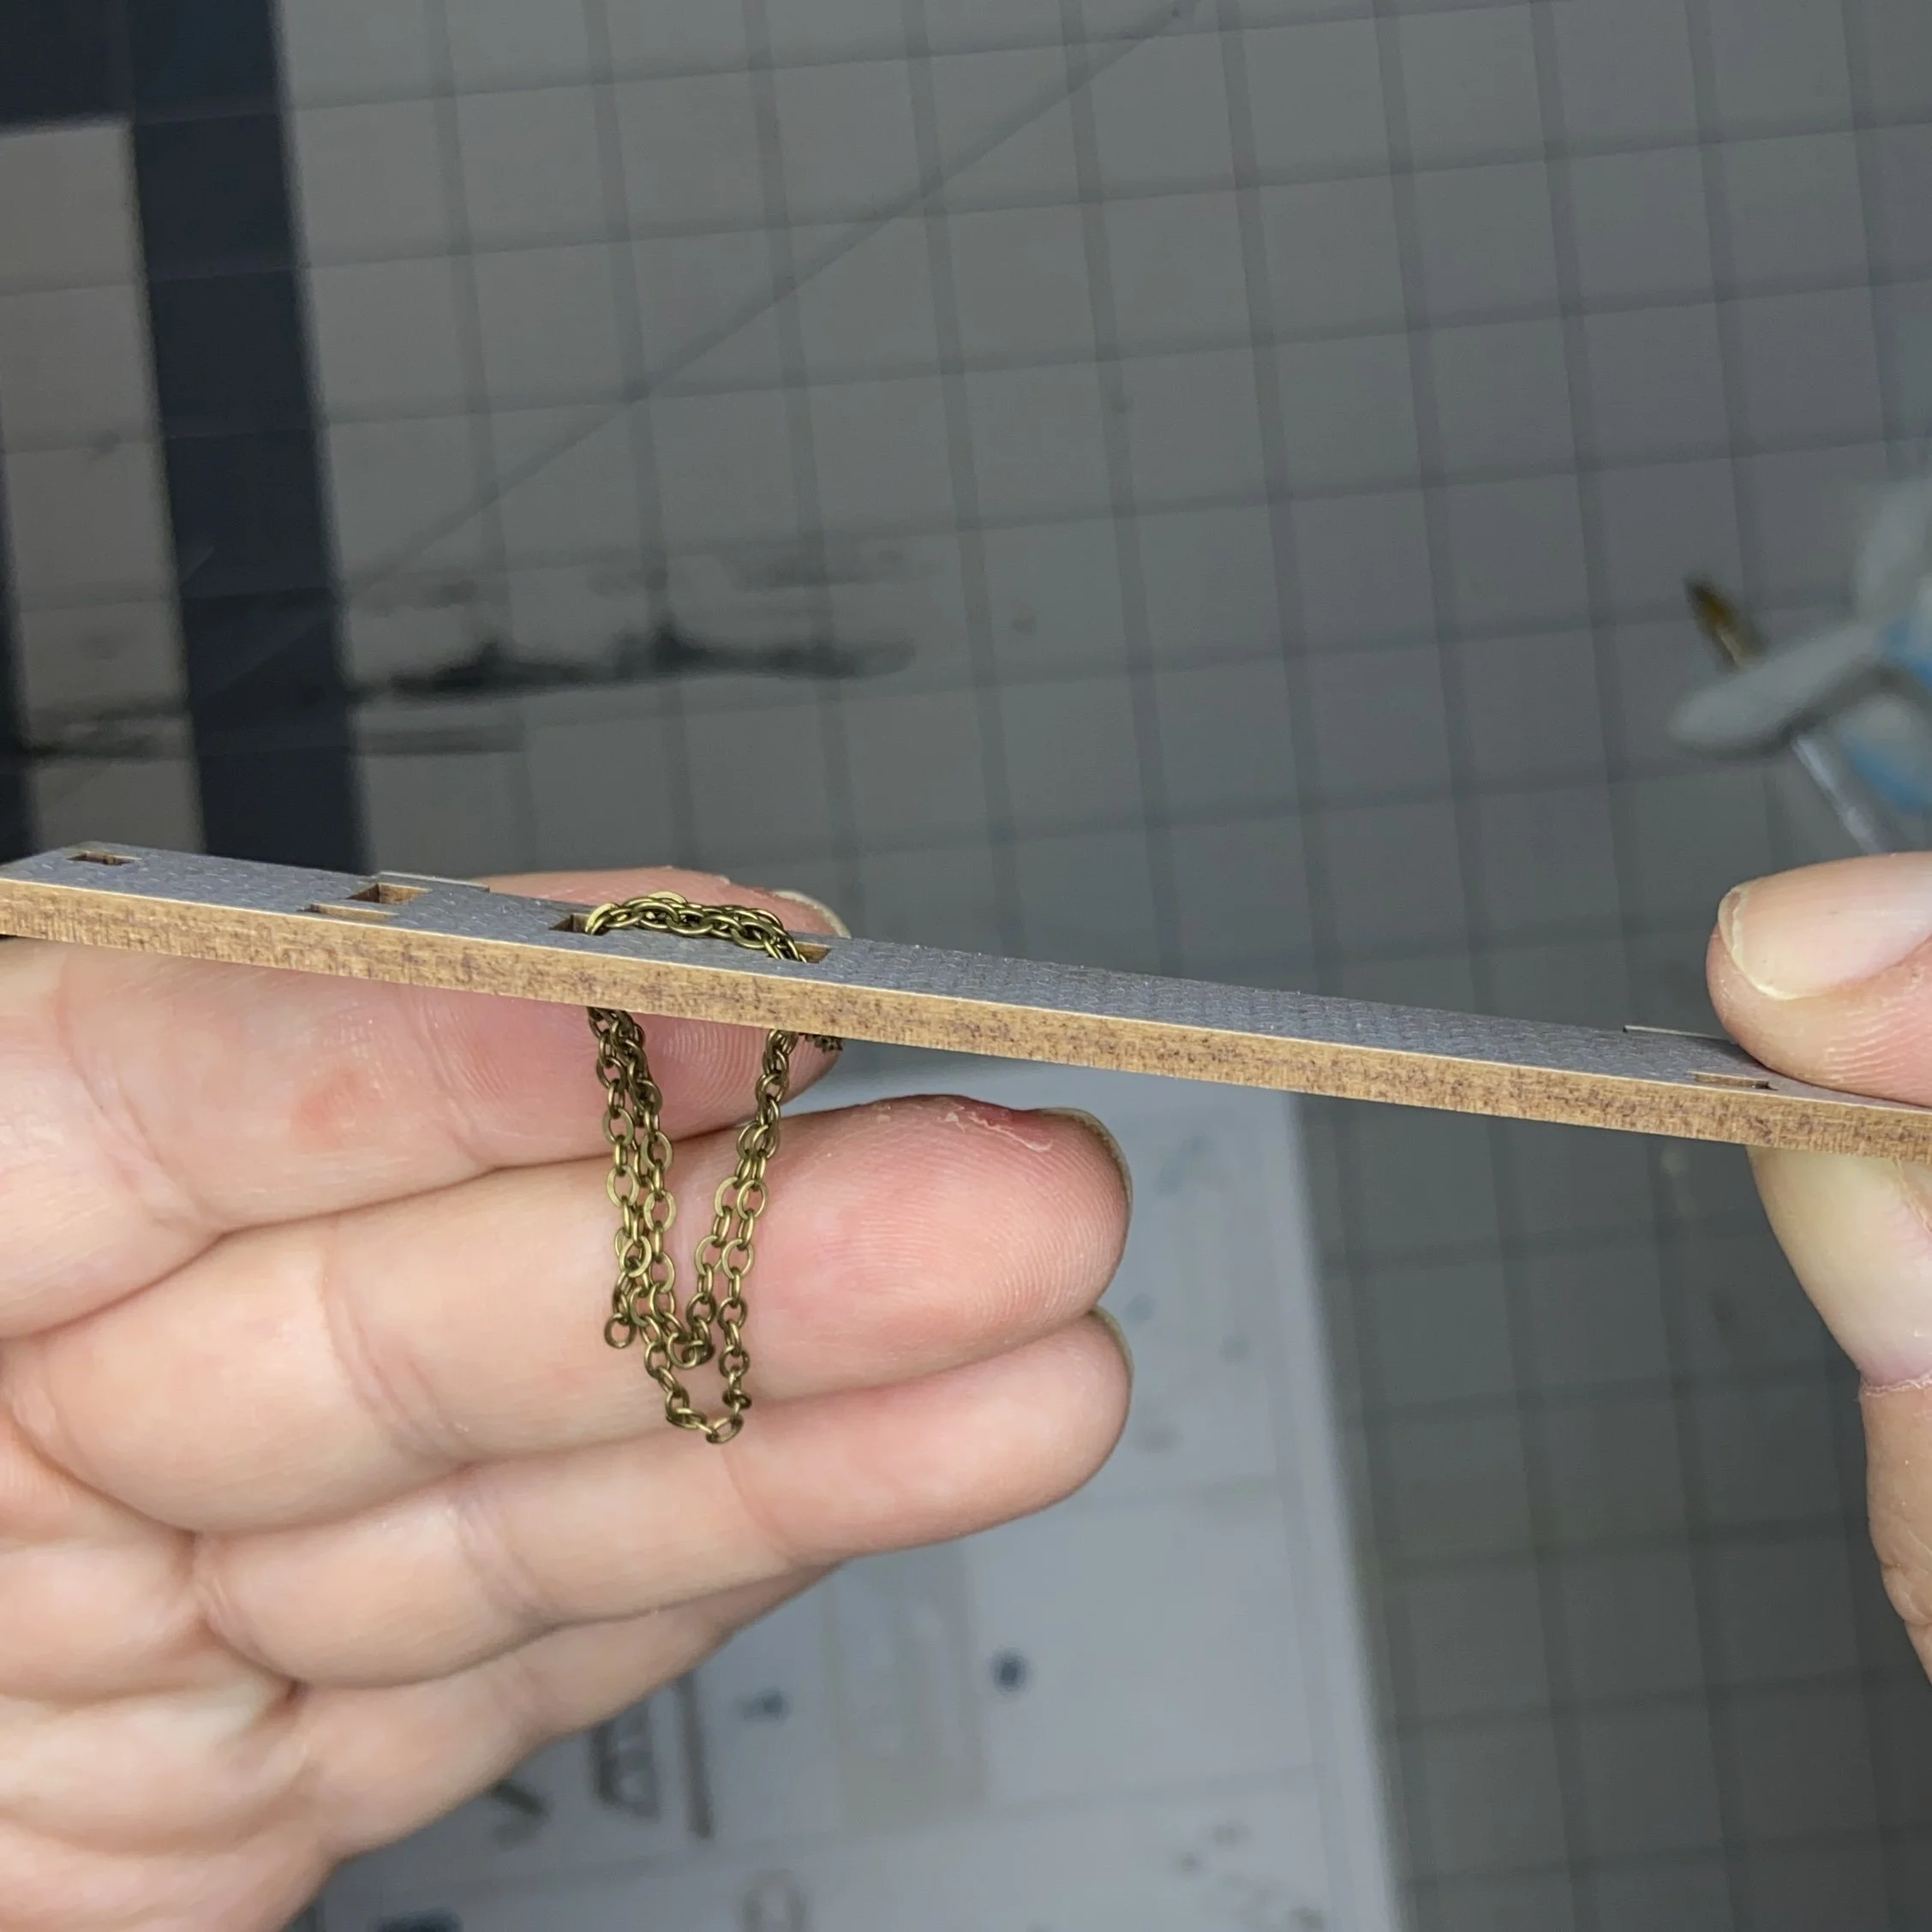
Some fine chain was included with the kit. The chain is completely decorative and doesn’t actually serve a function. Nonetheless, I needed to cut two pieces from the length of chain. On the page where the instructions were located, the company included an actual measure of the length needed. So helpful! Then the chain was wrapped around the appropriate ledge and glued in place.

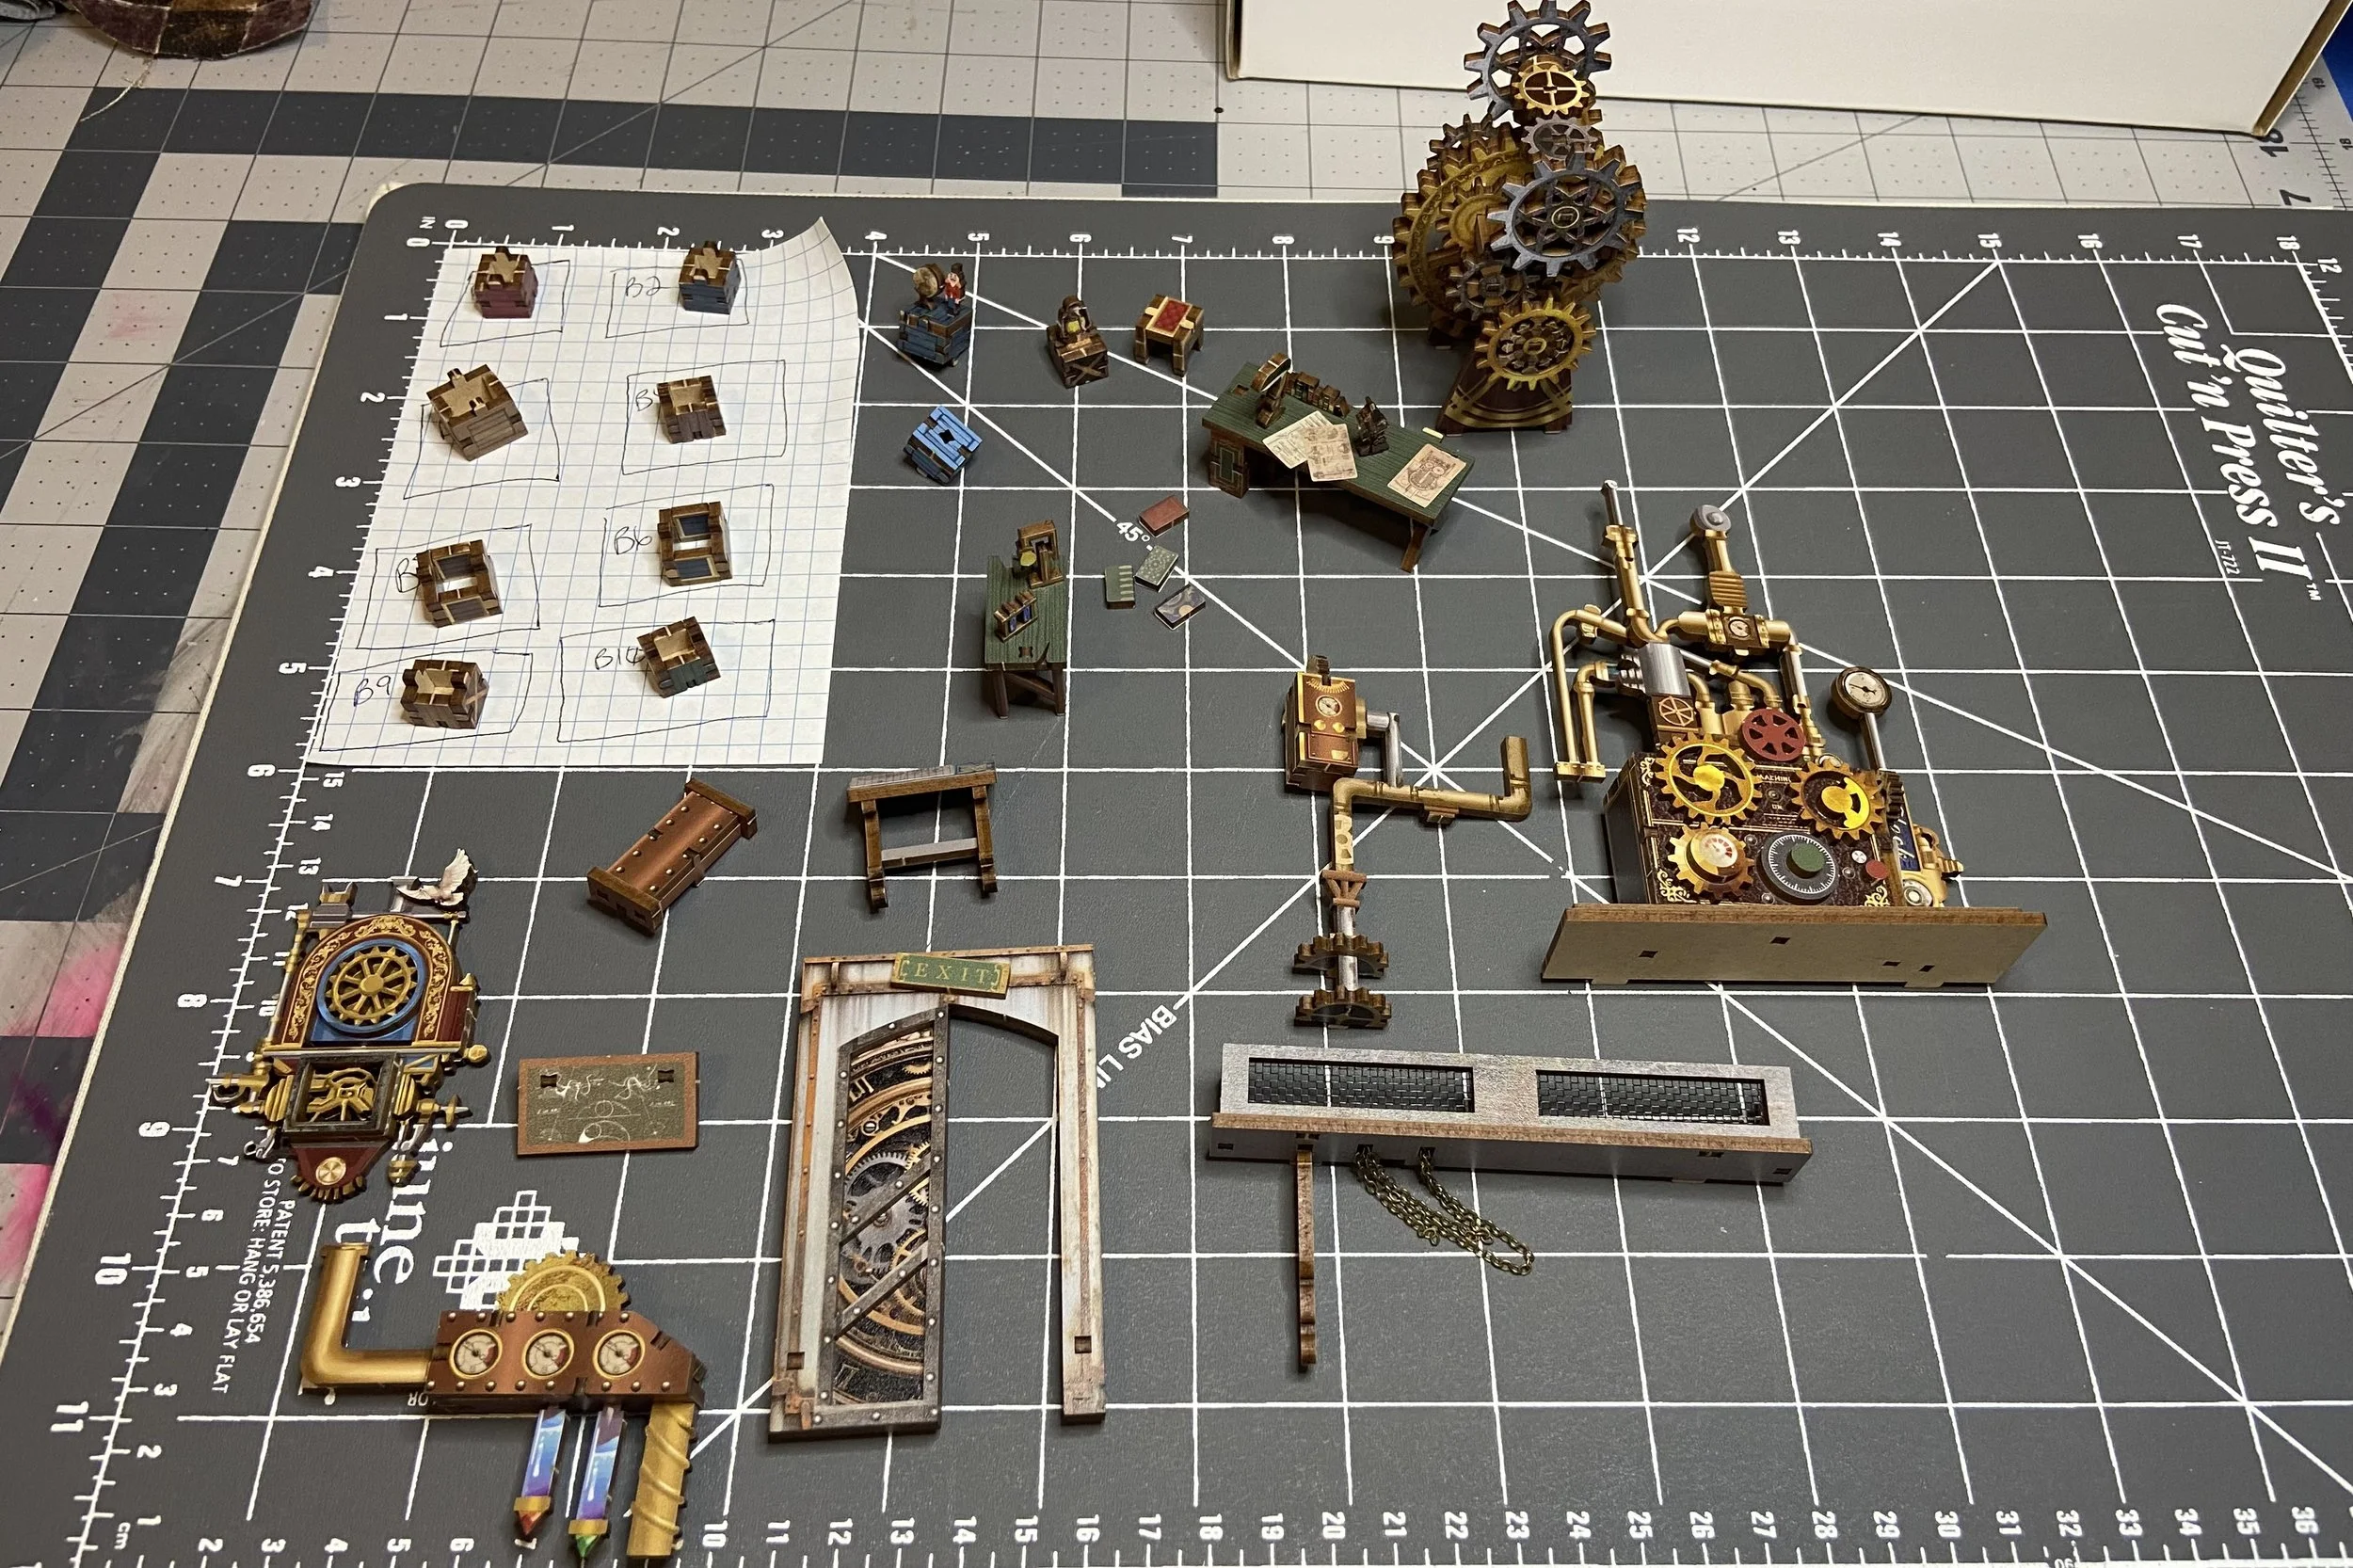
There were quite a number of pieces that needed to be pre-assembled before the nook actually started to take shape. Among them were a bunch of boxes that mostly looked identical. I was not confident in my ability to tell them apart later, so I laid them out on a piece of paper that labeled them according to the directions. I did end up with a nice little display of miniatures before I started to install them.
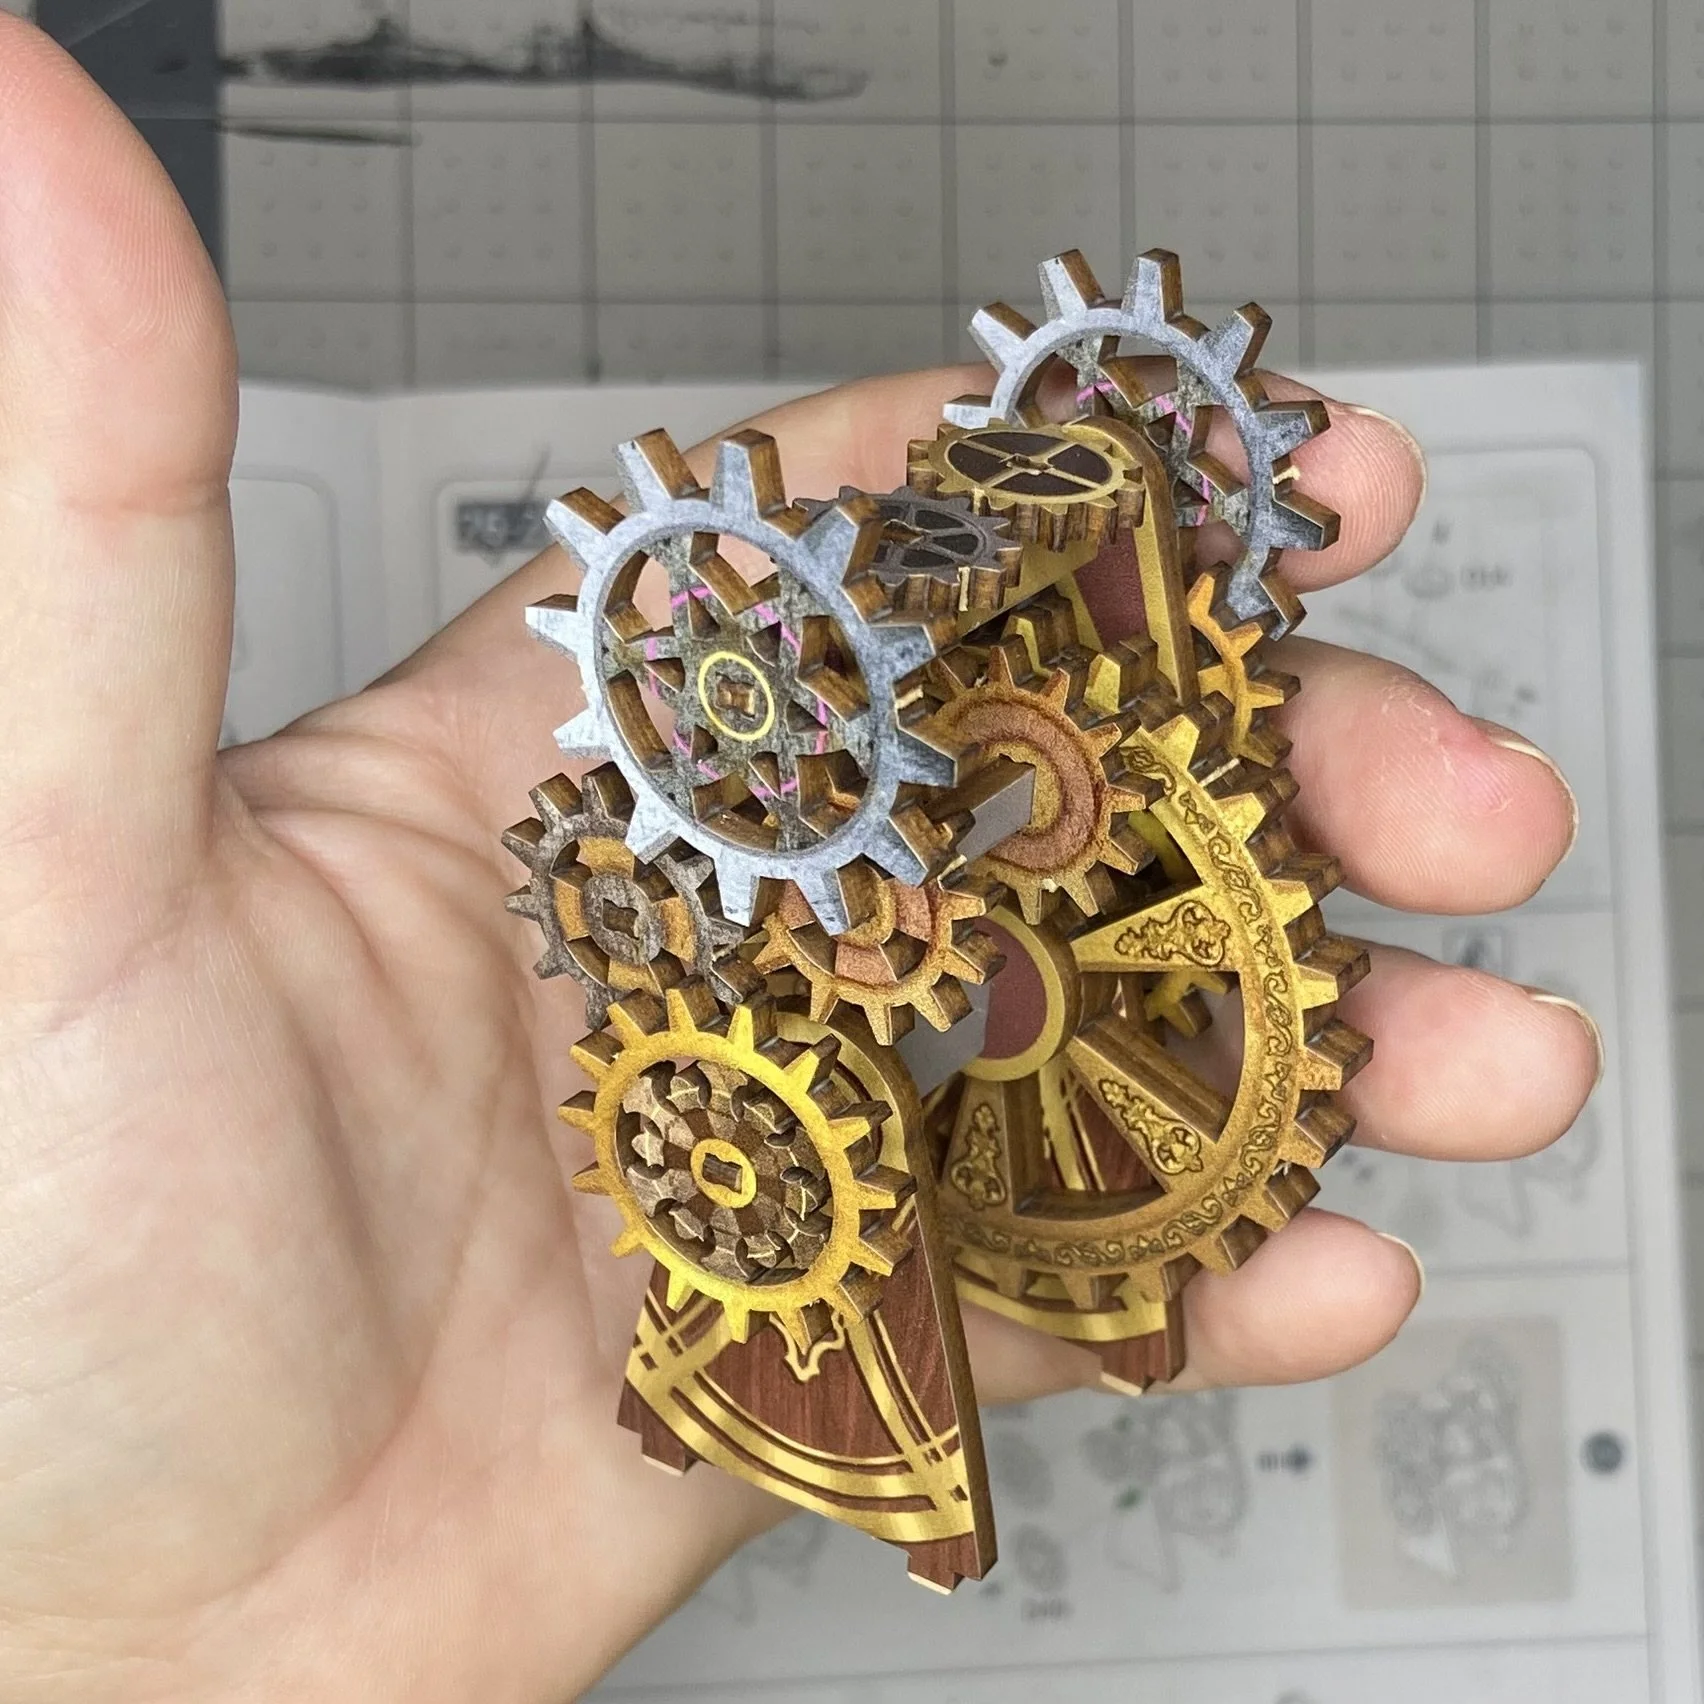
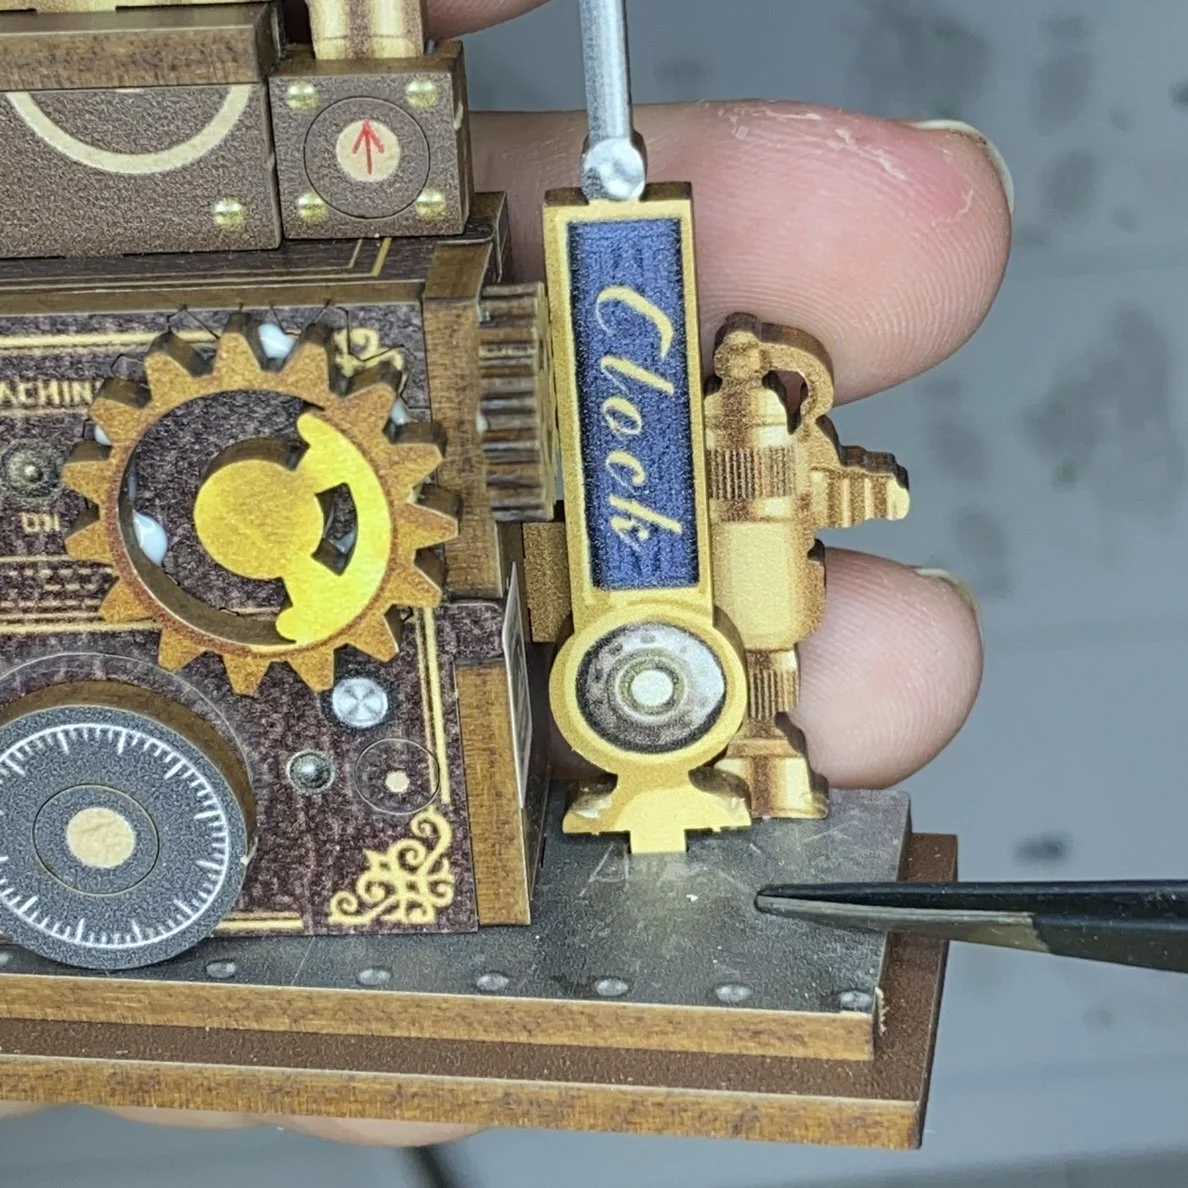
A lot of the miniatures were “gear-heavy” and I had to pay real attention to the sequence of assembly and the orientation of the pieces. Although the kit is beautifully crafted and all the pieces do slot in where they are supposed to, the fit is often quite tight. And if one is pushing very hard on a long skinny piece to get it into its slot, it’s very easy to snap the piece in half. (Ask me how I know. No, wait, don’t ask me…I won’t be able to explain without using bad language.) In the case of the picture below right, you can see that I just gave up trying to push the piece in any further and left it as it was. Even I can’t see the problem portion in the finished booknook.
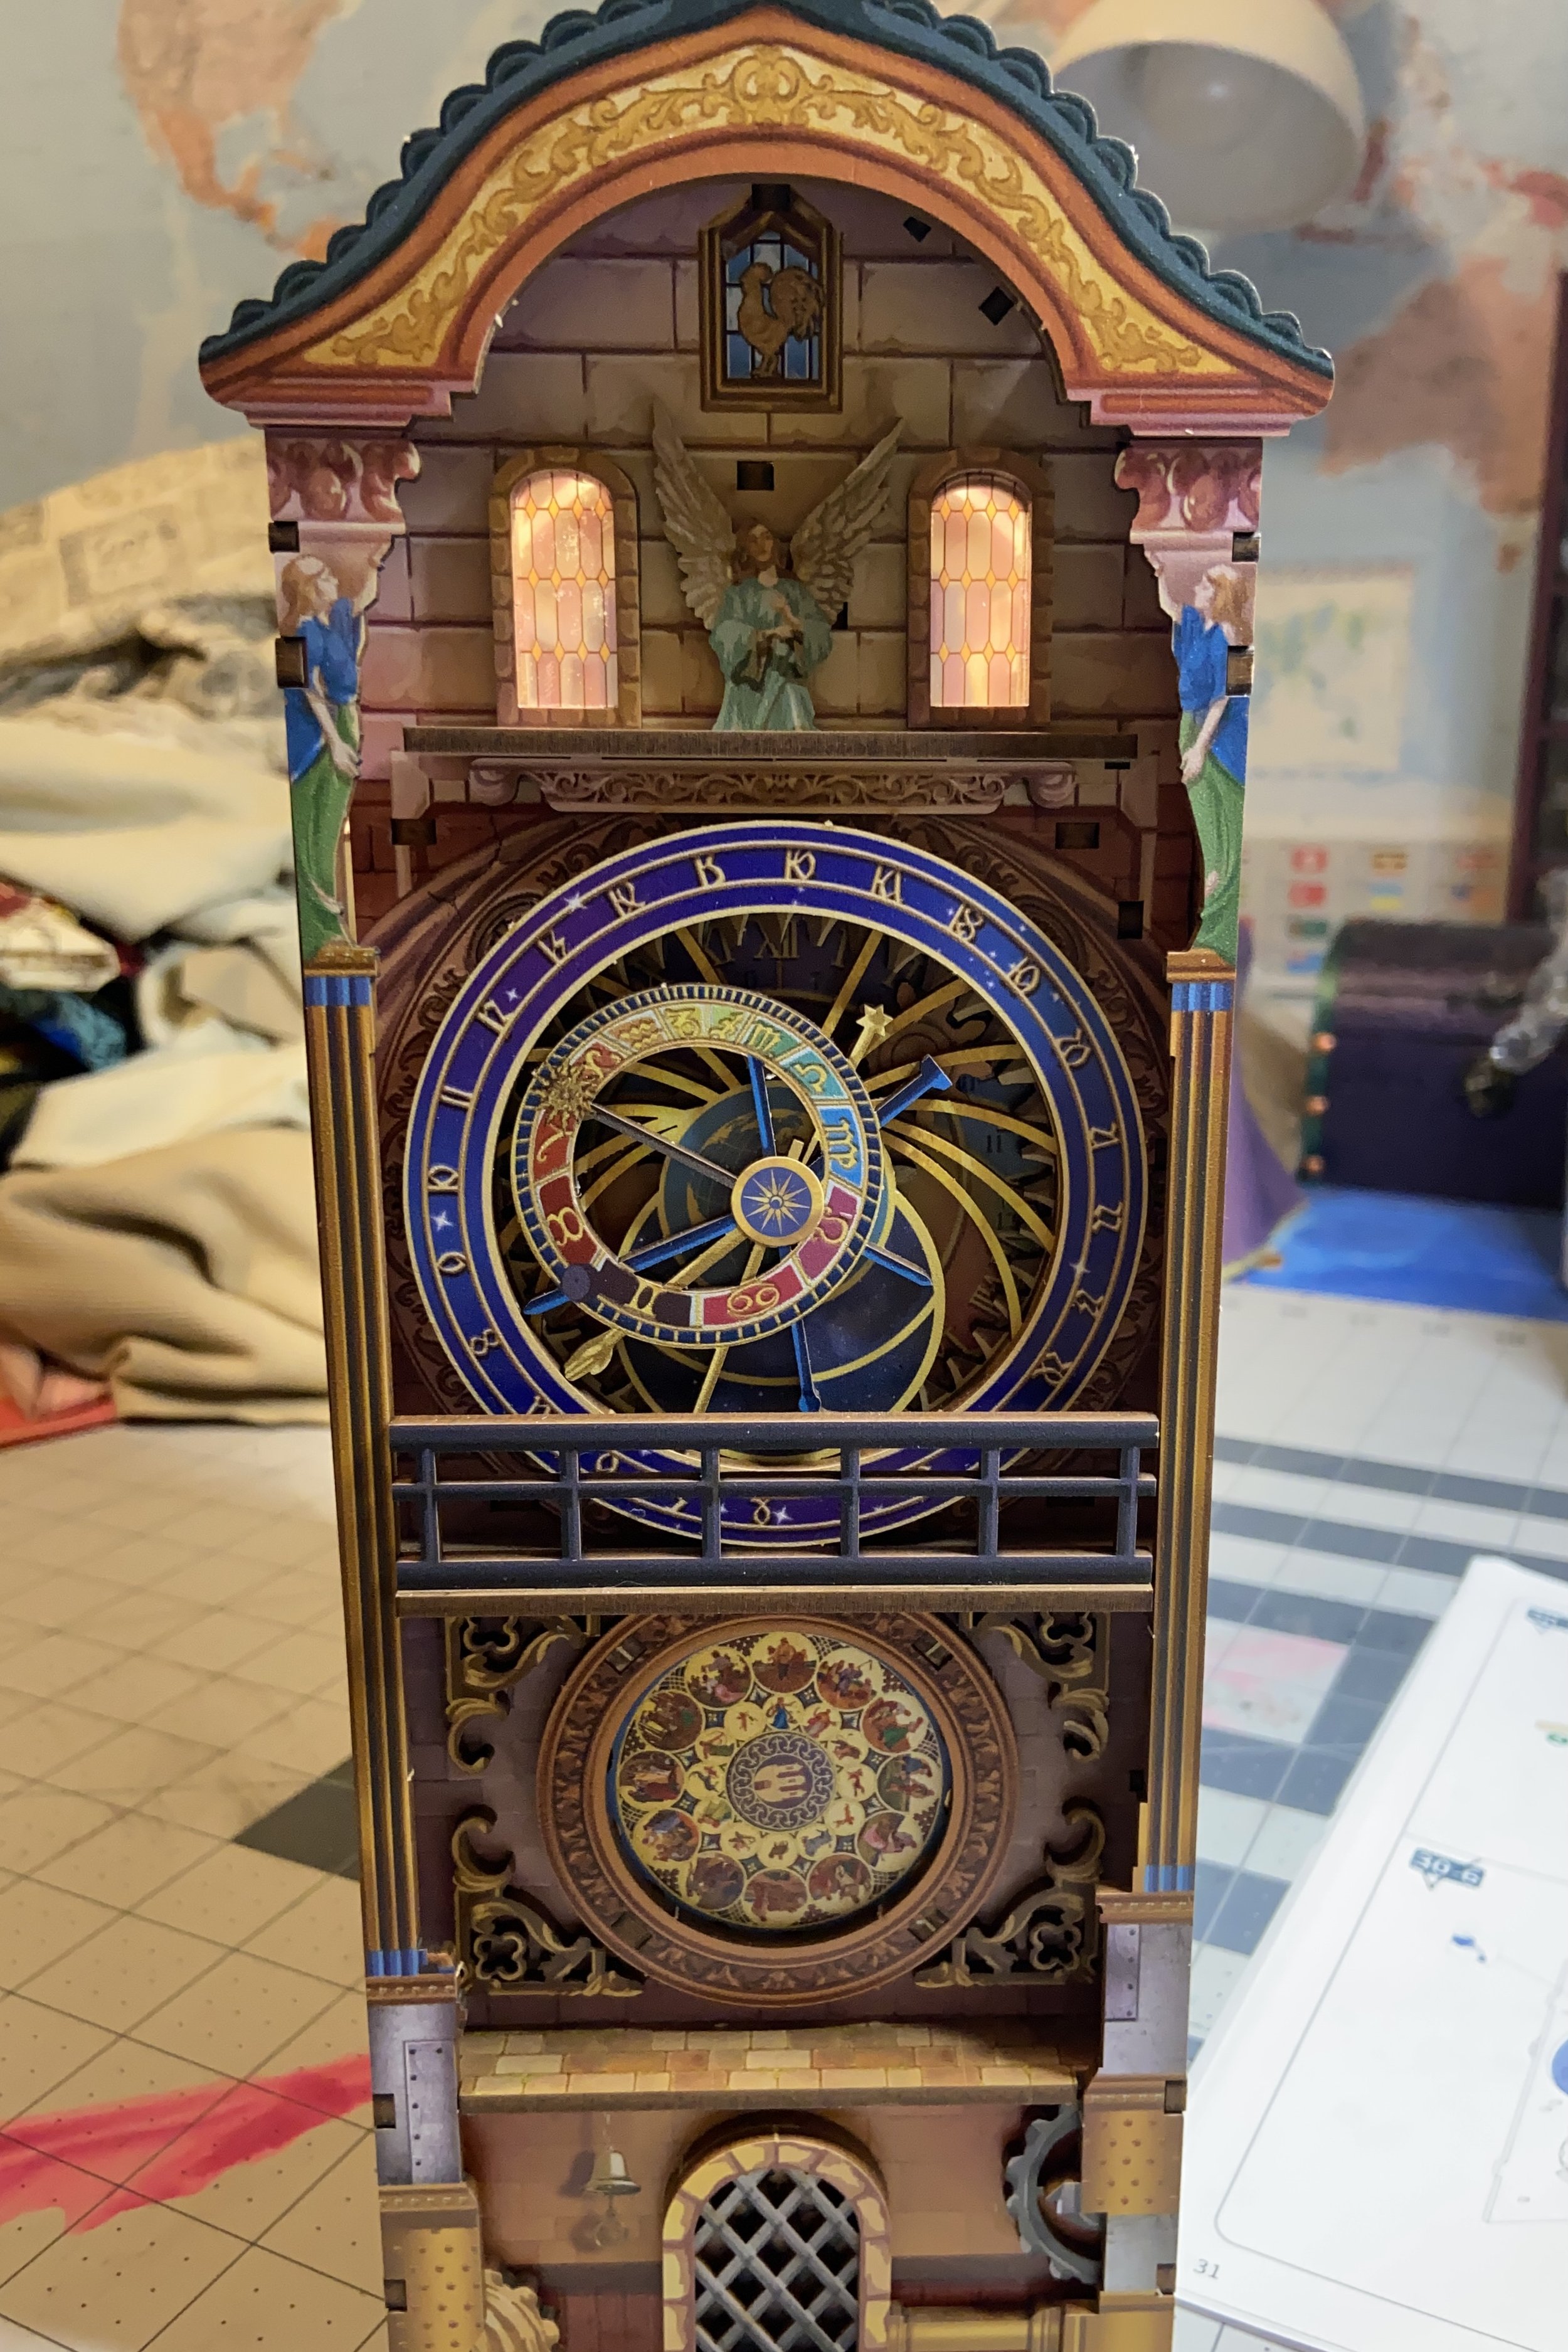
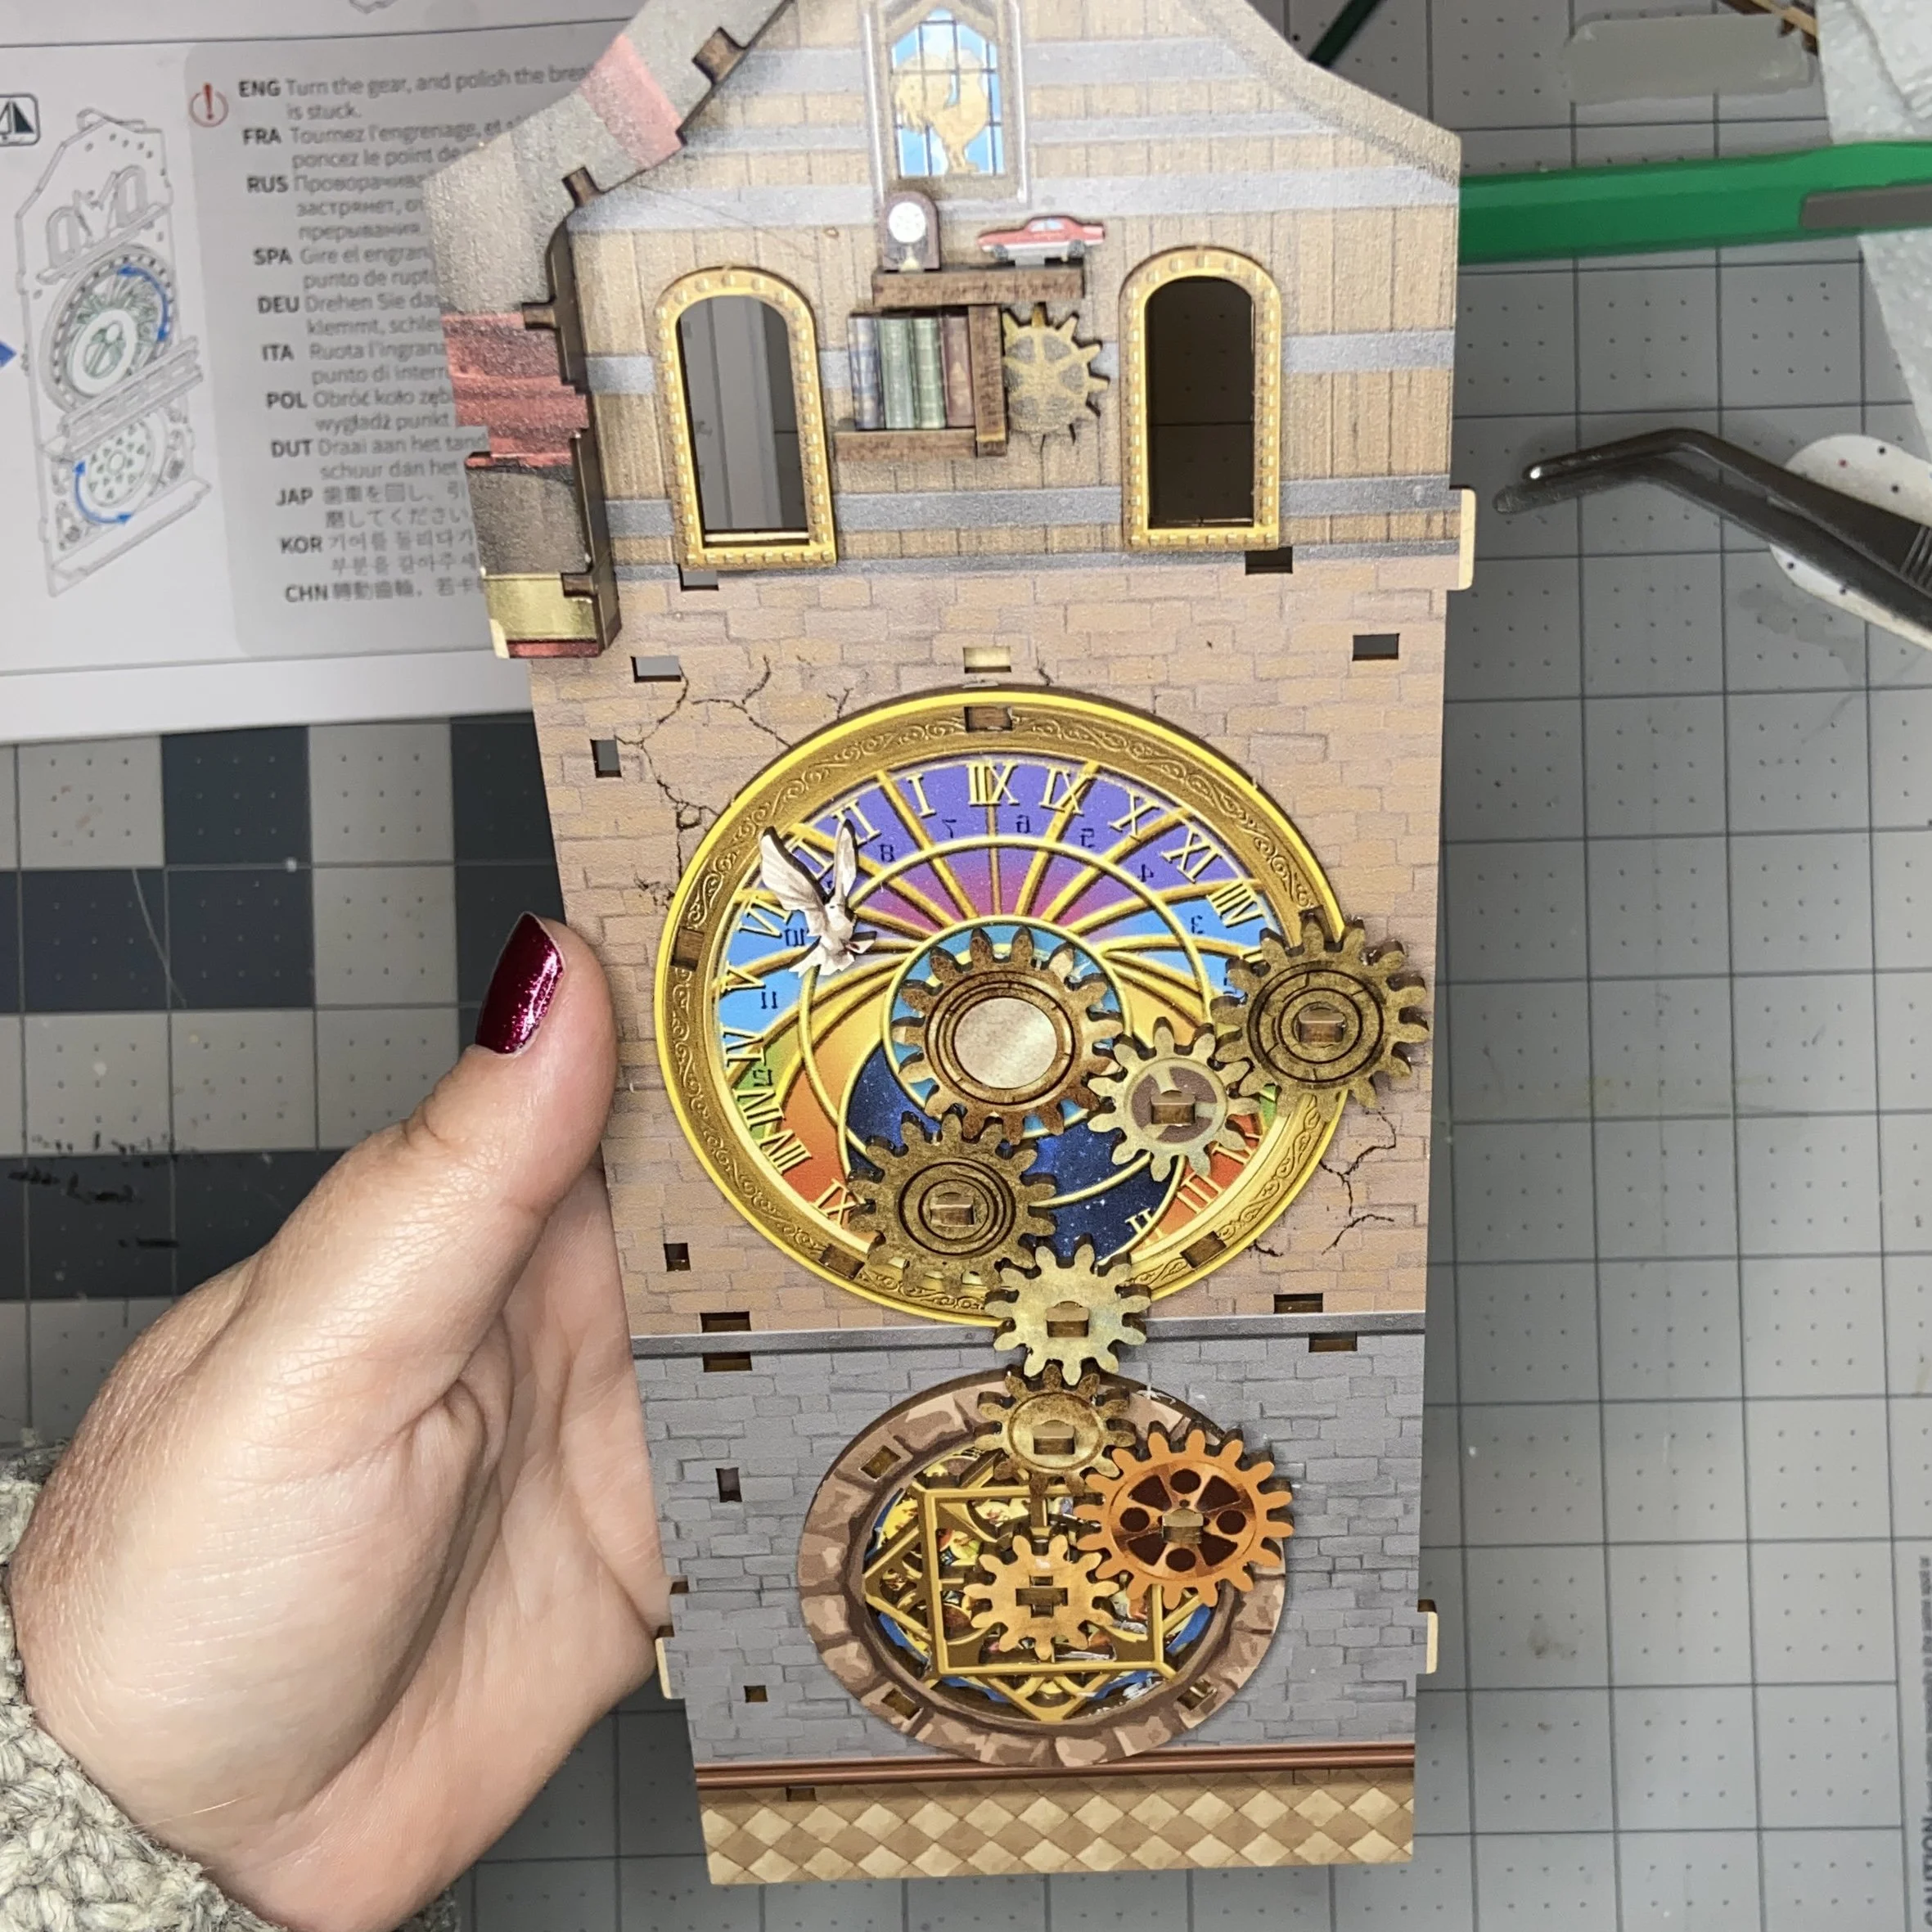
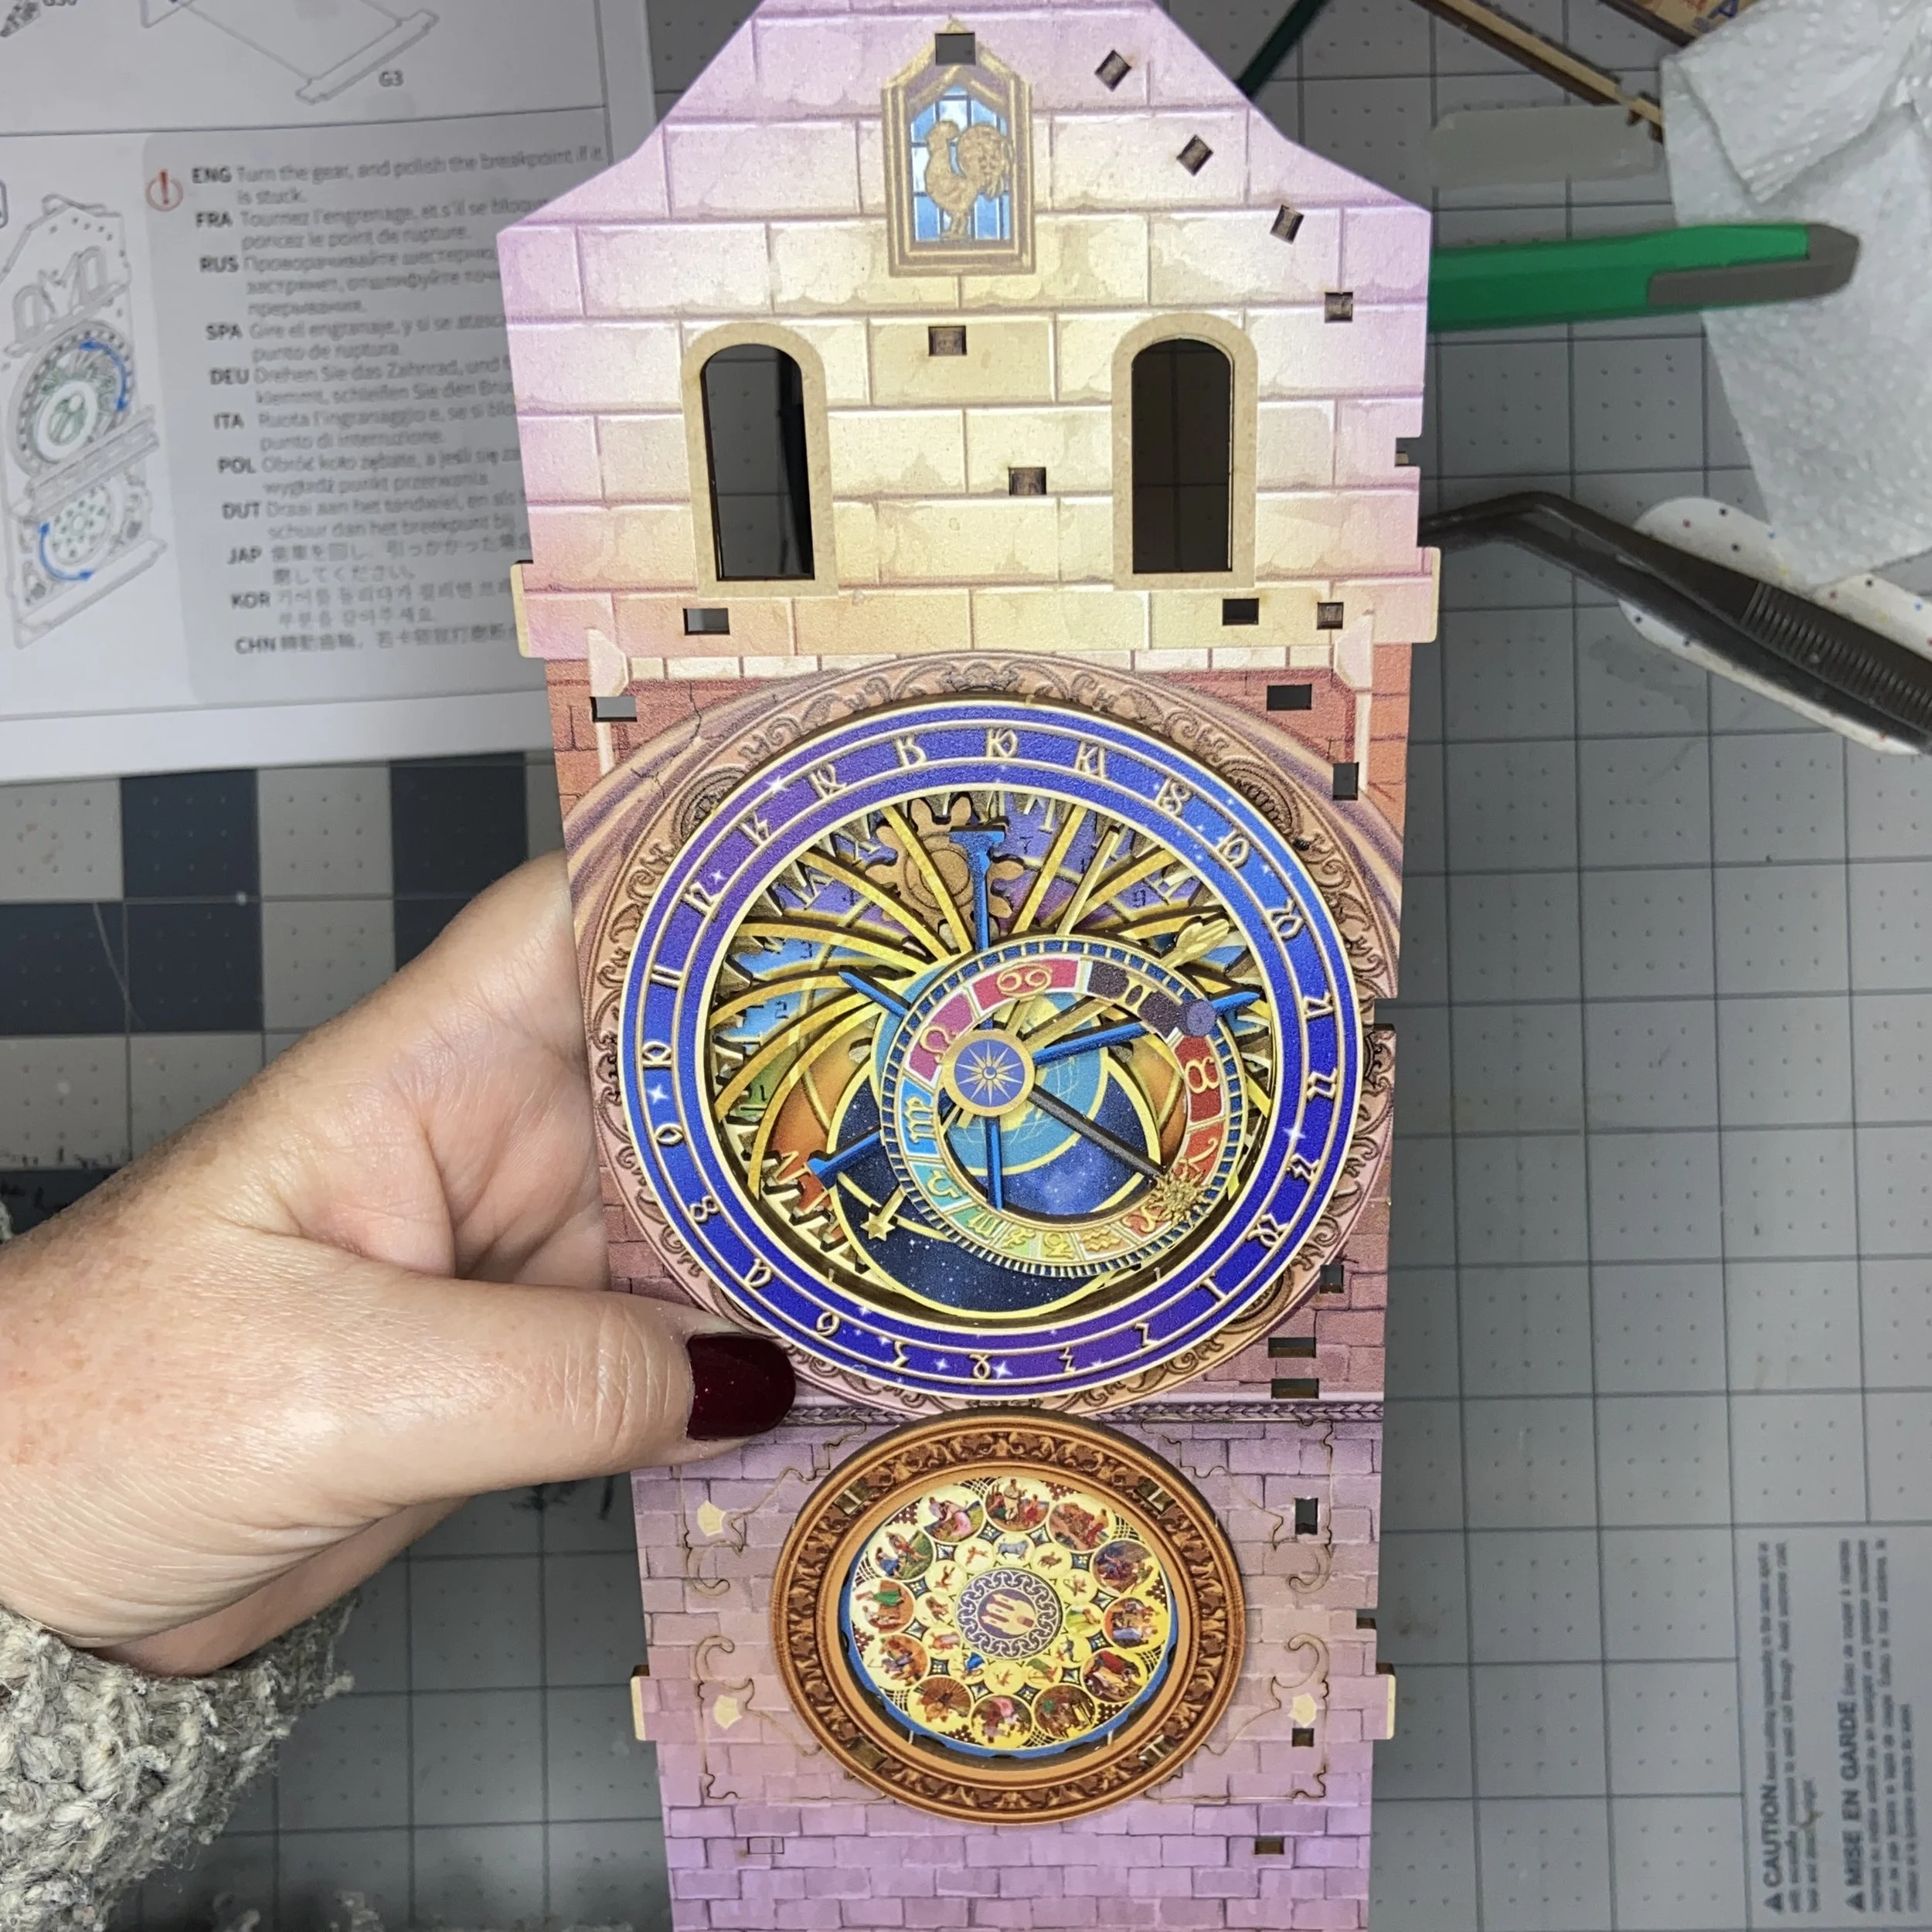
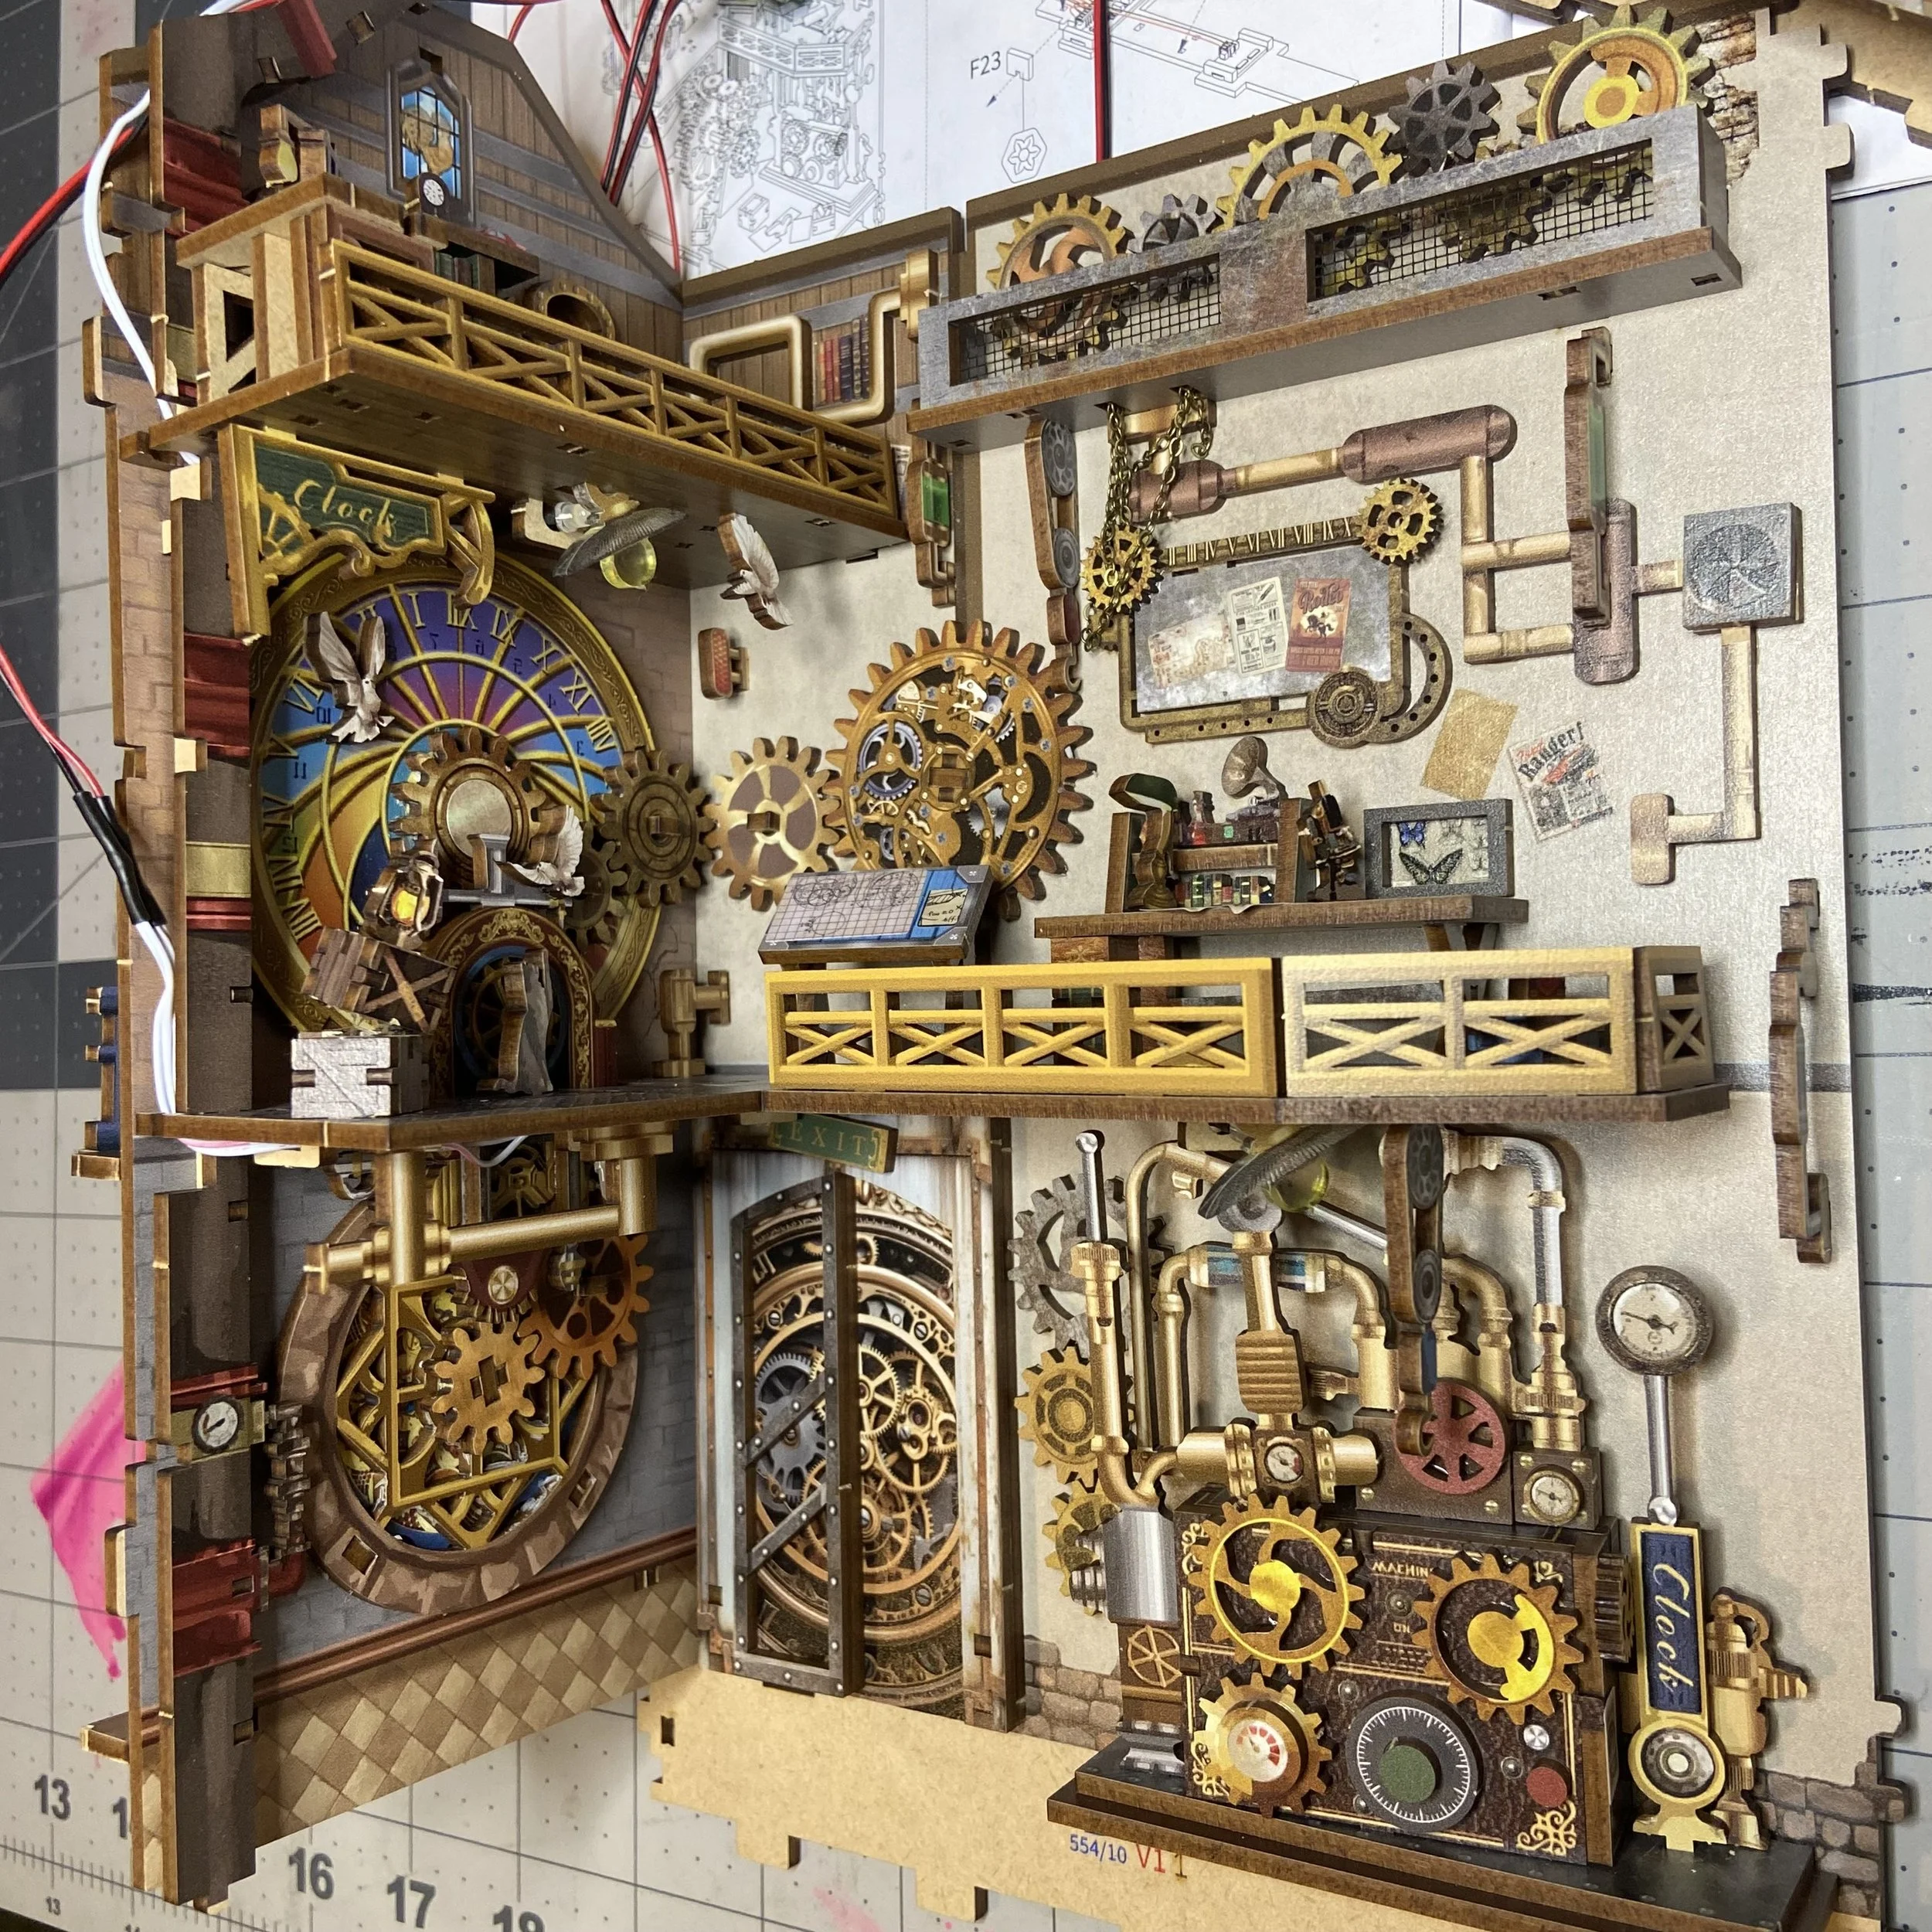
The major problem I encountered with this kit was the plethora of interlocking active (versus decorative) gears, and getting them to work together to turn the timepieces at the back of the nook. Below, you can see the beautiful interior and exterior of the back piece of the nook, and then the third picture shows how those gears and the gears from one sidewall are supposed to work together. But I simply could not get the primary turning knob on the sidewall to turn the clockworks at the back. The gearing needed to be heavier or something. Everything does turn…but I can’t do it with the turning knob. I have to grab hold of the clock face in the back and make that turn…and then everything else turns. It’s not clear to me if this is a failure of the kit (unlikely) or I did something wrong (not enough wax on the gearing?) but either way, it doesn’t work as intended. Never mind, it’s still beautiful.
The other moving part, the elevator, worked just fine. Lots of wax and far fewer gears.
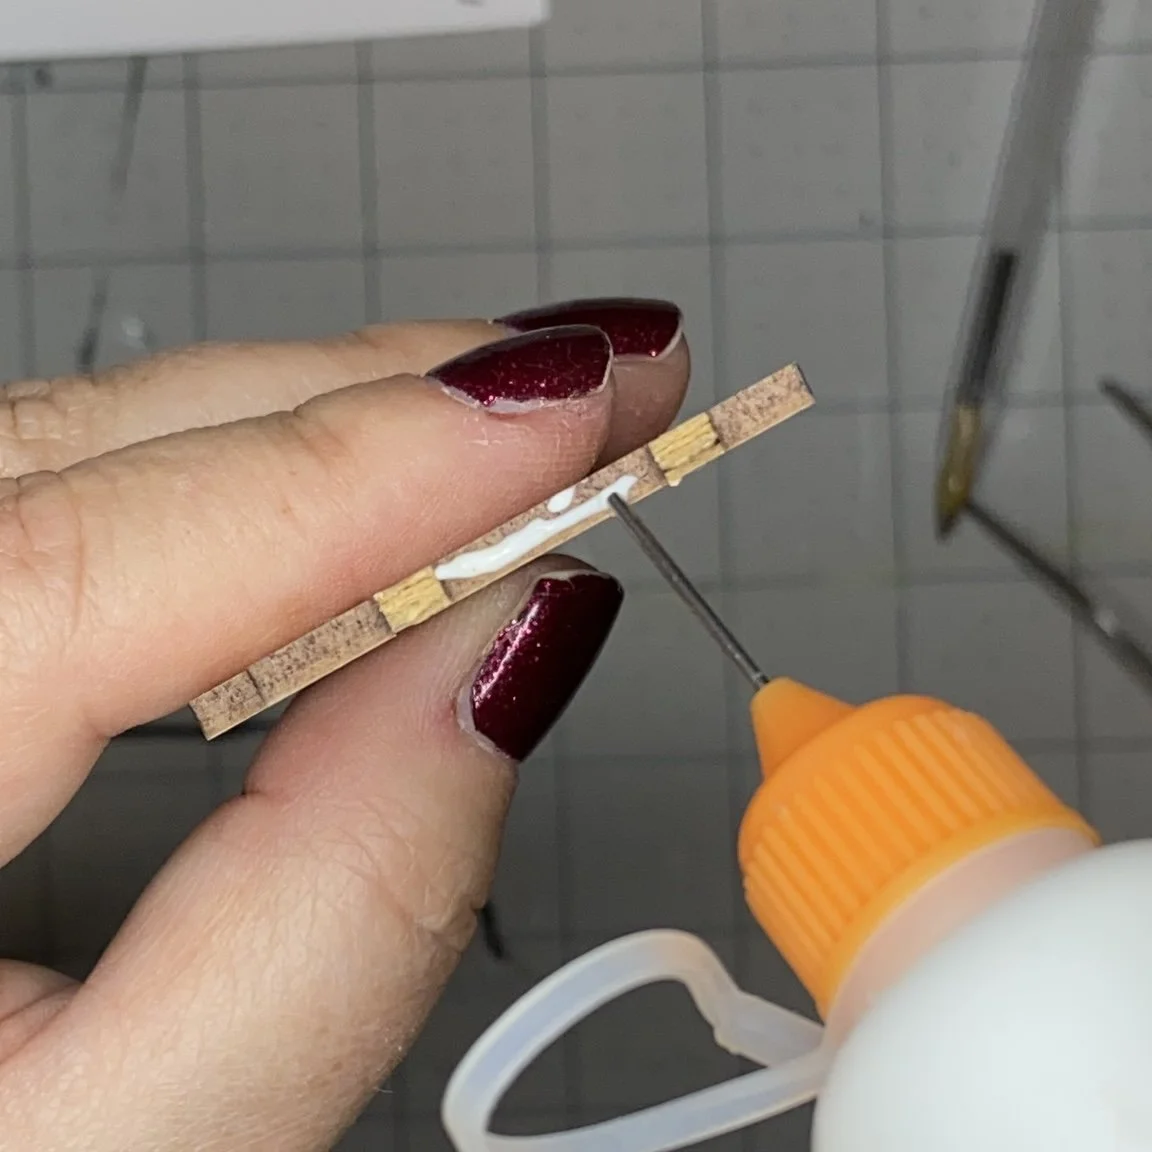
I did break the attachment points on the side of one of the decorative outer pieces. I just filed the edge smooth and then glued it in with my trusty bookbinder’s glue and my precision applicator. I’m getting so much use out of that applicator…

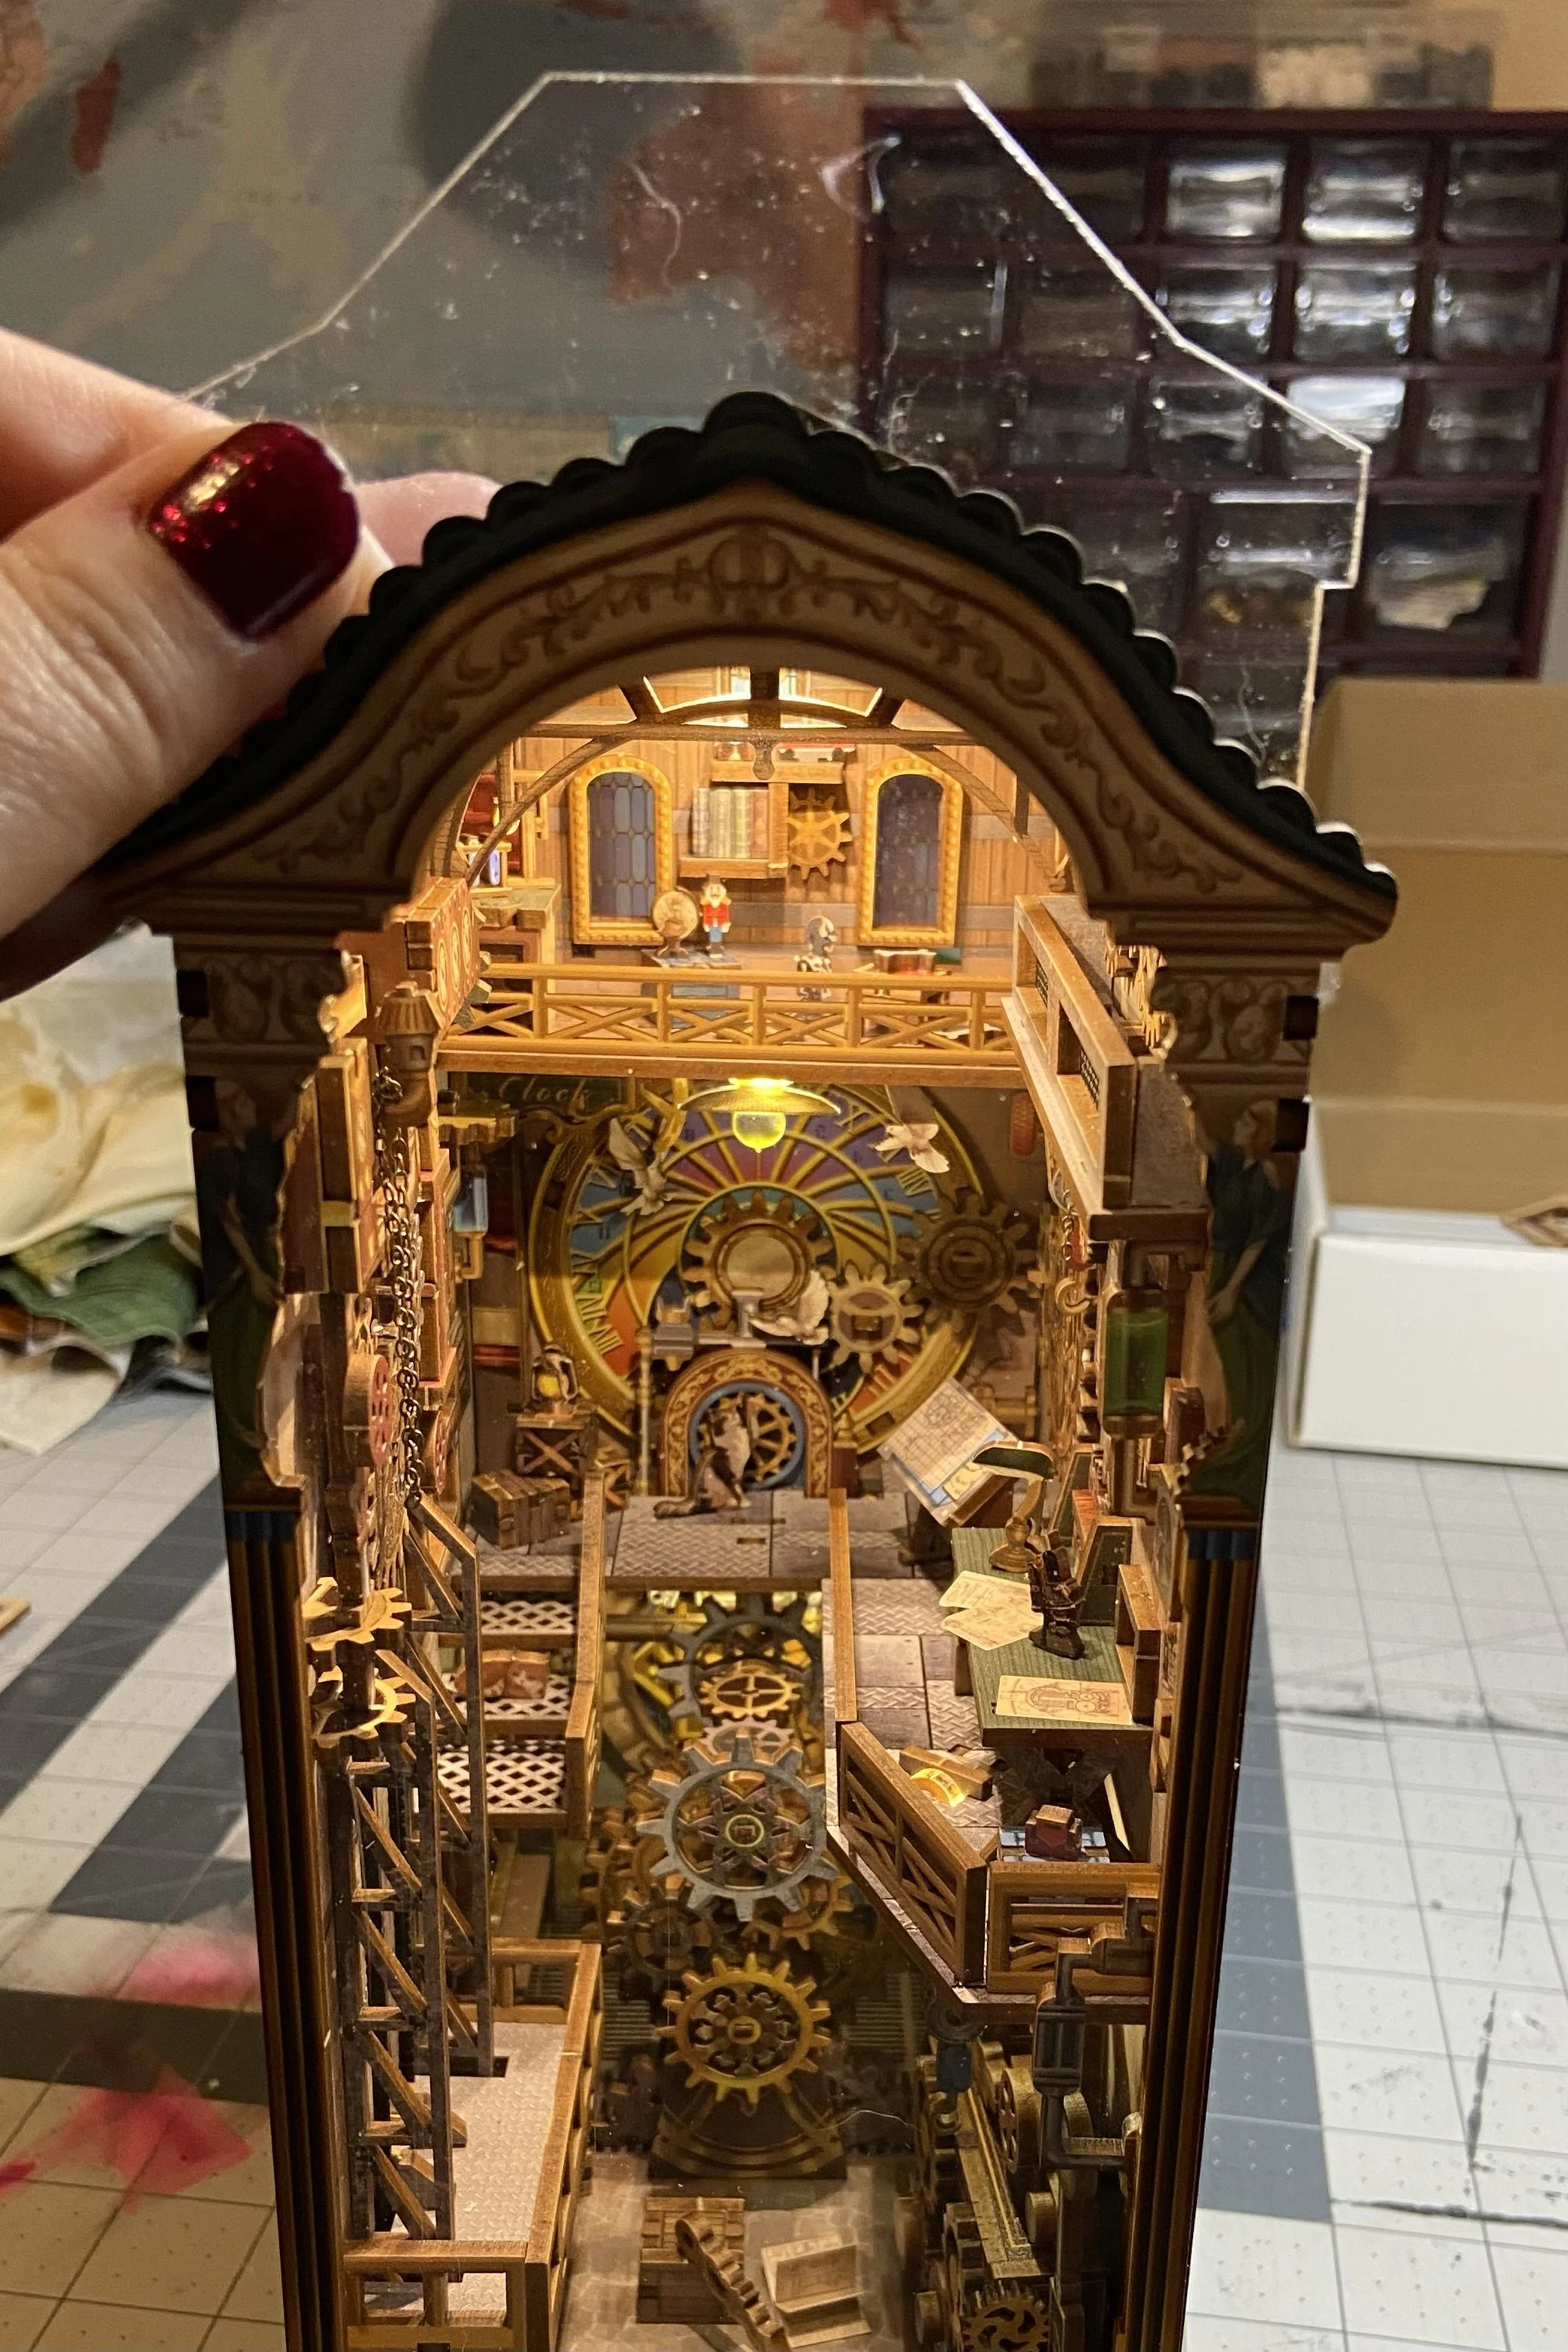
The wiring went in easily, both due to design (thank you, Tonecheer) and excellent directions (I did it!). Since that’s not always the case with booknooks, I really appreciate it when the wiring process is easy. The nook also does have an enclosed (mostly) roof and a clear dust barrier closing off the front, so it should stay relatively dust-free, which is always nice.
And done! Below, you can see the views of the inside, but I’ve also included a photo of the completed back outside panel, since it’s so colorful and gorgeous and detailed. This kit is another win from Tonecheer.