Adventures In Magic Pants
As an Amazon associate, I may earn a small commission if you navigate to Amazon from my site and buy something. This will not result in an extra cost to you.
In my ongoing quest to make clothing for myself that actually fits my body (like the linen dress I made recently), I bought a pattern called Magic Pants from designer Ann Tilley, along with the optional notions kit.


Before I get too far into documenting my process, I should like to refer the reader to the designer’s most excellent two-part YouTube tutorial on the construction of the garment. I found it extremely helpful and referred to it multiple times throughout the process, although honestly, the pattern instructions are so clear that the video is more a delightful luxury than a necessity.
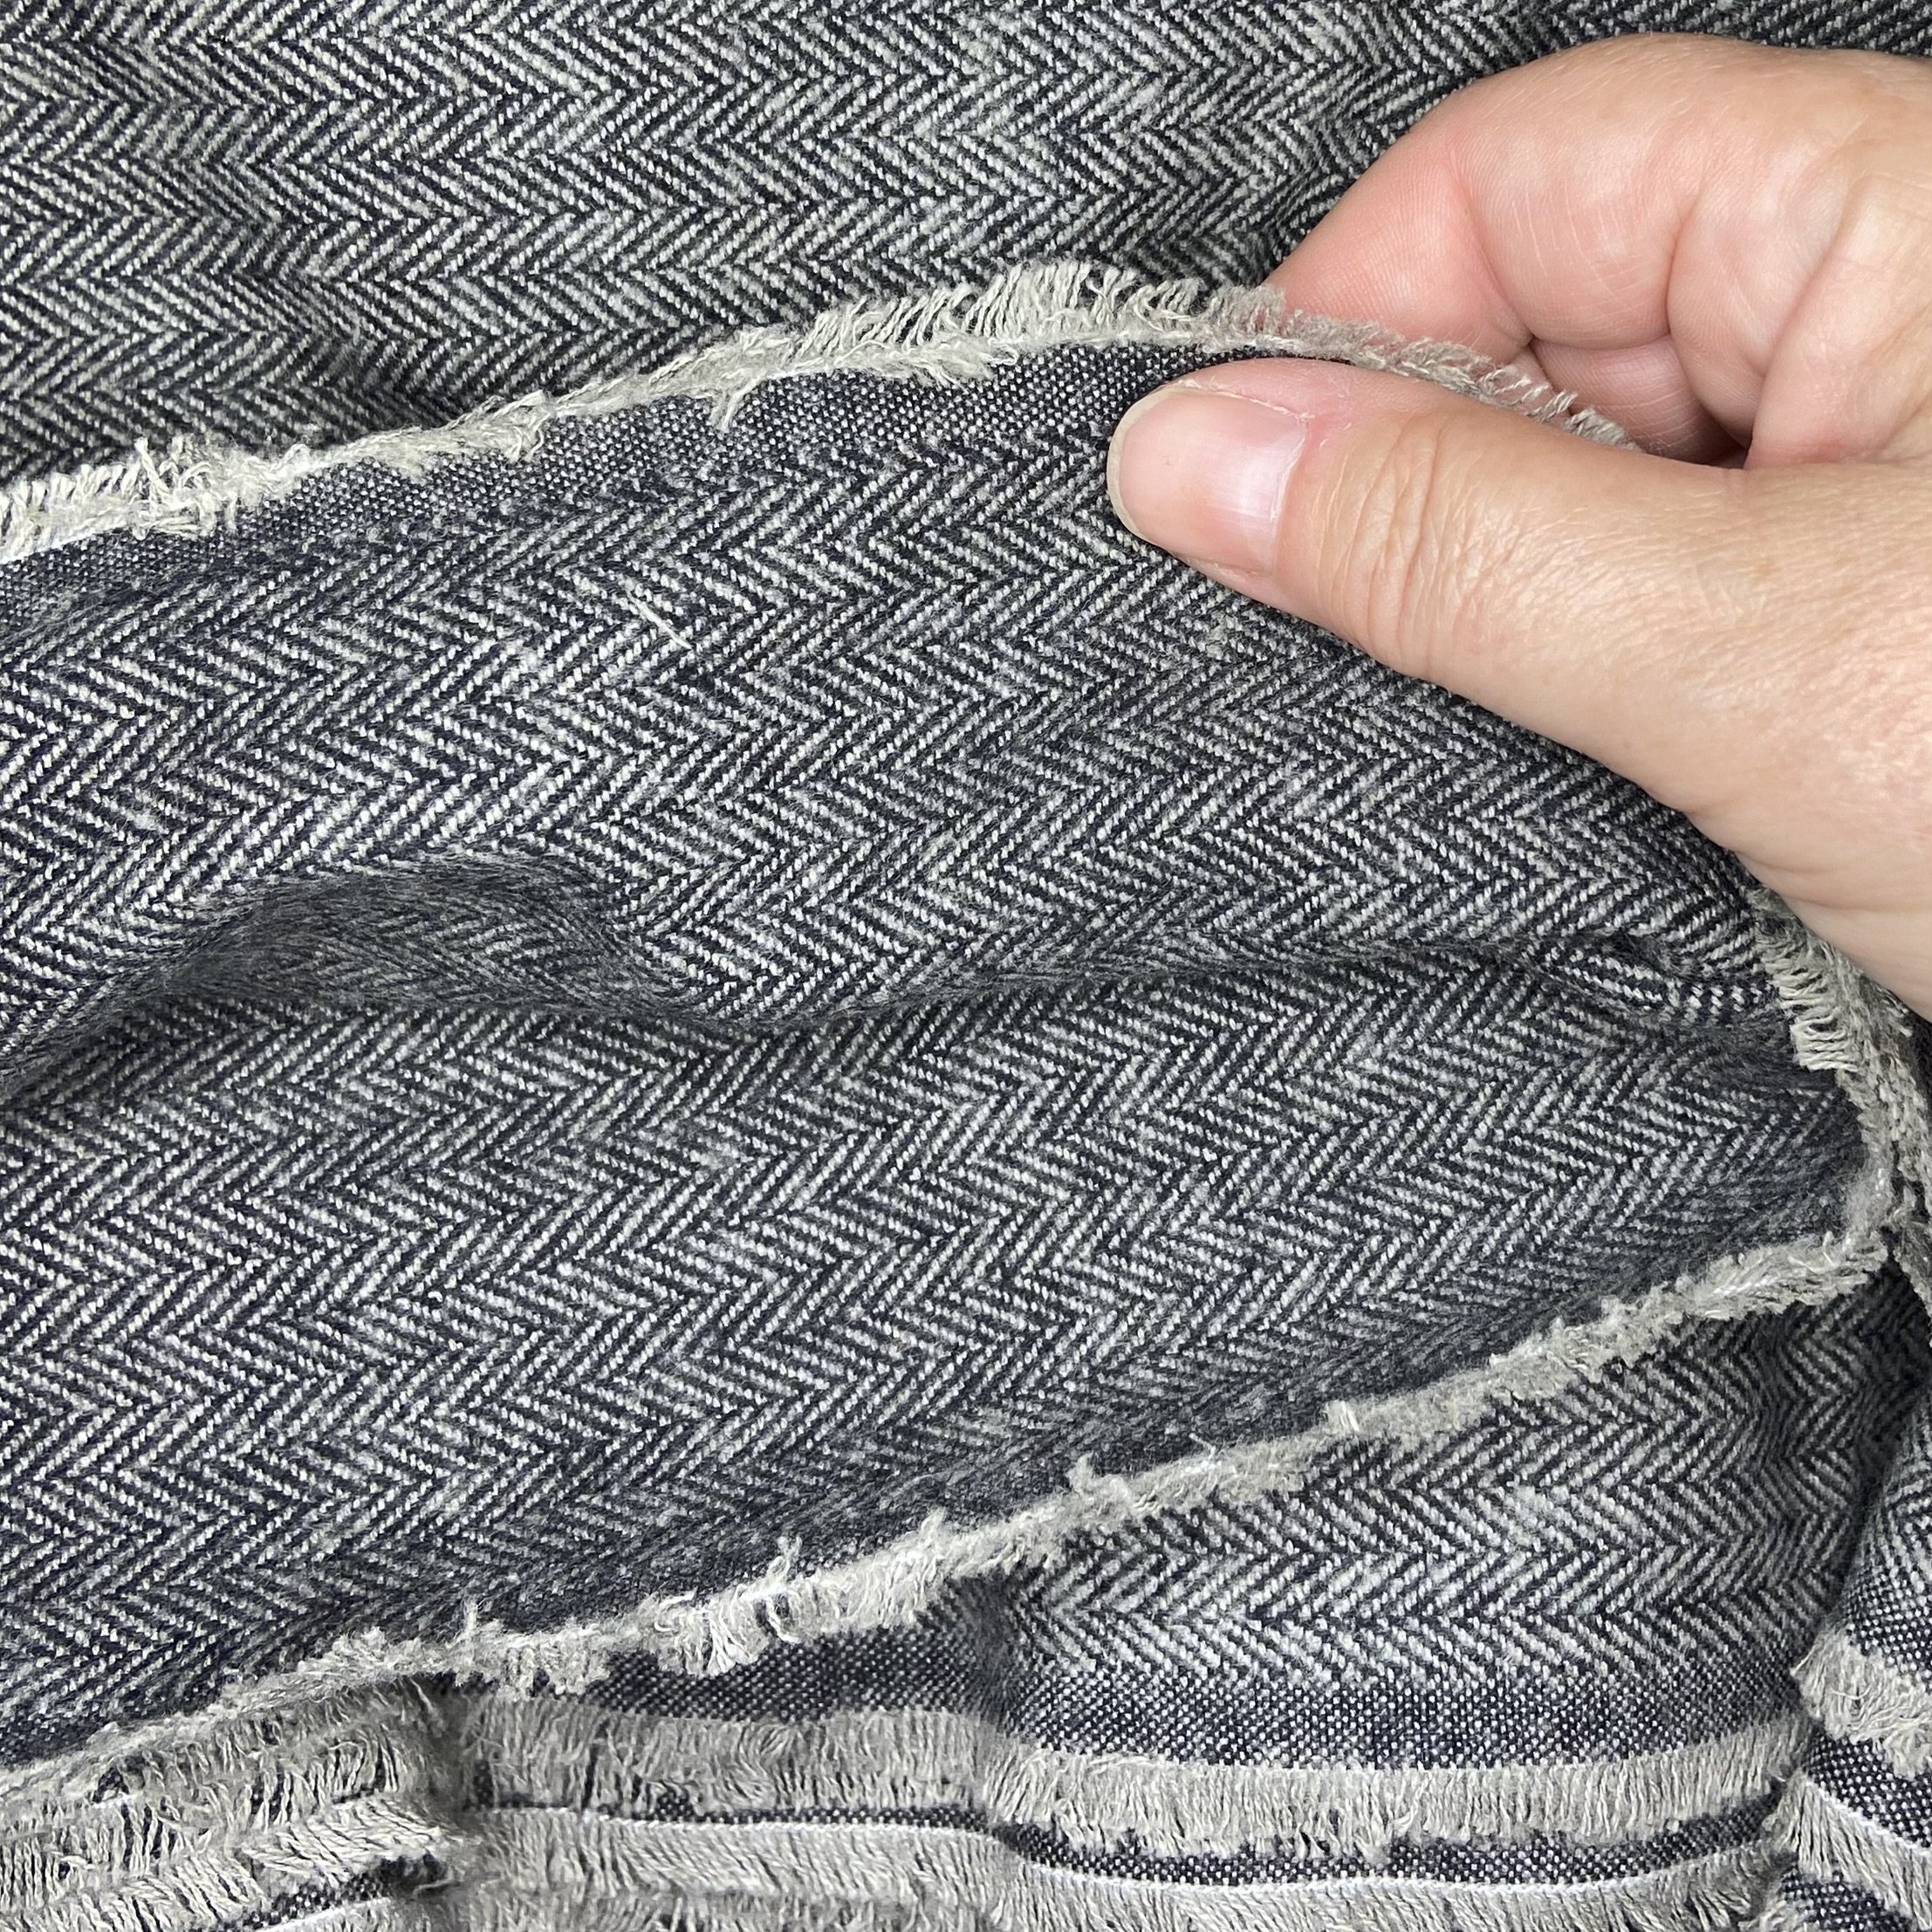
The pattern called for a lightweight woven fabric, like linen or cotton, but I wanted something that looked a little more like wool for my “tailored” slacks, so I bought some brushed cotton with a herringbone pattern.
The fabric looked the same on both sides, and when I prewashed it to take care of any shrinkage, it didn’t shrink. It also didn’t do much wrinkling, both factors very nice features. It was a substantial fabric. It had plenty of drape but it was not lightweight. In order to reduce bulk in the non-visible part of the pockets, I opted to use a pretty bit of quilting cotton I’d been saving for a special project. This fabric wouldn’t be visible when the pants were being worn, but it’s still fun to know there’s something pretty on the inside.
I had the PDF pattern printed by PDF Plotting, which is absolutely worth the money, especially if you have more than one pattern to print, which makes the mailing cost quite reasonable. I then used tracing paper to trace the size I needed, cut my pieces out of the tracing paper, and then used a heat erasable pen to trace around my pattern pieces onto my fabric. This made it quite easy to cut out.


I started this project back in August, 2024, which was before I acquired Hester, so in the absence of a serger, I used the overcast function (and foot!) on my regular sewing machine to overcast all the edges of every cut piece.

At this point, I set the project aside for some reason (maybe to work on something else) and sort of forgot about it until April. By April, I’d also lost a little confidence in my ability to execute the pattern, and decided to try basting the main seams together to check the fit before I started actually assembling the pants. This might have worked if I’d properly understood the construction, but since I didn’t, I basted the pieces together incorrectly and couldn’t even get the pants up over my hips.
This was disconcerting, to say the least. I wondered if I’d completely misunderstood the pattern instructions and cut out the wrong size. I rechecked my own measurements, compared those to the pattern instructions, and then checked my pattern pieces. Yep, I’d cut out the right size. I decided to just trust the process, forge ahead, and think optimistic thoughts.
The instructions start with the strap opening, utilizing a technique I’d never done before. I marked a rectangular opening on the interfaced small facing square as indicated in the instructions, lined it up (right sides together) with the same square marked on the back pants pieces, and sewed around the rectangle. The next instructions started with “Time to be brave.”


And I needed to be brave because the next step was to cut through both layers of fabric inside the rectangle, stopping before I got to the ends and cutting out toward the corners. I had to get very close to the corners without cutting into the stitches, which is always an exciting moment. Then I pushed the little facing piece through the hole I just made to the wrong side of the pants and ironed it. Looked great! I top stitched around the opening I’d just made, which looked less great. But since the black thread was not terribly visible on the fabric, I decided to live with my sloppy edge stitching.


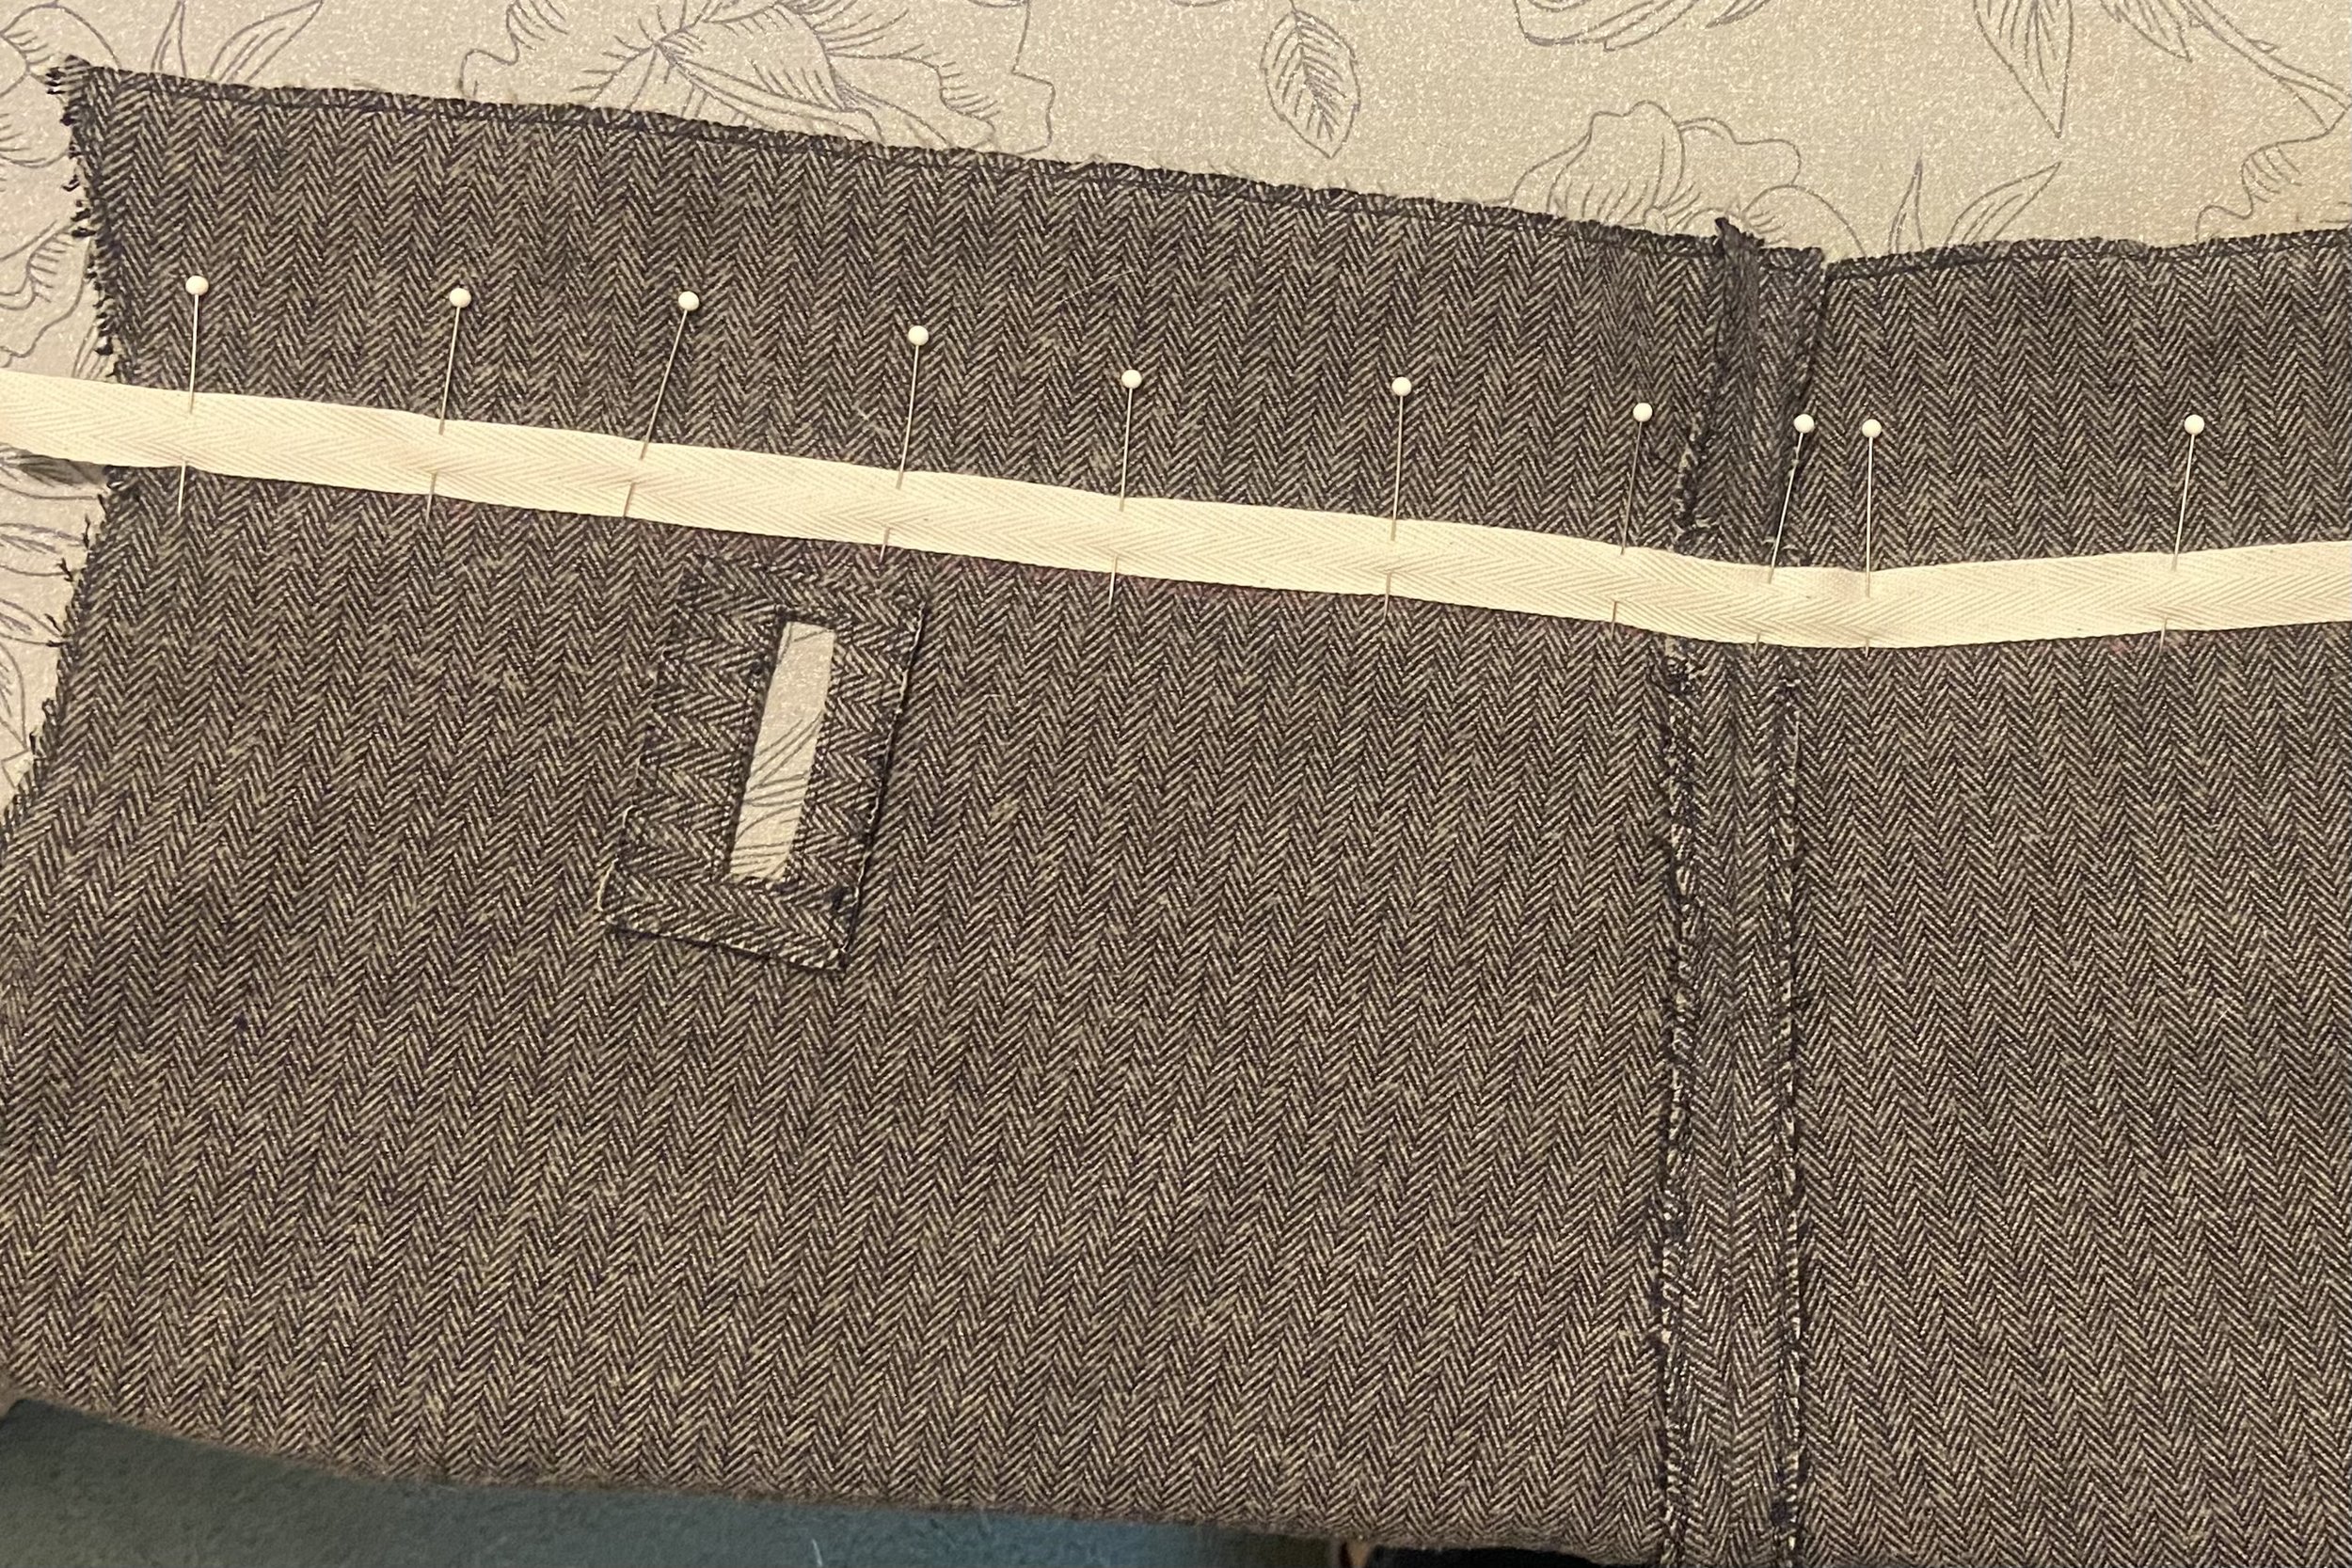
The pattern instructions had me putting twill tape on the top edges (or what would eventually be the top edges) of all pieces that comprised the waist of the pants. This was not difficult and was oddly satisfying.
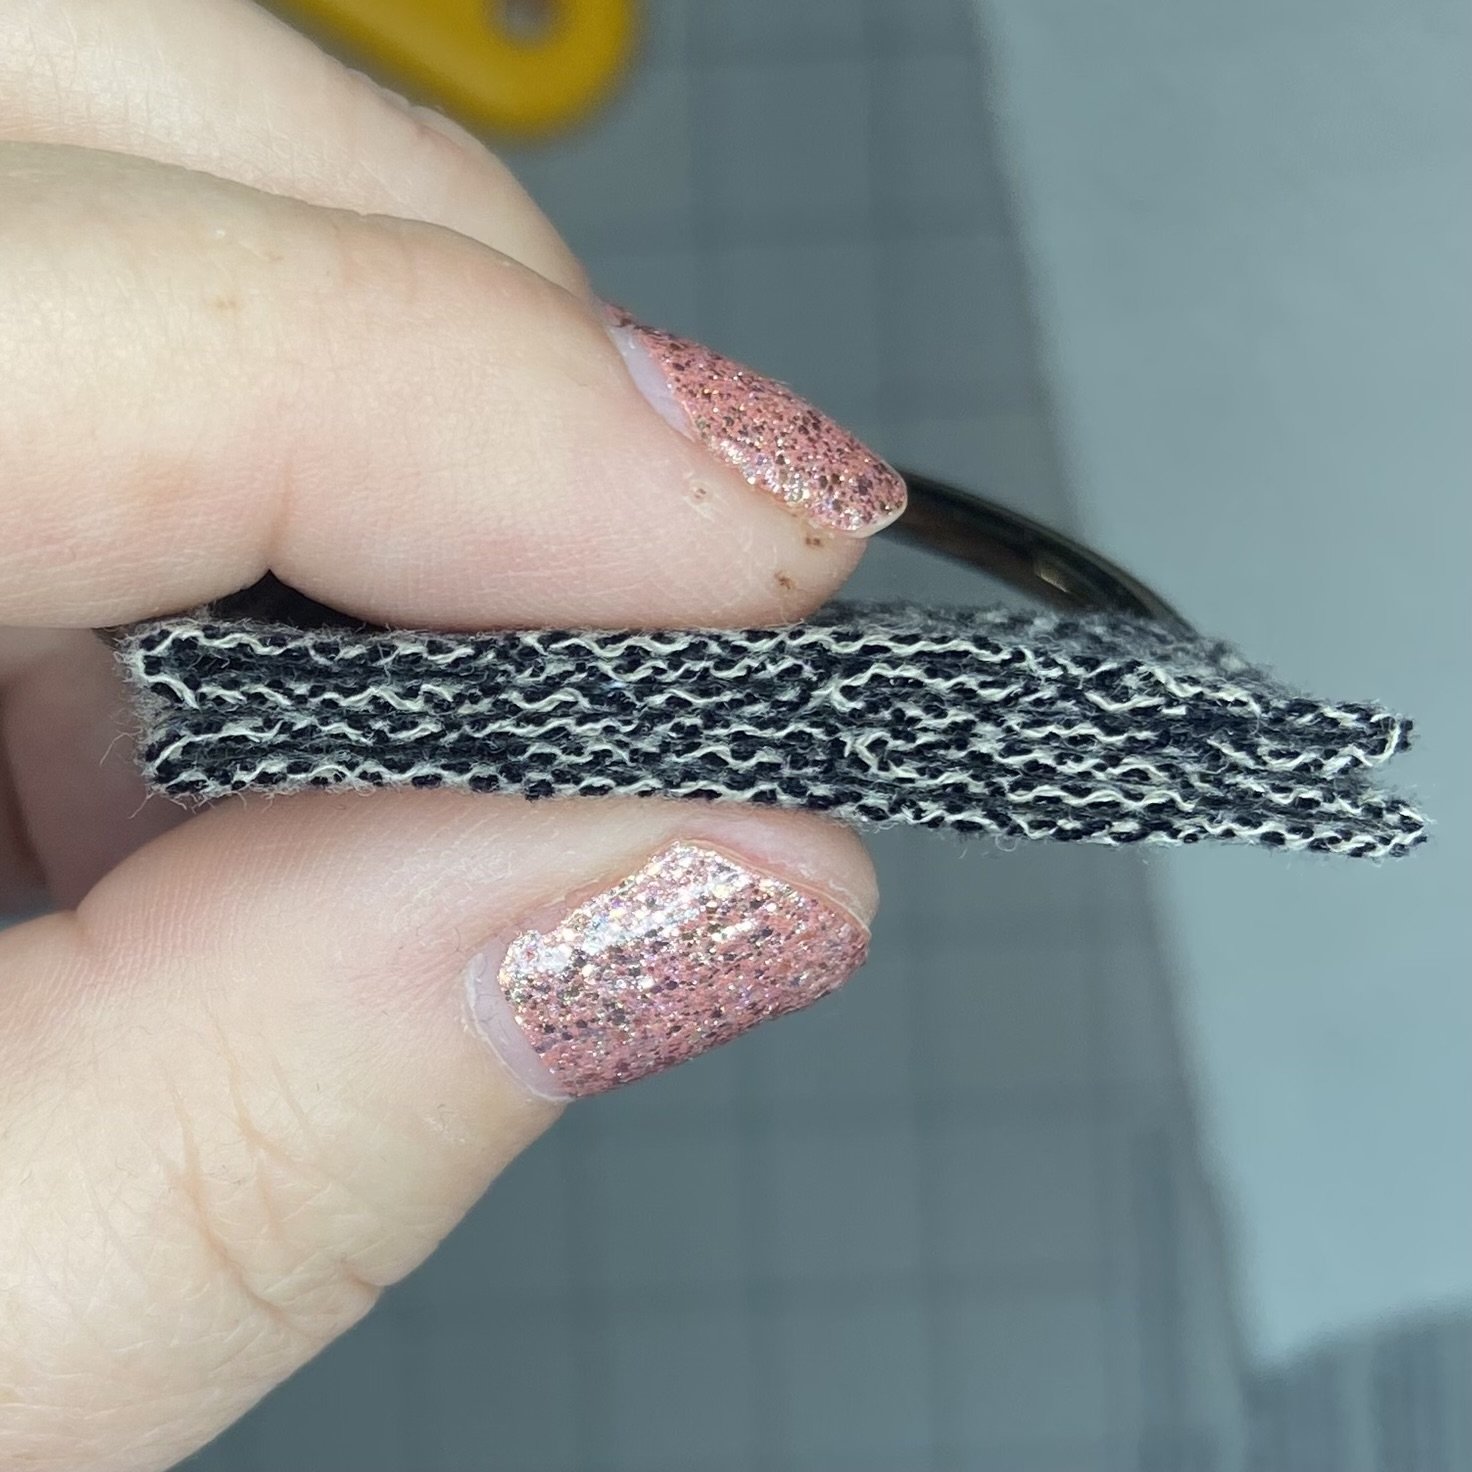
When I got to the part where I needed to make the tabs for the D-rings, I ran into a little problem. I mentioned earlier in this article that the brushed cotton fabric I used was not lightweight. In fact, it was about as thick as four layers of quilting cotton folded together.
Since I had also interfaced the fabric piece I was going to use to make the tabs (as per the insructions! I wasn’t going rogue and interfacing everything…), this meant that the multiple layers of thick cloth plus interfacing was so hefty that even the Singer could barely sew through it, and only with the help of the hump jumper. When I then got ready to sew the tabs into the side seams of the bib area, it was way too bulky to work. In the picture on the left below, you can see how thick the edge of the tab is when interfacing is part of the equation. I ended up cutting the tabs off the D-rings, cutting new tabs out of my fabric, and skipping the interfacing. In the picture on the right below, you can see that the bulk is greatly reduced. Also, the Singer got through it without any problems.

The rest of the project went together relatively smoothly. When I got to the two belt straps that needed snaps sewn onto them, I did not want any of the stitching to show. This meant for the end snap, I needed to sew only through one layer of fabric, and to make sure I didn’t stitch through too far, I stuck my wooden yardstick down inside the strap and kept it there while I sewed on the first snap at the end. The yardstick absolutely prevented me from accidentally stitching through the other layer. The other half of the snap would be covered up, so I stitched that through all the layers. I did end up moving the second half of the snap farther from the end than the directions indicated. This was because after I tried the pants on with the elastic, the straps were way too loose. (I only realized much later that this excessive strap length was because I’d cut the strap for a much larger pant size.) When I got the right placement of the straps on the elastic, I had plenty of overlap, so I decided to really overdo it and sewed a pretty square with an X inside it. Very secure.


The final step was to hem the pants. I pressed in a serious crease where I wanted the pants to end, turned them inside out, and hand-sewed the hem. Honestly, this was not hard, as the thickness of the fabric worked in my favor here. I came up under the hem overlap right under the stitch line of my original overcasting, brought the thread straight up to just above the overlap edge, and took a tiny bite of the main fabric…just one or two threads. I did that all the way around, with my stitches about 1/4” apart. It’s very secure, and since the pants are straight-legged, quite easy. You can see in the last picture the inside of the hemline on the bottom and the outside of the pant leg on the top. The hem stitching is completely invisible from the outside. Perfect!


Below you can see what the front of the pants looks like with the bib fastened, and with the bib partially retracted. That black bit in the middle is a ribbed knitted panel that allows the pants to stretch enough to come up over the hips and also makes them extremely comfortable at the waist. But at the same time, that front bib panel makes the pants look nicely tailored. A minor complaint…the curve of the D-ring scrunches up the belt every so slightly…I think it would look better with a rectangular ring.


I do have a bit of a tummy but mostly, these pants cover it up. The only place where I’m not completely happy with the fit is on the pocket facing, which sort of lovingly hugs a little bit of my love handles. But…this I can live with. Honestly, I had a blast making these, and I will definitely make another pair.
With that in mind, I made my first journey to a Portland fabric store called Bolt Neighborhood Fabric Boutique (yes, they do online orders and shipping), and was delighted to discover that the store is everything I could have hoped. They have a wide array of linen and cotton fabric (and blends) along with a selection of wool and knit fabric. They carry the only brand of thread I like to buy (Gutermann, of course). And they had every single extra notion I needed to make another pair of pants. I was torn between a dark green linen and a rather boho cotton print. I went with the cotton…it will be fabulous for summer!
