Adventures In Making Do
As an Amazon associate, I may earn a small commission if you navigate to Amazon from my site and buy something. This will not result in an extra cost to you.
There is no question that we live in a disposable world. Goods are so cheaply made that we hardly ever try to fix something…we simply dispose of it and buy new. This is true across many industries (electronics being a particularly egregious example) but my focus today is on clothing. No one seems to mend their clothing anymore. Why would anyone do that? It takes time and effort and the mended garment is often visibly mended, which can be unappealing.

This is a fairly new development in human history. Until relatively recently, goods of all kinds were simply too scarce and expensive to discard without at least attempting to fix them. This is graphically illustrated in Britain’s World War II “Make Do and Mend” campaign. There are lots of posters available on the internet that illustrate how widely this effort expanded. It was a citizen’s patriotic duty to obey the rationing laws! Save your money for the important (and available) things…don’t waste it on new clothing when your old clothing just needs a little hole sewn up.
Now, I also am guilty of just buying new clothes rather than mending the ones I have. But I’m trying to do better…I would prefer my life be less “disposable” and more “sustainable.” I’m a work in progress. There are other reasons to mend your clothing…it saves you money if you don’t have to buy new. And sometimes, a damaged garment is very dear and you don’t want to part with it. Mend it, keep it, wear it.
As far as mending techniques…I’m going to demonstrate just three in this article, but be advised that the mending method you choose will depend on both the garment itself (what kind of fabric is it? woven or knit? multi-colored or solid?) and the type of damage that you are trying to fix. If you want to spend a fun afternoon on YouTube, just do a search for “mending clothing” and enjoy. You’re welcome. If YouTube isn’t your thing (What???), there are also multiple excellent books on the subect. My point is that there are many ways to accomplish mending and the method you choose is entirely up to you. Visible mending can be fun and there are also many ways to do that. But today, I’m concentrating on less visible mends.
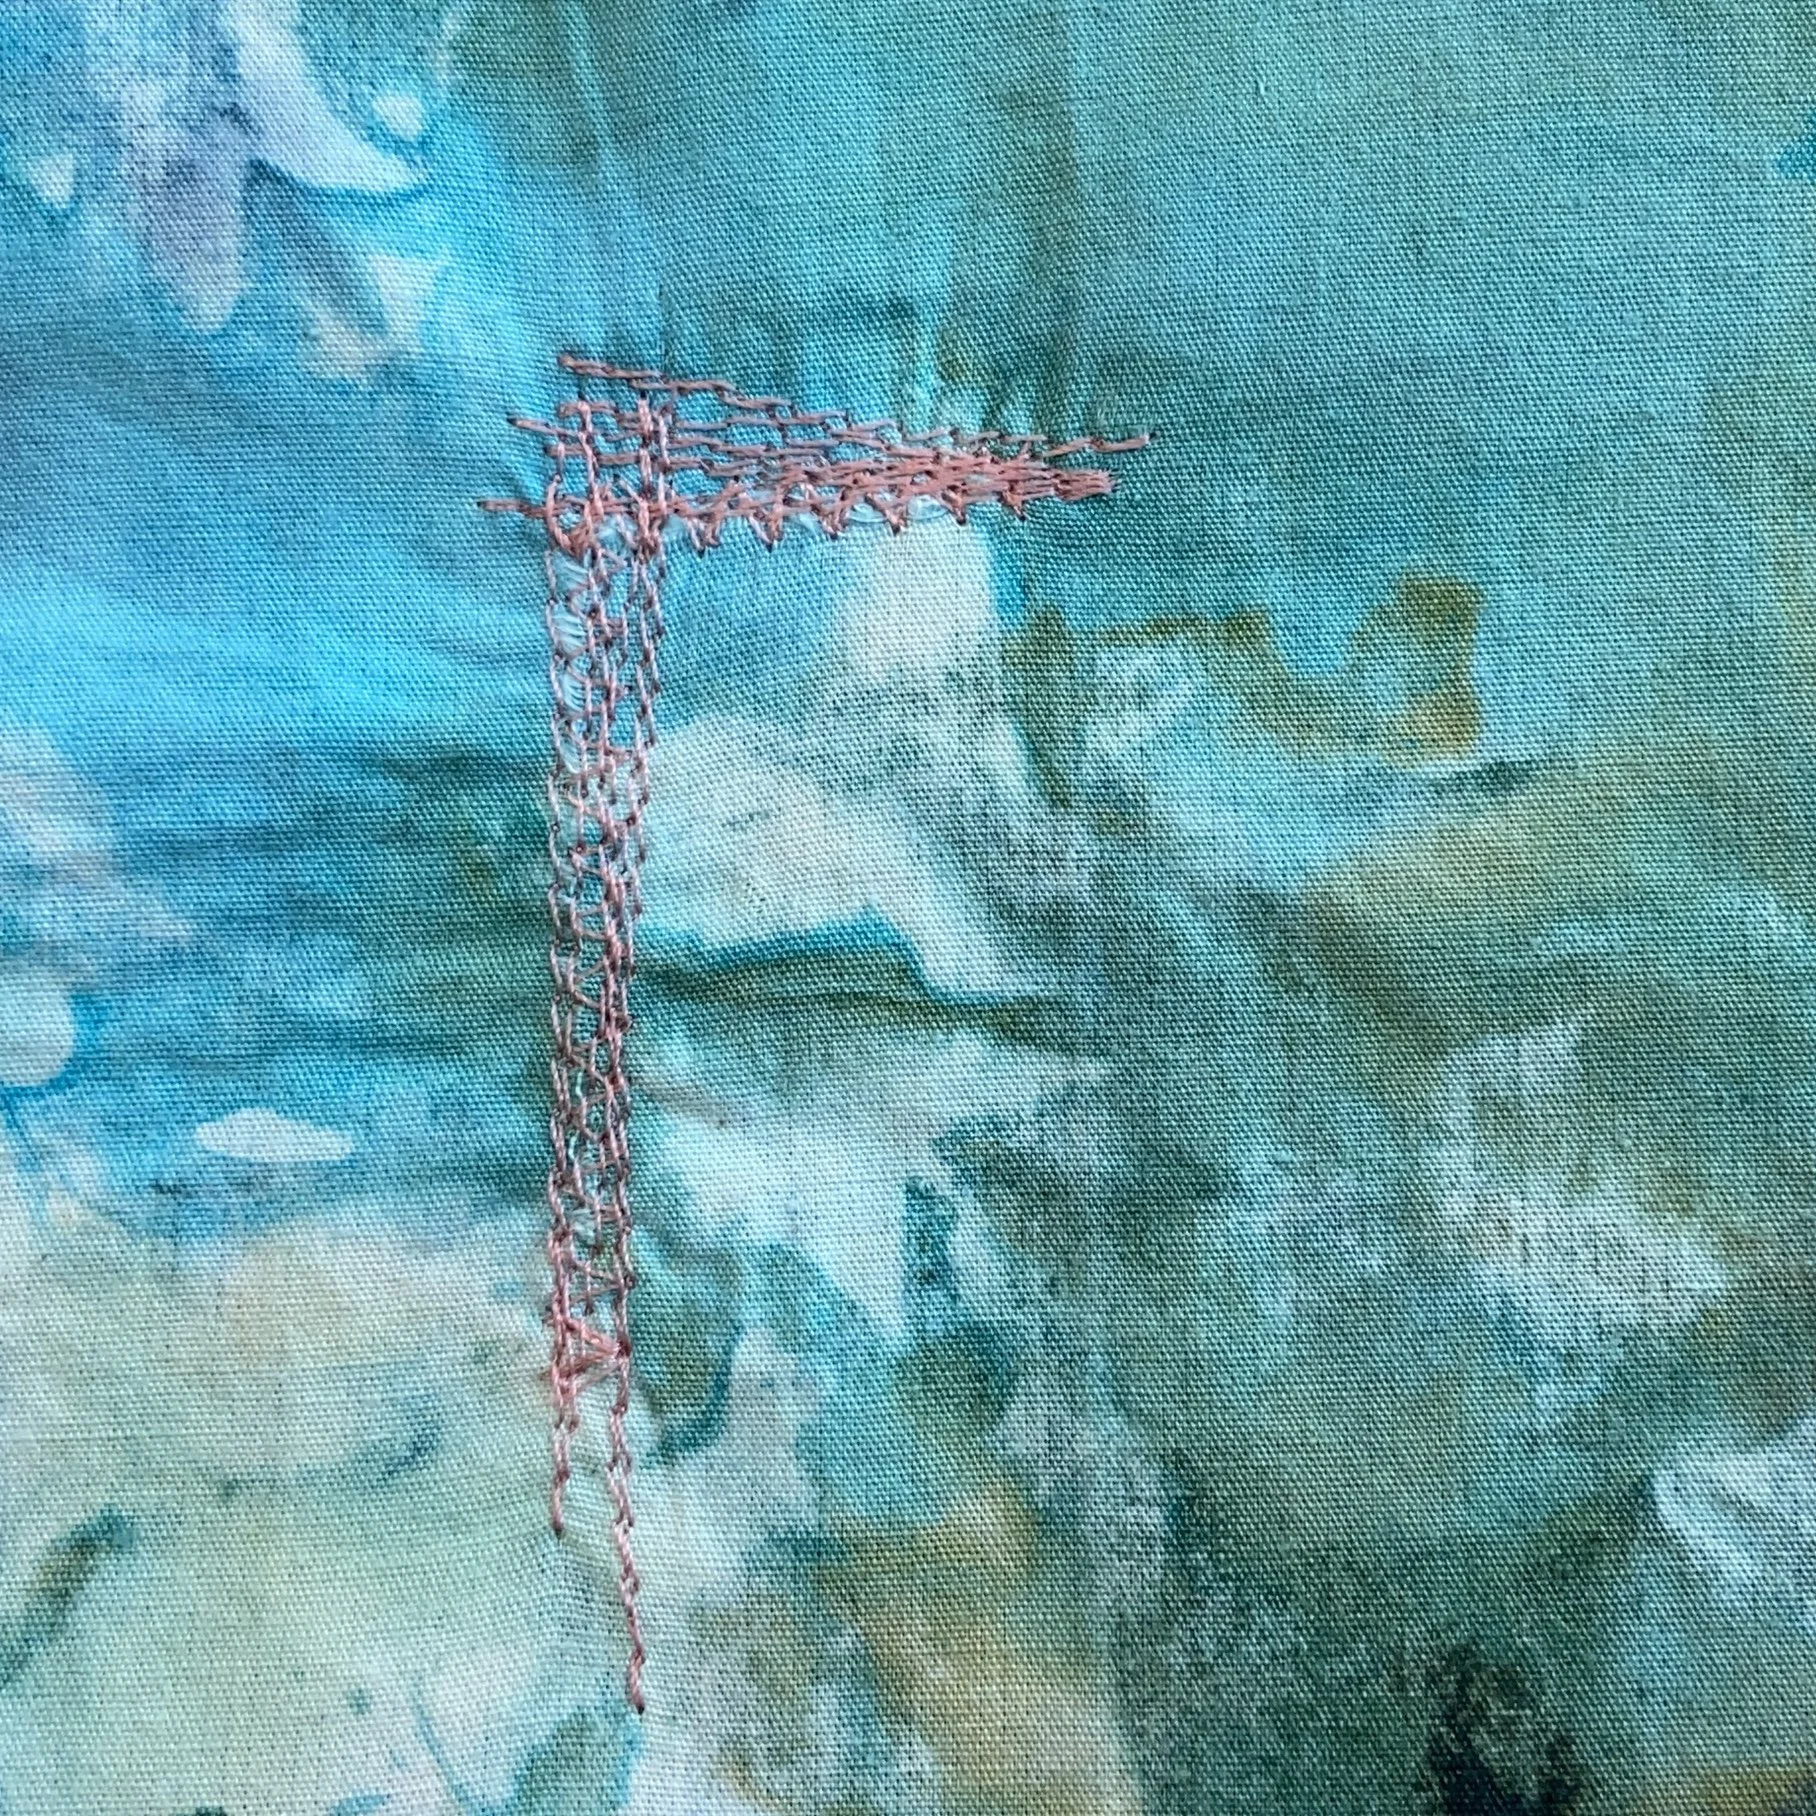
First up, a tear in woven fabric. When you catch your garment on something pointy and keep moving, you often get an L-shaped tear. I’m using a contrasting thread color for this sample to make sure the stitches are visible in the pictures. First, iron your garment so that the torn edges lay as flat and close together as possible. Use some very sharp scissors to carefully cut away loose threads.
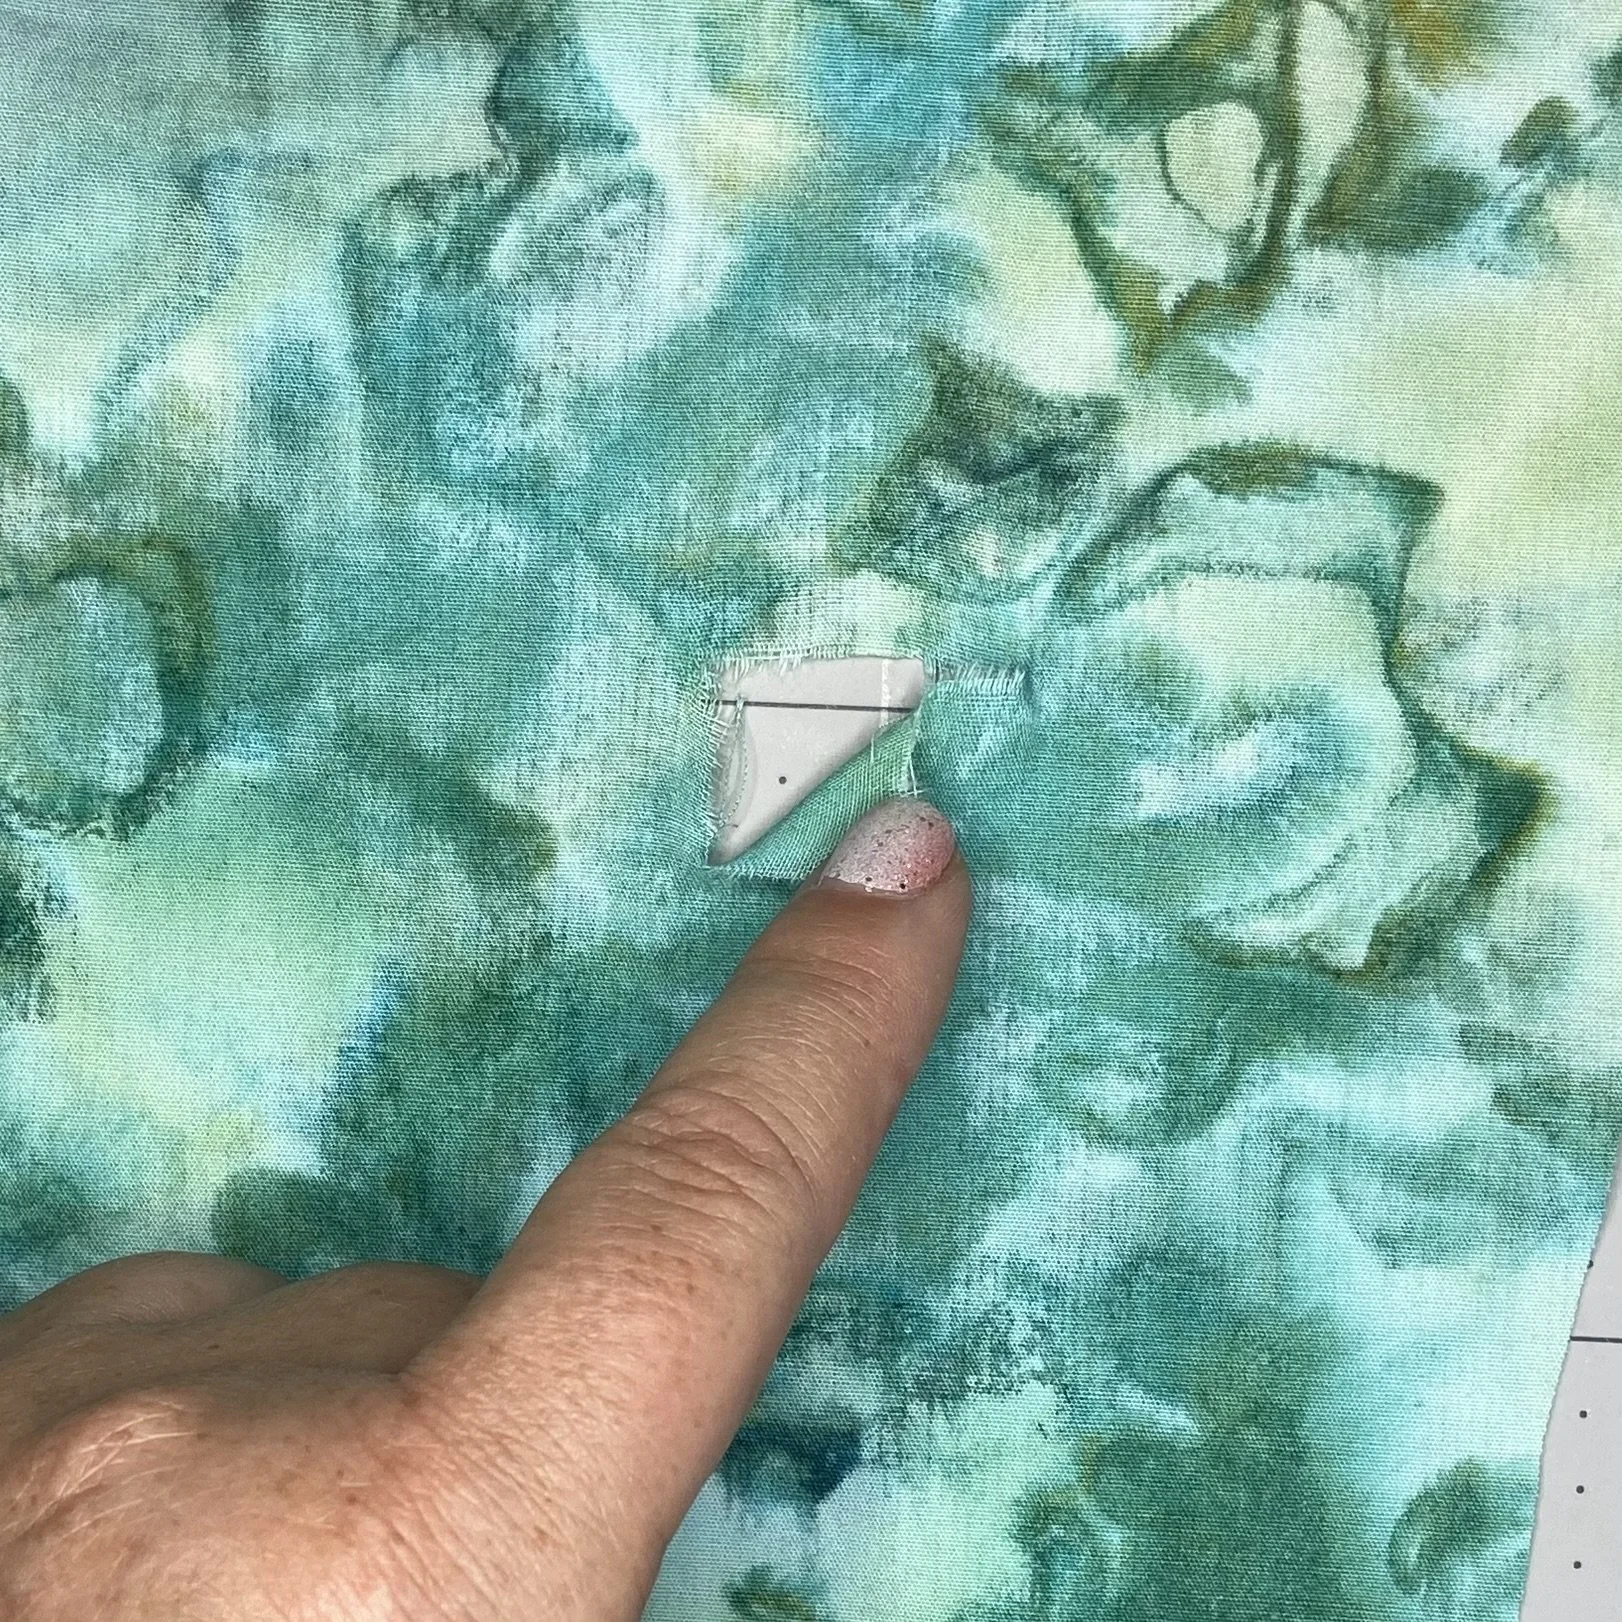
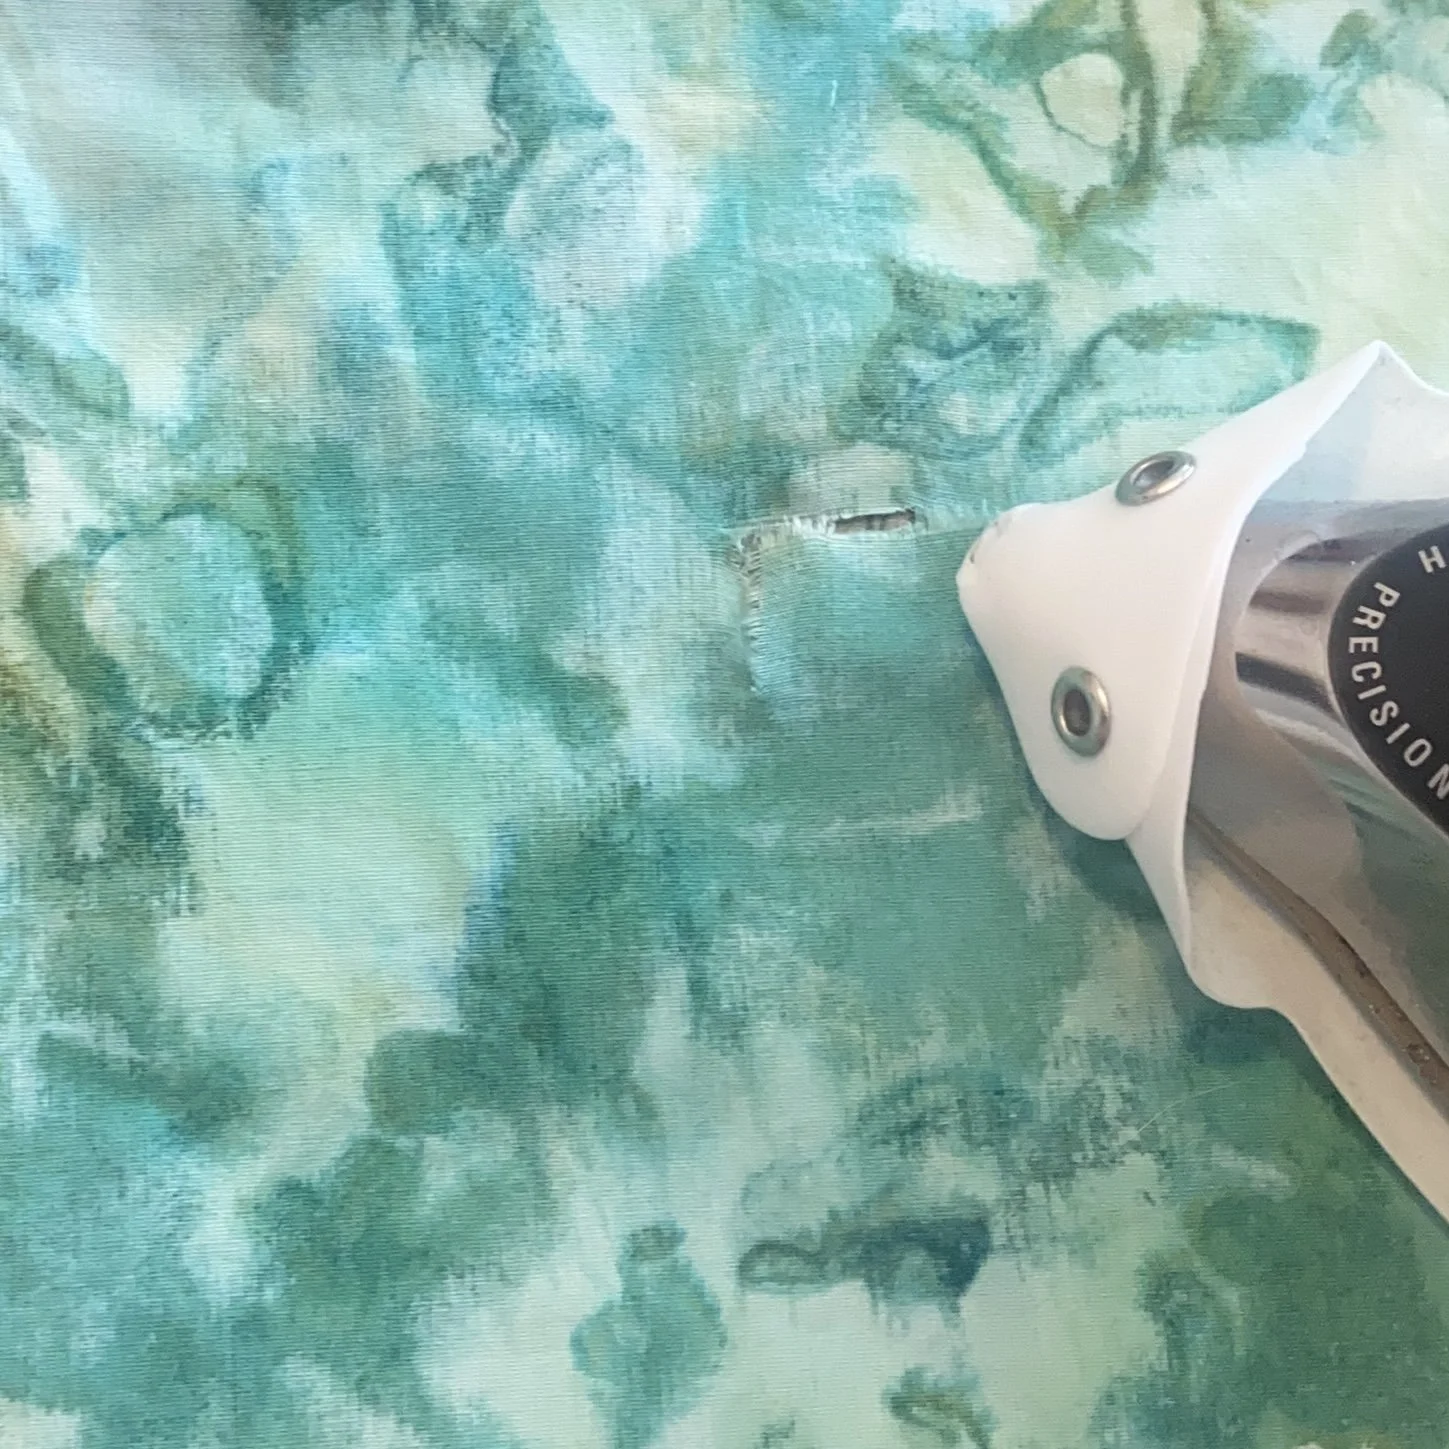
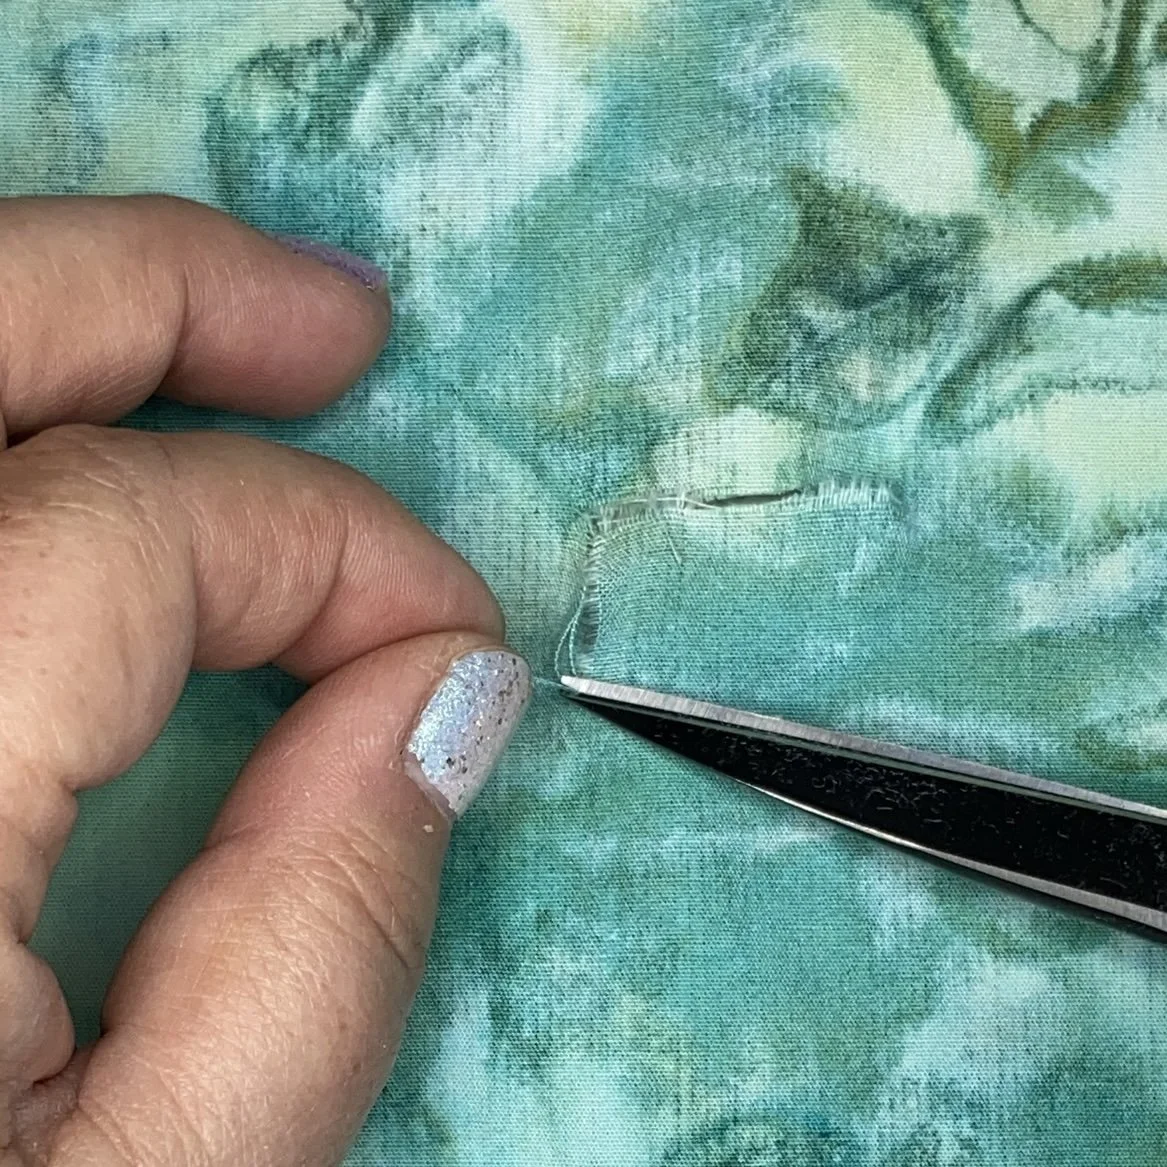
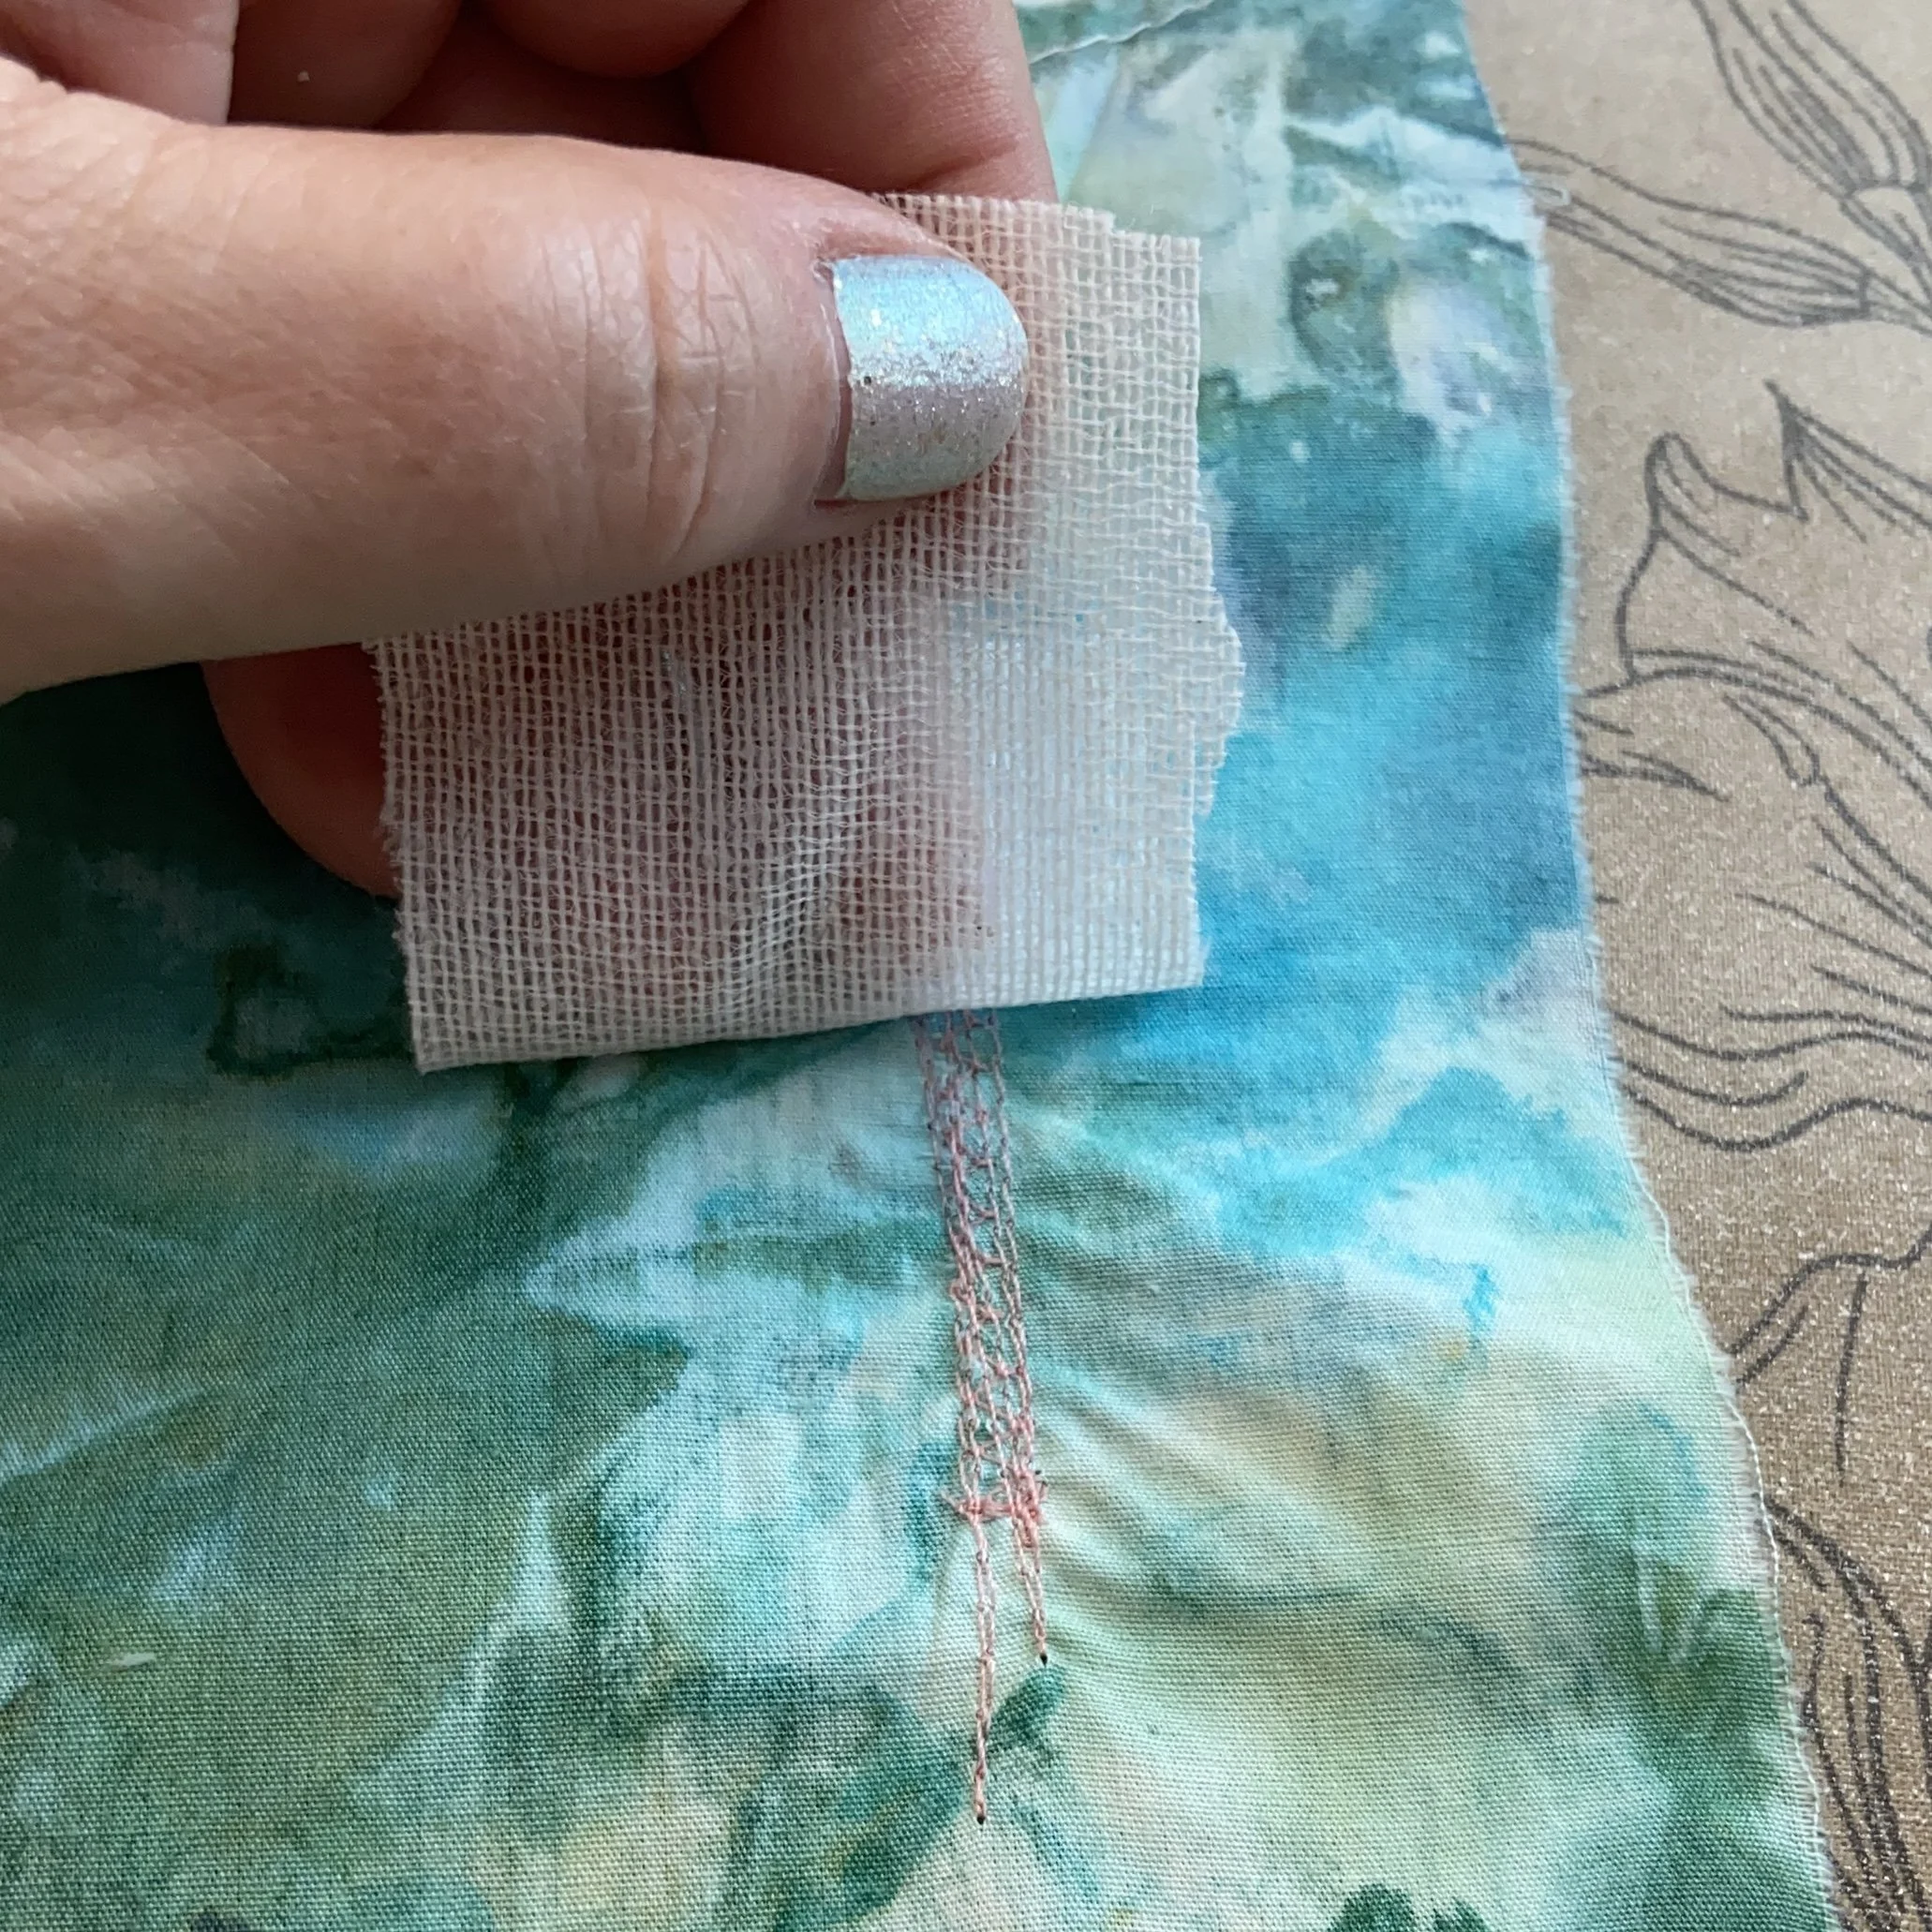
Then use your sewing machine to stitch the hole closed. If you use a straight stitch, just go back and forth in short little lines to hold the torn edges together. For this example, I used a wide zigzag stitch to close the tear and then did some straight stitching to reinforce the mend. Then I ironed some very light woven interfacing on the back, just enough to cover up the stitching and help the fabric hold together. And yes, if you don’t have a sewing machine, you could certainly do this with careful hand-sewing as well.

Below you can see my sample repair with contrasting stitching. And you can see my favorite pants repaired with matching thread. When the garment is worn, the repair is darn-near invisible. And I can keep wearing my pants (and not walk into any more pointy things).


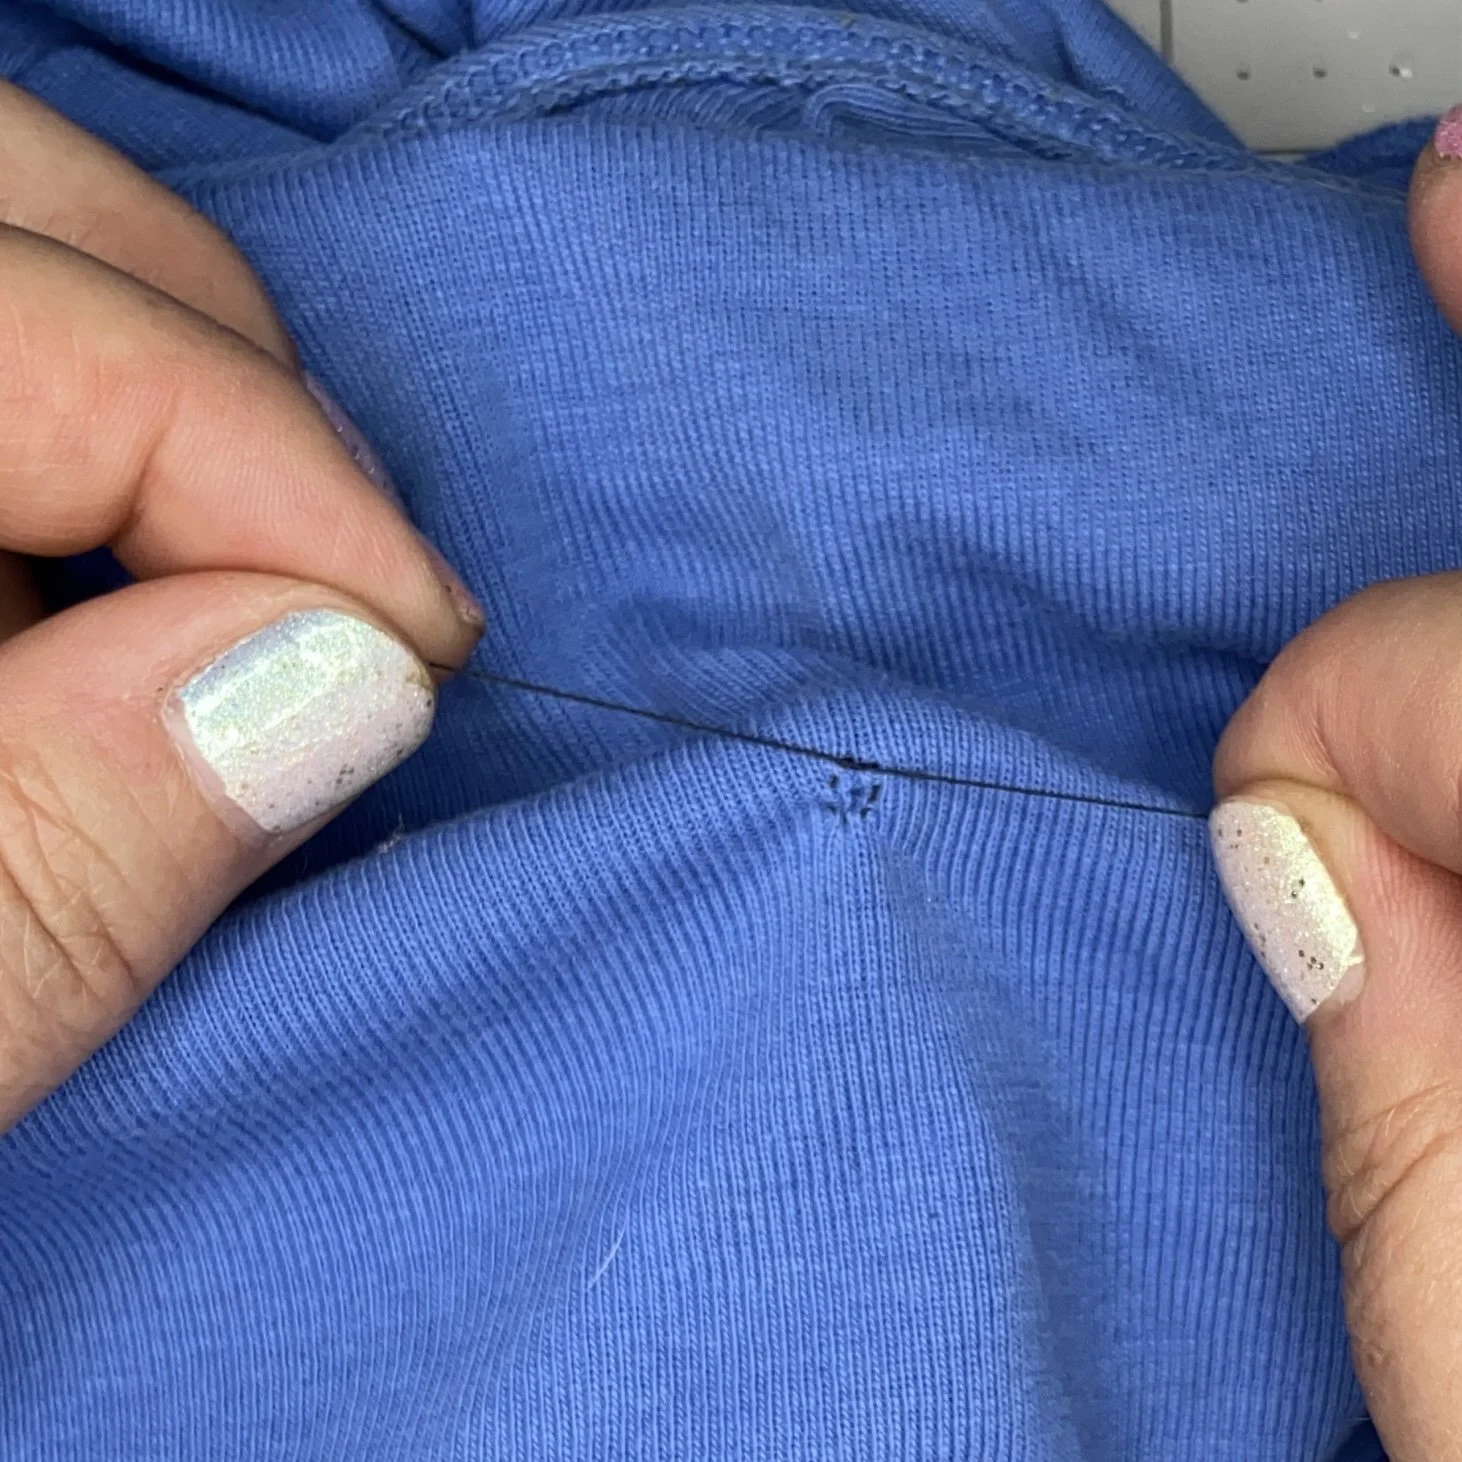
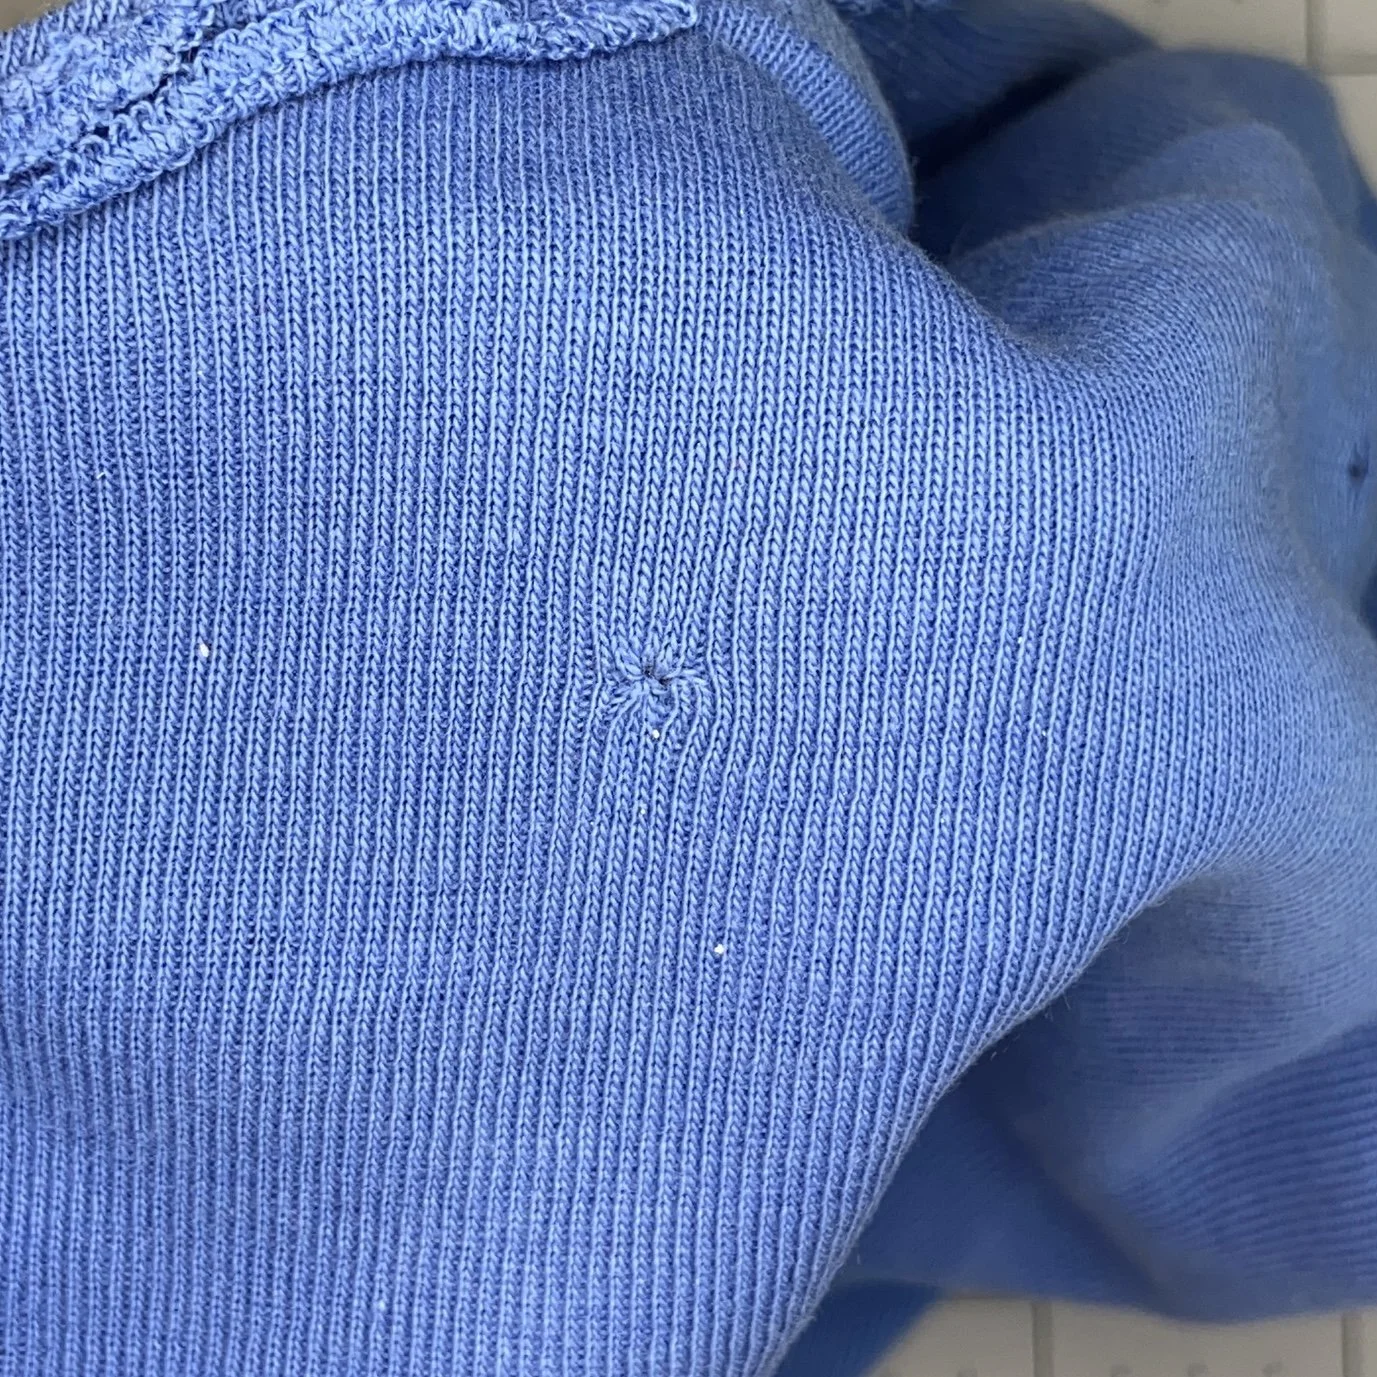
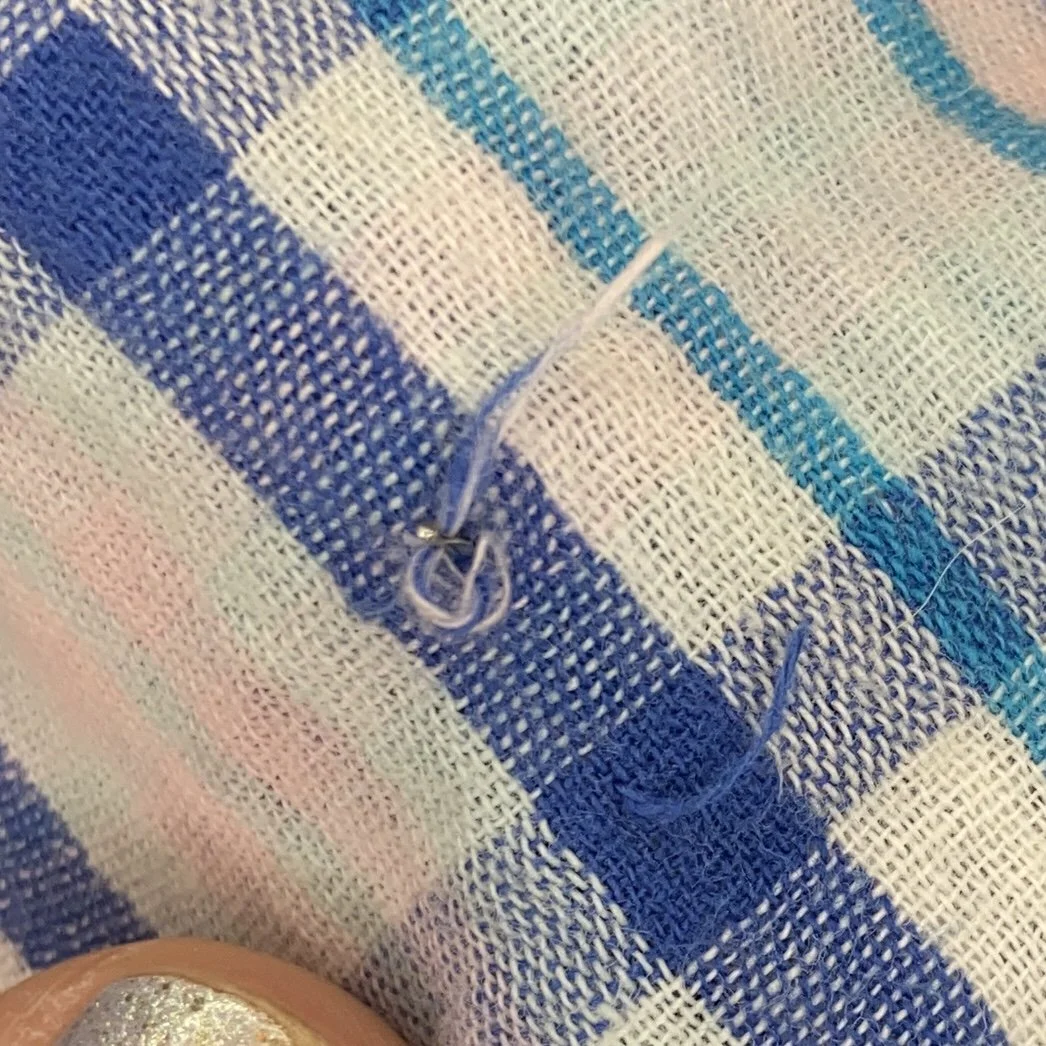
Next up is a little hole in knit fabric. These holes appear every time the furry blue-eyed devil who lives in my house takes my clothes out of the laundry basket. These holes are the size and shape of her incisors. I’m sure that’s just a coincidence. Again, I’m using contrasting thread for this but you’ll get better results with matching thread. Working from the front, start hand-sewing a little circle around the hole. Use tiny stitches and get pretty close to the hole but not so close that the thread will just pull loose and make the hole bigger. You’re sort of lassoing the hole.


Cross the ends of the thread and draw the lasso closed. Use your needle to take both thread ends to the back of the work, where you will tie them off securely with a knot. Trim the ends. Use a small piece of woven interfacing on the back to secure everything in place. From the front, you can see that the hole is securely closed. There is a small visible flaw in the fabric, but honestly, it’s not that obvious. I’ve used this technique on a favorite shirt that is black and I cannot see the repair at all.
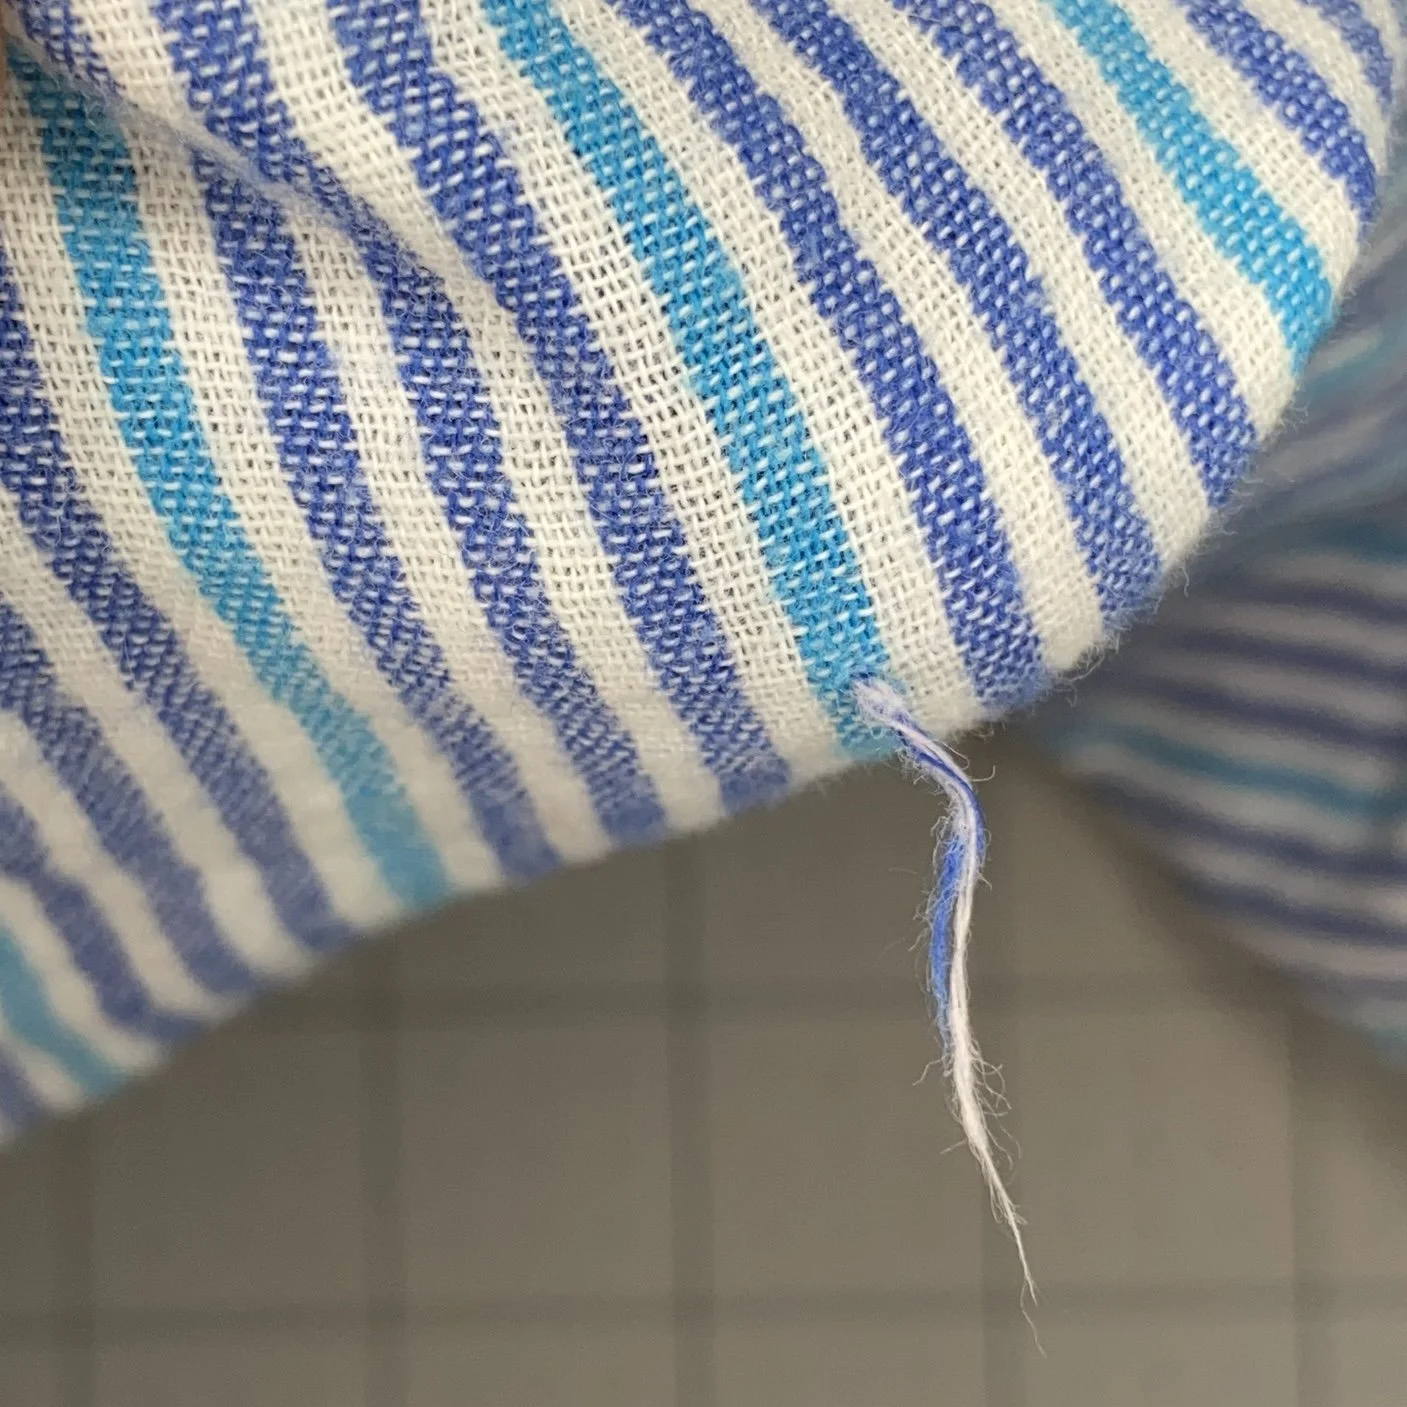
And finally, snagged thread. In addition to dogs, I have cats. And if I pick one up, I can guarantee I will get a snag in whatever I’m wearing. Every time. So. First, smooth out the snag as best you can, especially if it has visibly gathered up the fabric. Then thread the snag through the eye of a needle (a needle threader is very handy for this) and pull the thread to the back of the work. If there are two broken ends in the snag, pull each end to the back and then tie them together in a knot.


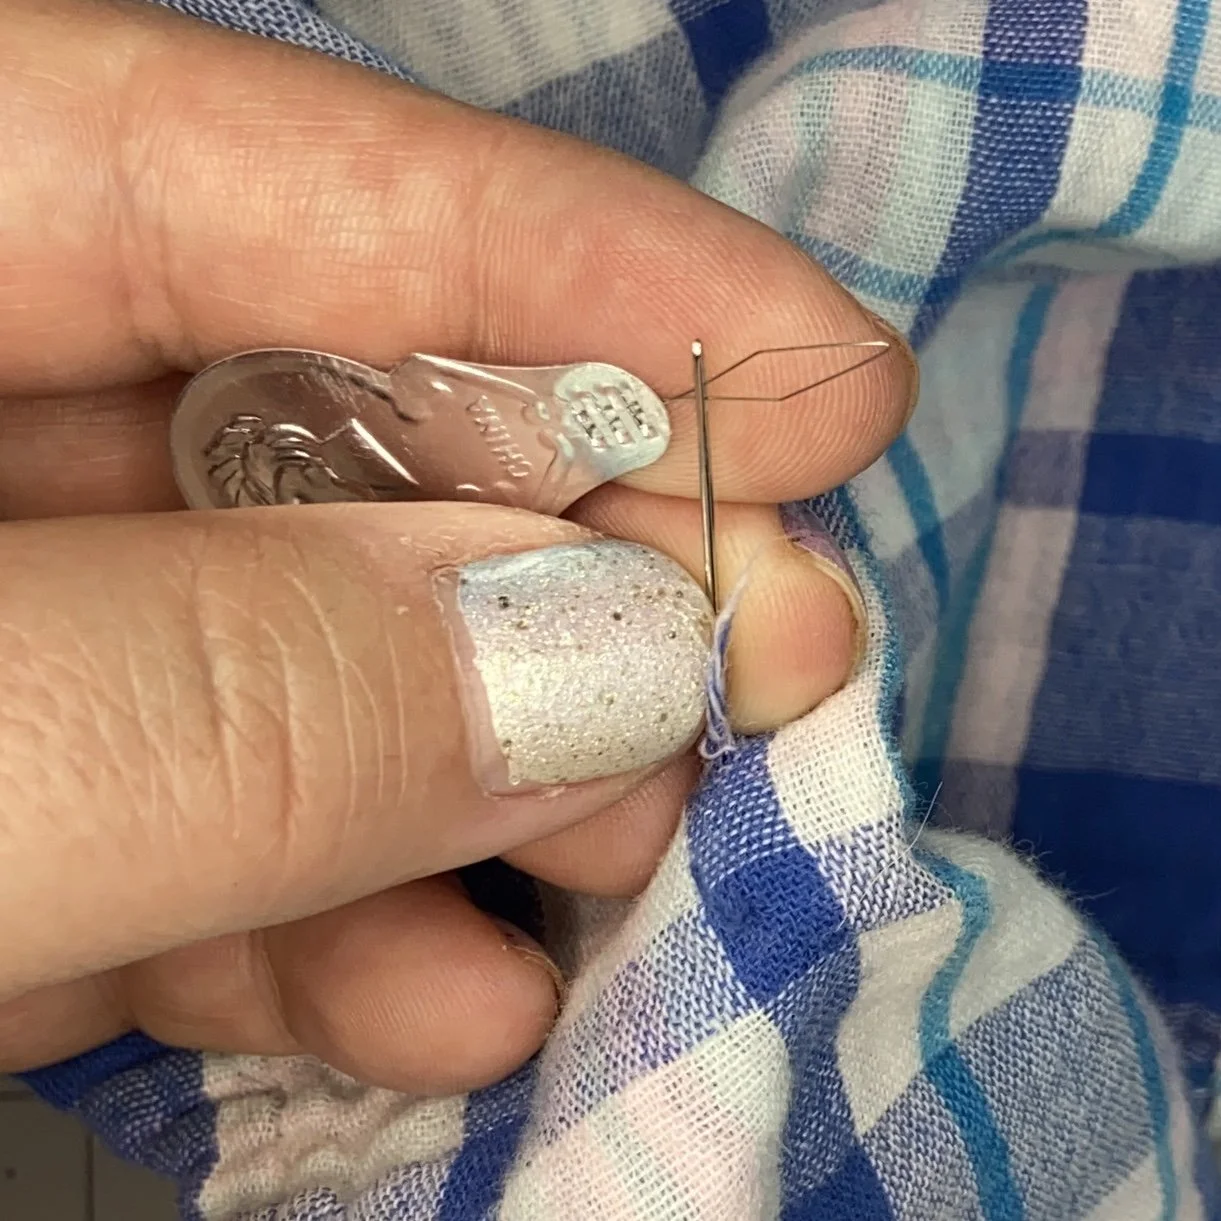
And that’s it. The snagged thread is now invisibly on the inside of your garment and is unlikely to go anywhere. And the front side looks almost normal.

These are just three very simple examples of mending methods. And there were lots of other ways I could have executed the repairs. I mostly wanted to introduce the idea that mending isn’t hard and it’s worth the effort for any number of reasons. Give it a try. You’ll save money, you’ll save a garment, and you’ll feel good about yourself. Win, win, win!